Chapter 1 • Introducing the Proxima® Desktop Projector
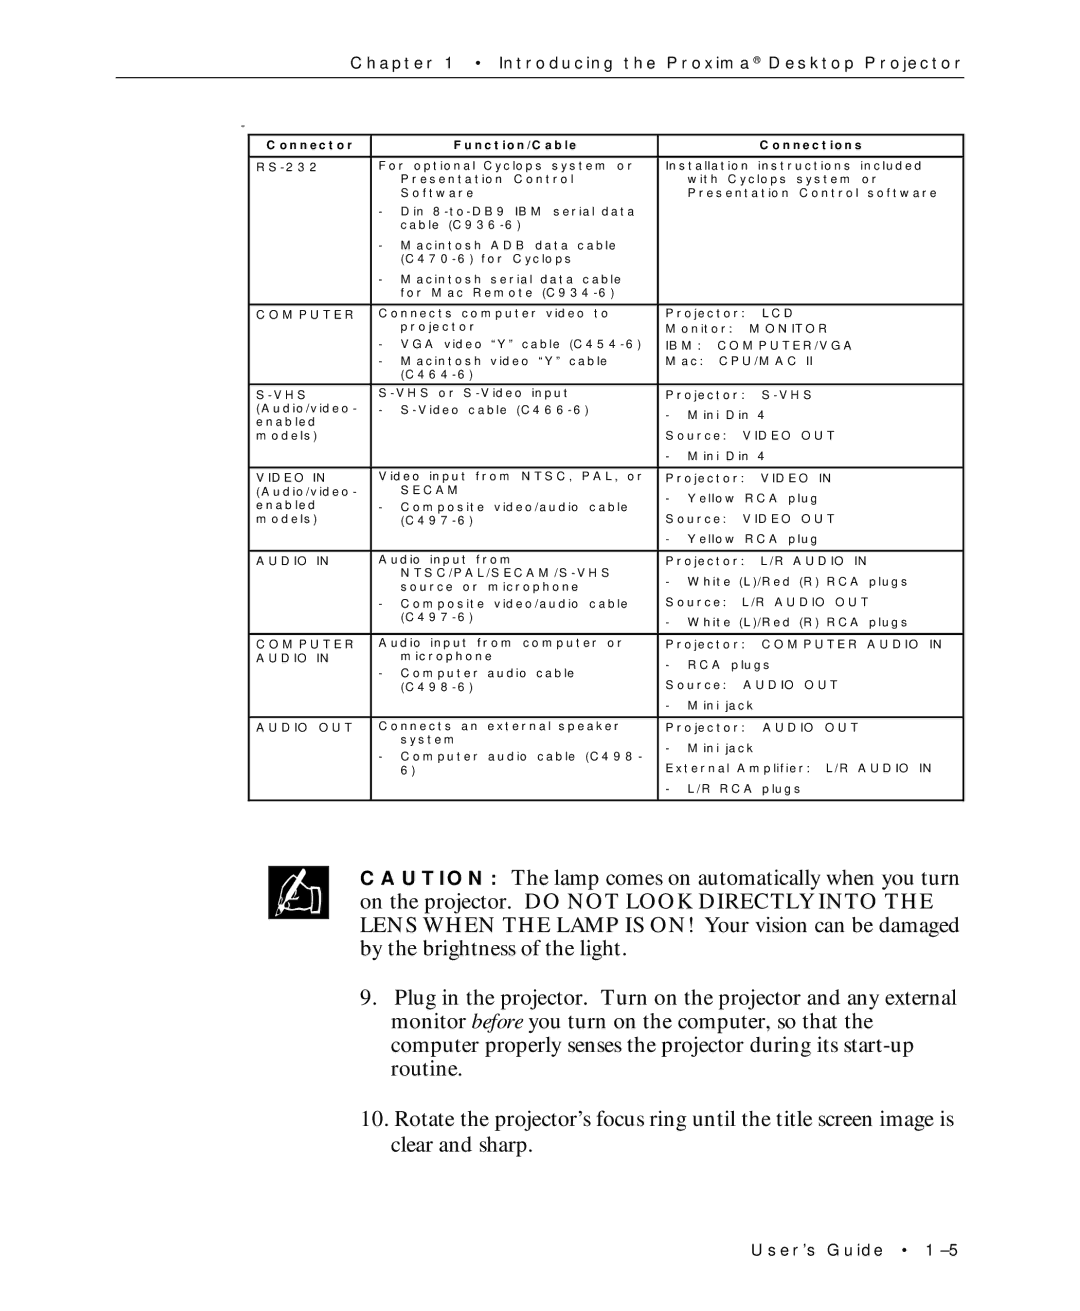
Connector
Function/Cable
For optional Cyclops system or Presentation Control Software
-Din
-Macintosh ADB data cable
-Macintosh serial data cable for Mac Remote
Connections
Installation instructions included with Cyclops system or Presentation Control software
COMPUTER | Connects computer video to |
| projector |
| - VGA video “Y” cable |
| - Macintosh video “Y” cable |
| |
| |
(Audio/video- | - |
enabled |
|
models) |
|
Projector: LCD
Monitor: MONITOR
IBM: COMPUTER/VGA
Mac: CPU/MAC II
Projector:
- | Mini Din 4 |
Source: VIDEO OUT | |
- | Mini Din 4 |
VIDEO IN (Audio/video- enabled models)
AUDIO IN
COMPUTER AUDIO IN
AUDIO OUT
Video input from NTSC, PAL, or
SECAM
-Composite video/audio cable
Audio input from
-Composite video/audio cable
Audio input from computer or microphone
-Computer audio cable
Connects an external speaker system
- Computer audio cable (C498- 6)
Projector: VIDEO IN |
- Yellow RCA plug |
Source: VIDEO OUT |
- Yellow RCA plug |
Projector: L/R AUDIO IN |
- White (L)/Red (R) RCA plugs |
Source: L/R AUDIO OUT |
- White (L)/Red (R) RCA plugs |
Projector: COMPUTER AUDIO IN |
- RCA plugs |
Source: AUDIO OUT
-Mini jack
Projector: AUDIO OUT
-Mini jack
External Amplifier: L/R AUDIO IN
-L/R RCA plugs
✍CAUTION: The lamp comes on automatically when you turn on the projector. DO NOT LOOK DIRECTLY INTO THE LENS WHEN THE LAMP IS ON! Your vision can be damaged by the brightness of the light.
9.Plug in the projector. Turn on the projector and any external monitor before you turn on the computer, so that the computer properly senses the projector during its
10.Rotate the projector’s focus ring until the title screen image is clear and sharp.
User’s Guide •