Video Dubbing
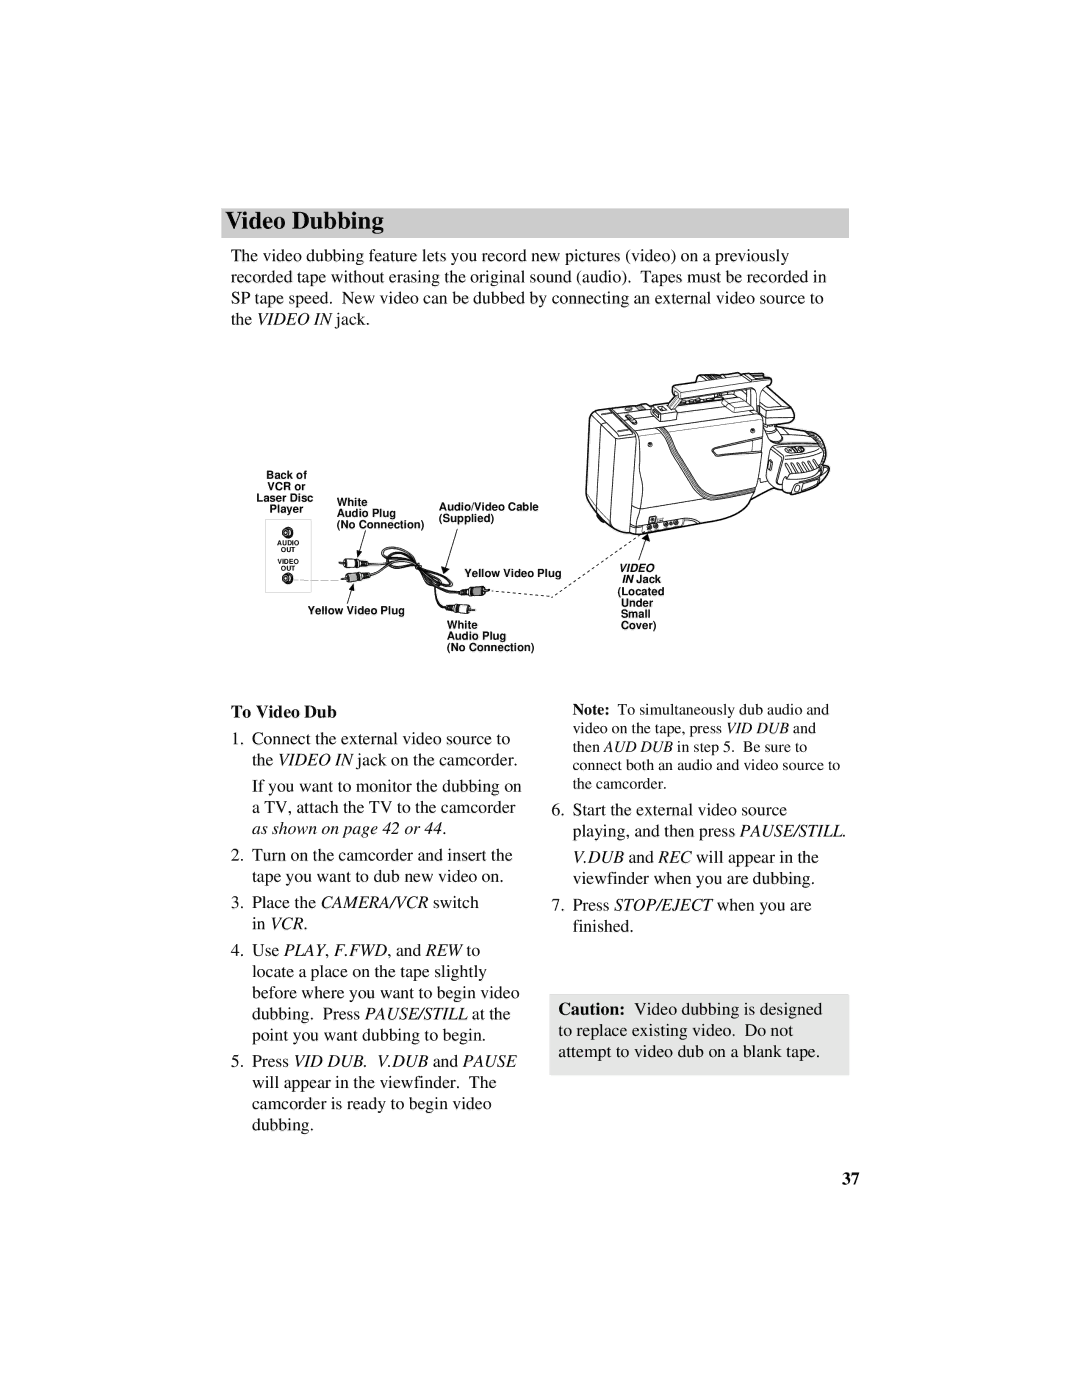
The video dubbing feature lets you record new pictures (video) on a previously recorded tape without erasing the original sound (audio). Tapes must be recorded in SP tape speed. New video can be dubbed by connecting an external video source to the VIDEO IN jack.
Back of |
|
|
|
VCR or |
|
|
|
Laser Disc | White | Audio/Video Cable | |
Player |
| ||
| Audio Plug | ||
|
| (Supplied) | |
|
| (No Connection) | |
|
|
| |
AUDIO |
|
|
|
OUT |
|
|
|
VIDEO |
|
|
|
OUT |
|
| Yellow Video Plug |
|
|
| |
| Yellow Video Plug |
| |
|
|
| White |
|
|
| Audio Plug |
|
|
| (No Connection) |
DC IN 12V
AUDIO
VIDEO
AUDIO
VIDEO
VIDEO
IN Jack
(Located Under Small Cover)
To Video Dub
1.Connect the external video source to the VIDEO IN jack on the camcorder.
If you want to monitor the dubbing on a TV, attach the TV to the camcorder as shown on page 42 or 44.
2.Turn on the camcorder and insert the tape you want to dub new video on.
3.Place the CAMERA/VCR switch in VCR.
4.Use PLAY, F.FWD, and REW to locate a place on the tape slightly before where you want to begin video dubbing. Press PAUSE/STILL at the point you want dubbing to begin.
5.Press VID DUB. V.DUB and PAUSE will appear in the viewfinder. The camcorder is ready to begin video dubbing.
Note: To simultaneously dub audio and video on the tape, press VID DUB and then AUD DUB in step 5. Be sure to connect both an audio and video source to the camcorder.
6.Start the external video source playing, and then press PAUSE/STILL.
V.DUB and REC will appear in the viewfinder when you are dubbing.
7.Press STOP/EJECT when you are finished.
Caution: Video dubbing is designed to replace existing video. Do not attempt to video dub on a blank tape.
37