SETUP AND CONNECTIONS
BACK OF THE HD RECEIVER
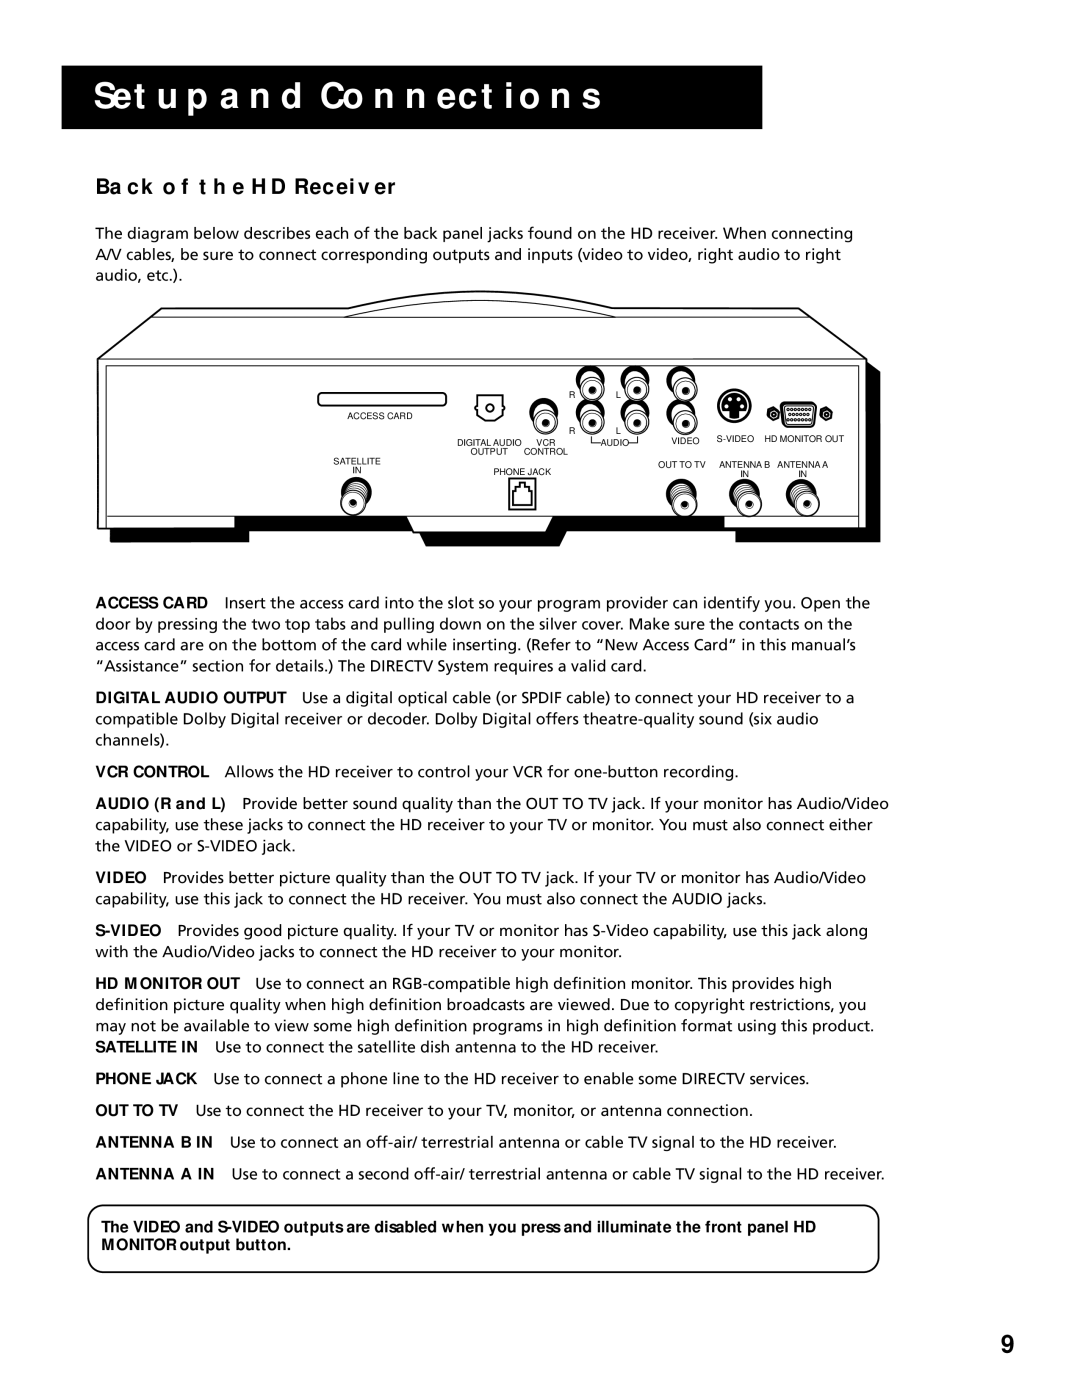
The diagram below describes each of the back panel jacks found on the HD receiver. When connecting A/V cables, be sure to connect corresponding outputs and inputs (video to video, right audio to right audio, etc.).
|
| R | L |
|
|
|
ACCESS CARD |
|
|
|
|
|
|
|
| R | L | VIDEO | HD MONITOR OUT | |
| DIGITAL AUDIO | VCR | AUDIO | |||
SATELLITE | OUTPUT | CONTROL |
|
|
|
|
|
|
| OUT TO TV | ANTENNA B ANTENNA A | ||
IN | PHONE JACK |
| ||||
|
| IN | IN | |||
ACCESS CARD Insert the access card into the slot so your program provider can identify you. Open the door by pressing the two top tabs and pulling down on the silver cover. Make sure the contacts on the access card are on the bottom of the card while inserting. (Refer to “New Access Card” in this manual’s “Assistance” section for details.) The DIRECTV System requires a valid card.
DIGITAL AUDIO OUTPUT Use a digital optical cable (or SPDIF cable) to connect your HD receiver to a compatible Dolby Digital receiver or decoder. Dolby Digital offers
VCR CONTROL Allows the HD receiver to control your VCR for
AUDIO (R and L) Provide better sound quality than the OUT TO TV jack. If your monitor has Audio/Video capability, use these jacks to connect the HD receiver to your TV or monitor. You must also connect either the VIDEO or
VIDEO Provides better picture quality than the OUT TO TV jack. If your TV or monitor has Audio/Video capability, use this jack to connect the HD receiver. You must also connect the AUDIO jacks.
HD MONITOR OUT Use to connect an
PHONE JACK Use to connect a phone line to the HD receiver to enable some DIRECTV services.
OUT TO TV Use to connect the HD receiver to your TV, monitor, or antenna connection.
ANTENNA B IN Use to connect an
ANTENNA A IN Use to connect a second
The VIDEO and
9
