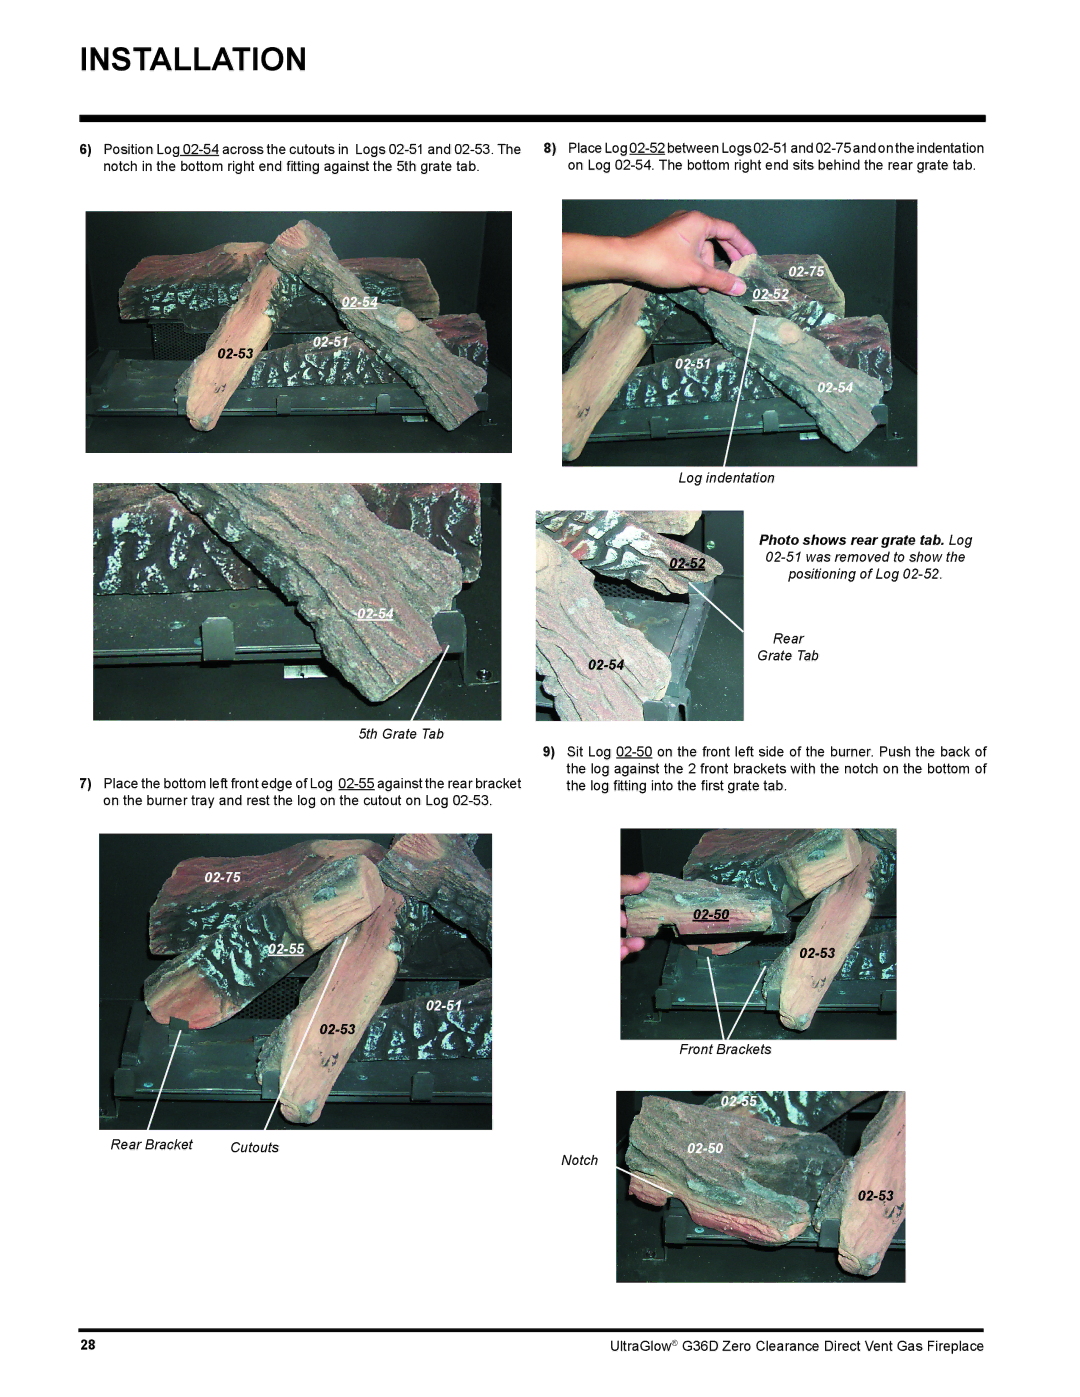
Regency G36D Installation, 02-54 02-51 02-54, 02-75 02-52 02-51 02-54, 02-75 02-55 02-51, 02-50

Models: G36D

1 44
Download 44 pages 31.34 Kb
Page 28
Image 28
02-54

INSTALLATION

6)Position Log 02-54 across the cutouts in Logs 02-51 and 02-53. The notch in the bottom right end fi tting against the 5th grate tab.

02-54

02-51

02-54

5th Grate Tab

7)Place the bottom left front edge of Log 02-55 against the rear bracket on the burner tray and rest the log on the cutout on Log 02-53.

8)Place Log 02-52 between Logs 02-51 and 02-75 and on the indentation on Log 02-54. The bottom right end sits behind the rear grate tab.

02-75

02-52

02-51

02-54

Log indentation

Photo shows rear grate tab. Log 02-51 was removed to show the positioning of Log 02-52.

Rear

Grate Tab

9)Sit Log 02-50 on the front left side of the burner. Push the back of the log against the 2 front brackets with the notch on the bottom of the log fi tting into the fi rst grate tab.

02-75

02-55

02-51

Front Brackets

02-55

Rear Bracket

Cutouts

02-50

Notch

28

UltraGlow® G36D Zero Clearance Direct Vent Gas Fireplace

Page 28
Image 28
Regency G36D installation manual Installation, 02-54 02-51 02-54, 02-75 02-52 02-51 02-54, 02-75 02-55 02-51, 02-50