Effects List
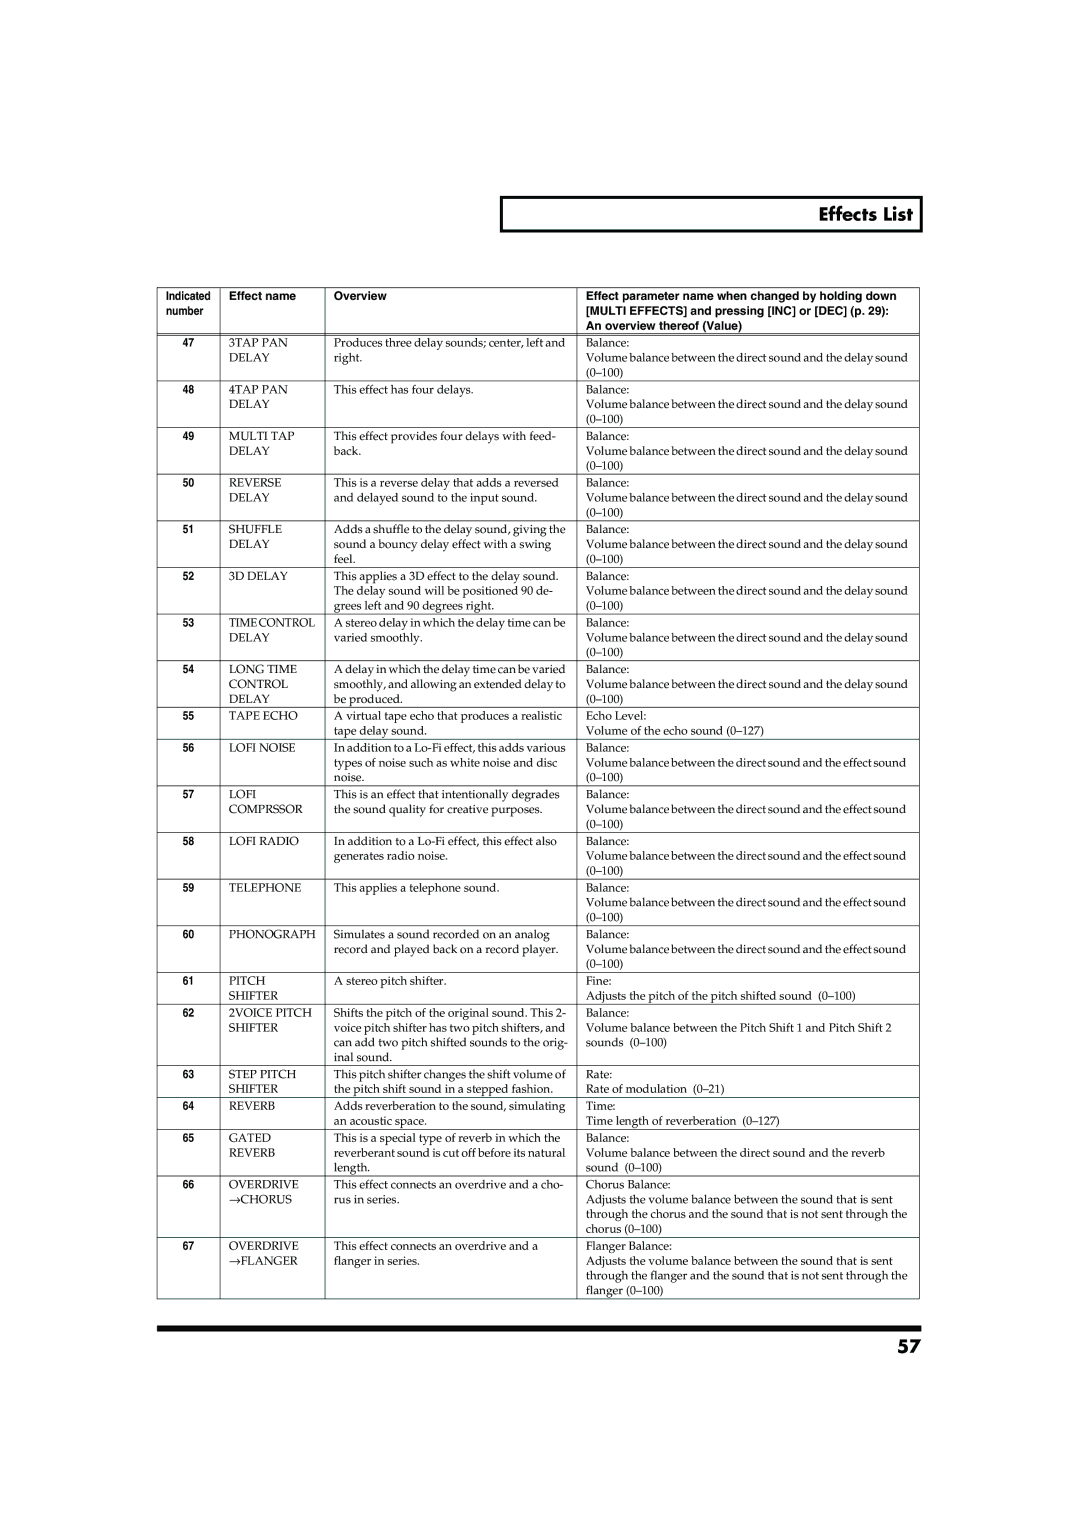
Indicated | Effect name | Overview | Effect parameter name when changed by holding down |
number |
|
| [MULTI EFFECTS] and pressing [INC] or [DEC] (p. 29): |
|
|
| An overview thereof (Value) |
|
|
|
|
47 | 3TAP PAN | Produces three delay sounds; center, left and | Balance: |
| DELAY | right. | Volume balance between the direct sound and the delay sound |
|
|
| |
48 | 4TAP PAN | This effect has four delays. | Balance: |
| DELAY |
| Volume balance between the direct sound and the delay sound |
|
|
| |
49 | MULTI TAP | This effect provides four delays with feed- | Balance: |
| DELAY | back. | Volume balance between the direct sound and the delay sound |
|
|
| |
50 | REVERSE | This is a reverse delay that adds a reversed | Balance: |
| DELAY | and delayed sound to the input sound. | Volume balance between the direct sound and the delay sound |
|
|
| |
51 | SHUFFLE | Adds a shuffle to the delay sound, giving the | Balance: |
| DELAY | sound a bouncy delay effect with a swing | Volume balance between the direct sound and the delay sound |
|
| feel. | |
52 | 3D DELAY | This applies a 3D effect to the delay sound. | Balance: |
|
| The delay sound will be positioned 90 de- | Volume balance between the direct sound and the delay sound |
|
| grees left and 90 degrees right. | |
53 | TIME CONTROL | A stereo delay in which the delay time can be | Balance: |
| DELAY | varied smoothly. | Volume balance between the direct sound and the delay sound |
|
|
| |
54 | LONG TIME | A delay in which the delay time can be varied | Balance: |
| CONTROL | smoothly, and allowing an extended delay to | Volume balance between the direct sound and the delay sound |
| DELAY | be produced. | |
55 | TAPE ECHO | A virtual tape echo that produces a realistic | Echo Level: |
|
| tape delay sound. | Volume of the echo sound |
56 | LOFI NOISE | In addition to a | Balance: |
|
| types of noise such as white noise and disc | Volume balance between the direct sound and the effect sound |
|
| noise. | |
57 | LOFI | This is an effect that intentionally degrades | Balance: |
| COMPRSSOR | the sound quality for creative purposes. | Volume balance between the direct sound and the effect sound |
|
|
| |
58 | LOFI RADIO | In addition to a | Balance: |
|
| generates radio noise. | Volume balance between the direct sound and the effect sound |
|
|
| |
59 | TELEPHONE | This applies a telephone sound. | Balance: |
|
|
| Volume balance between the direct sound and the effect sound |
|
|
| |
60 | PHONOGRAPH | Simulates a sound recorded on an analog | Balance: |
|
| record and played back on a record player. | Volume balance between the direct sound and the effect sound |
|
|
| |
61 | PITCH | A stereo pitch shifter. | Fine: |
| SHIFTER |
| Adjusts the pitch of the pitch shifted sound |
62 | 2VOICE PITCH | Shifts the pitch of the original sound. This 2- | Balance: |
| SHIFTER | voice pitch shifter has two pitch shifters, and | Volume balance between the Pitch Shift 1 and Pitch Shift 2 |
|
| can add two pitch shifted sounds to the orig- | sounds |
|
| inal sound. |
|
63 | STEP PITCH | This pitch shifter changes the shift volume of | Rate: |
| SHIFTER | the pitch shift sound in a stepped fashion. | Rate of modulation |
64 | REVERB | Adds reverberation to the sound, simulating | Time: |
|
| an acoustic space. | Time length of reverberation |
65 | GATED | This is a special type of reverb in which the | Balance: |
| REVERB | reverberant sound is cut off before its natural | Volume balance between the direct sound and the reverb |
|
| length. | sound |
66 | OVERDRIVE | This effect connects an overdrive and a cho- | Chorus Balance: |
| →CHORUS | rus in series. | Adjusts the volume balance between the sound that is sent |
|
|
| through the chorus and the sound that is not sent through the |
|
|
| chorus |
67 | OVERDRIVE | This effect connects an overdrive and a | Flanger Balance: |
| →FLANGER | flanger in series. | Adjusts the volume balance between the sound that is sent |
|
|
| through the flanger and the sound that is not sent through the |
|
|
| flanger |
57