Specifications
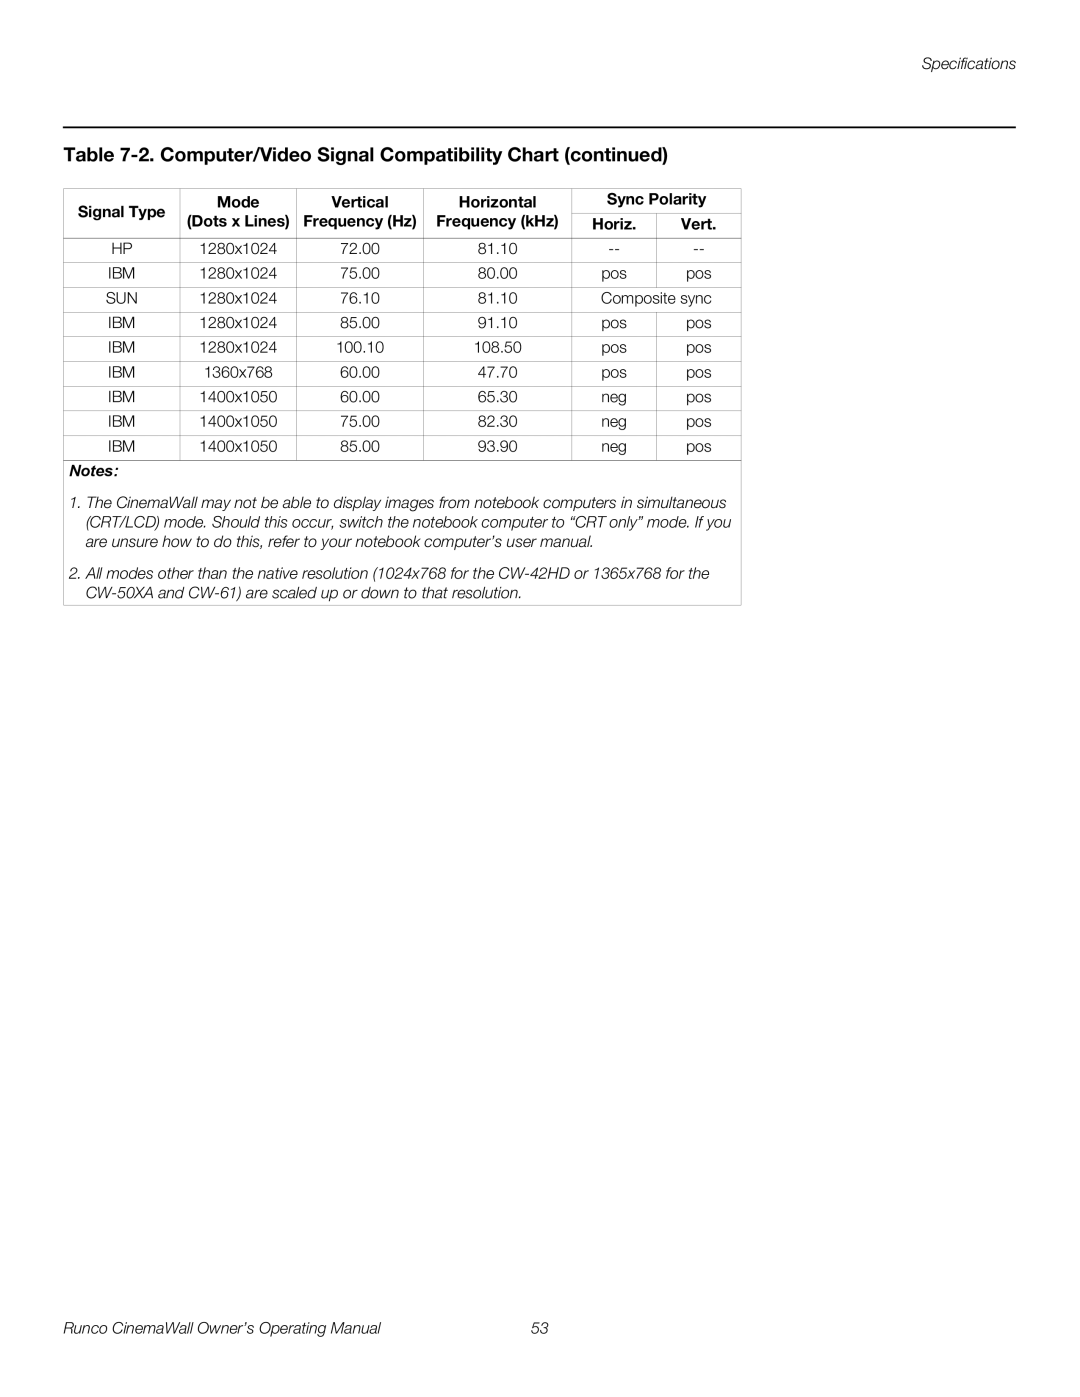
Table 7-2. Computer/Video Signal Compatibility Chart (continued)
Signal Type | Mode | Vertical | Horizontal | Sync Polarity | |
(Dots x Lines) | Frequency (Hz) | Frequency (kHz) |
|
| |
| Horiz. | Vert. | |||
|
|
|
|
|
|
HP | 1280x1024 | 72.00 | 81.10 | ||
|
|
|
|
|
|
IBM | 1280x1024 | 75.00 | 80.00 | pos | pos |
|
|
|
|
|
|
SUN | 1280x1024 | 76.10 | 81.10 | Composite sync | |
|
|
|
|
|
|
IBM | 1280x1024 | 85.00 | 91.10 | pos | pos |
|
|
|
|
|
|
IBM | 1280x1024 | 100.10 | 108.50 | pos | pos |
|
|
|
|
|
|
IBM | 1360x768 | 60.00 | 47.70 | pos | pos |
|
|
|
|
|
|
IBM | 1400x1050 | 60.00 | 65.30 | neg | pos |
|
|
|
|
|
|
IBM | 1400x1050 | 75.00 | 82.30 | neg | pos |
|
|
|
|
|
|
IBM | 1400x1050 | 85.00 | 93.90 | neg | pos |
|
|
|
|
|
|
Notes: |
|
|
|
|
|
1. The CinemaWall may not be able to display images from notebook computers in simultaneous | |||||
(CRT/LCD) mode. Should this occur, switch the notebook computer to “CRT only” mode. If you | |||||
are unsure how to do this, refer to your notebook computer’s user manual. |
| ||||
2. All modes other than the native resolution (1024x768 for the | |||||
|
| ||||
|
|
|
|
|
|
Runco CinemaWall Owner’s Operating Manual | 53 |