Operation

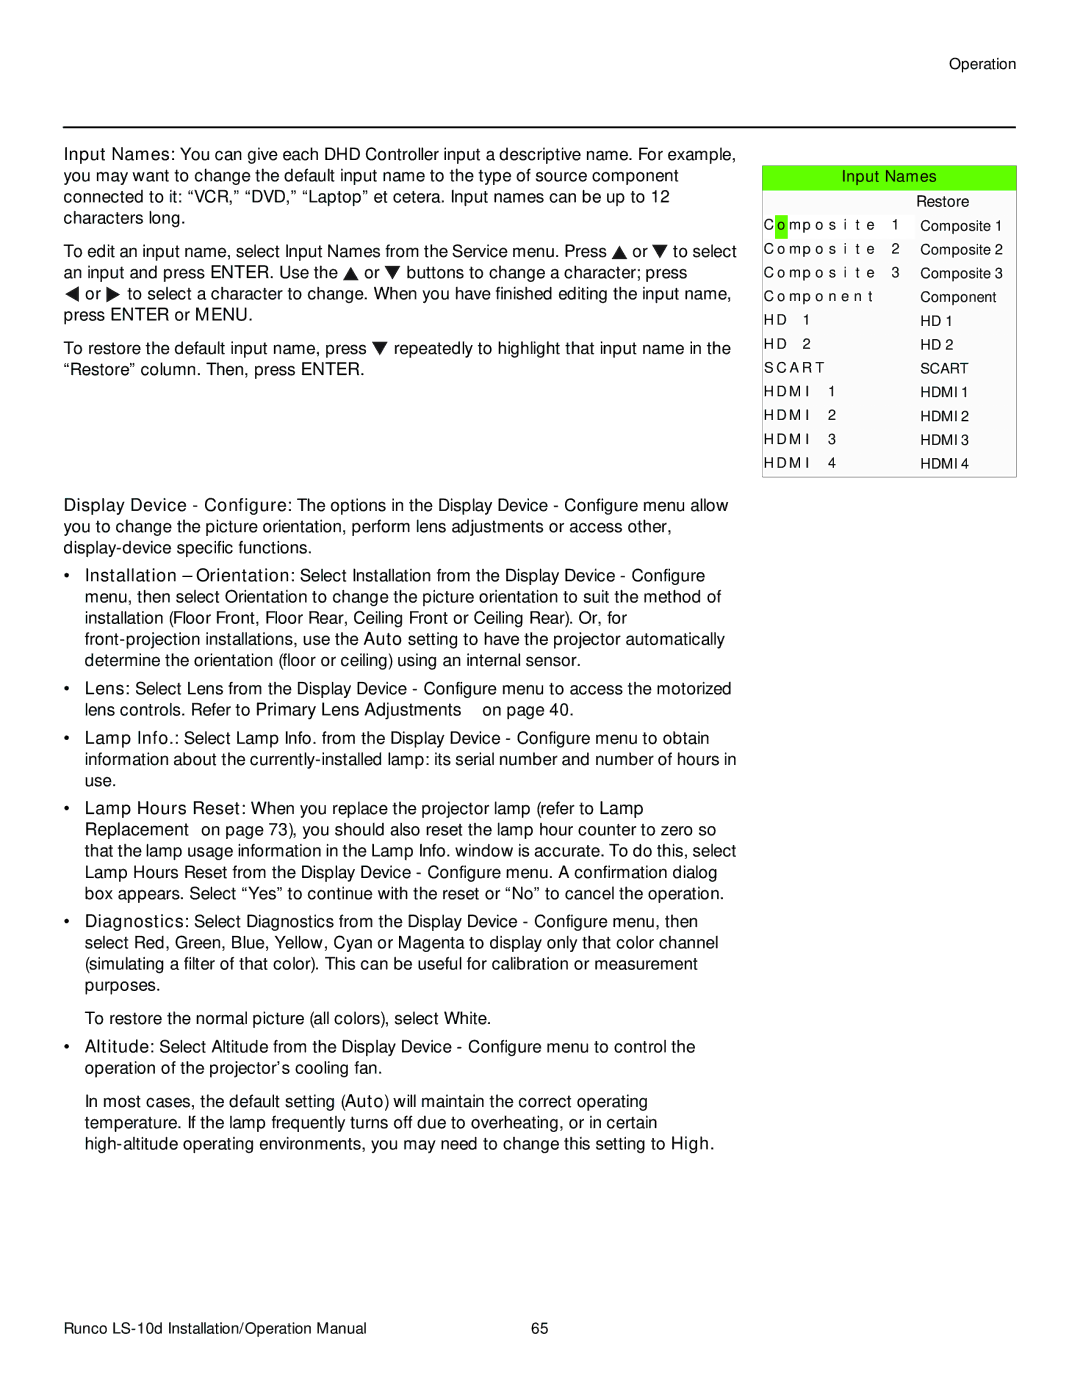
Input Names: You can give each DHD Controller input a descriptive name. For example, you may want to change the default input name to the type of source component connected to it: “VCR,” “DVD,” “Laptop” et cetera. Input names can be up to 12 characters long.

To edit an input name, select Input Names from the Service menu. Press or to select an input and press ENTER. Use the or buttons to change a character; press

or to select a character to change. When you have finished editing the input name, press ENTER or MENU.

To restore the default input name, press repeatedly to highlight that input name in the “Restore” column. Then, press ENTER.

Display Device - Configure: The options in the Display Device - Configure menu allow you to change the picture orientation, perform lens adjustments or access other, display-device specific functions.

Installation – Orientation: Select Installation from the Display Device - Configure menu, then select Orientation to change the picture orientation to suit the method of installation (Floor Front, Floor Rear, Ceiling Front or Ceiling Rear). Or, for front-projection installations, use the Auto setting to have the projector automatically determine the orientation (floor or ceiling) using an internal sensor.

Lens: Select Lens from the Display Device - Configure menu to access the motorized lens controls. Refer to Primary Lens Adjustments on page 40.

Lamp Info.: Select Lamp Info. from the Display Device - Configure menu to obtain

information about the currently-installed lamp: its serial number and number of hours in use.

Lamp Hours Reset: When you replace the projector lamp (refer to Lamp Replacement on page 73), you should also reset the lamp hour counter to zero so that the lamp usage information in the Lamp Info. window is accurate. To do this, select Lamp Hours Reset from the Display Device - Configure menu. A confirmation dialog box appears. Select “Yes” to continue with the reset or “No” to cancel the operation.

Diagnostics: Select Diagnostics from the Display Device - Configure menu, then select Red, Green, Blue, Yellow, Cyan or Magenta to display only that color channel (simulating a filter of that color). This can be useful for calibration or measurement purposes.

To restore the normal picture (all colors), select White.

Altitude: Select Altitude from the Display Device - Configure menu to control the operation of the projector’s cooling fan.

In most cases, the default setting (Auto) will maintain the correct operating temperature. If the lamp frequently turns off due to overheating, or in certain high-altitude operating environments, you may need to change this setting to High.


Input Names


Restore


C

o

mp o s i

t e

1

Composite 1


C

o mp o s i

t e

2

Composite 2

C

o

mp o s i

t e

3

Composite 3

C

o

mp

o n e n t


Component

H

D

1


HD 1

H

D

2


HD 2

S

C

A

R

T


SCART

H

D

M

I


1


HDMI 1

H

D

M

I


2


HDMI 2

H

D

M

I


3


HDMI 3

H

D

M

I


4


HDMI 4


Runco LS-10d Installation/Operation Manual

65

Page 81
Image 81
Runco LS-10D operation manual Input Names

LS-10D specifications

The Runco LS-10D is a high-performance projector that is captivating audiences with its exceptional image quality and advanced features. Designed for home cinema enthusiasts, the LS-10D combines cutting-edge technology and stylish aesthetics to deliver an immersive viewing experience that is second to none.

One of the standout features of the LS-10D is its remarkable color performance. Utilizing Runco's proprietary Vivix processing, the projector achieves a color accuracy that is unparalleled in the industry. This technology ensures that images appear vibrant and true to the original source material, making movies, sports, and gaming more engaging than ever. The LS-10D also supports a wide color gamut, enabling it to reproduce a broad spectrum of colors, resulting in lifelike images that captivate viewers.

Another noteworthy characteristic of the LS-10D is its resolution capabilities. The projector boasts a native resolution of 1080p, delivering sharp and detailed images that enhance the overall viewing experience. For users looking for even greater clarity, the LS-10D is also compatible with 4K content through its advanced upscaling technology, allowing it to present finer details in high-resolution formats without losing quality.

The LS-10D employs an advanced lamp technology, producing an impressive brightness level that ensures excellent performance even in well-lit environments. This capability makes it ideal for a variety of settings, from dedicated home theaters to living rooms where ambient light cannot be controlled. Users will appreciate the projectors' reliable light source that enhances contrast and reduces the risk of color fading over time.

To further complement its impressive features, the LS-10D incorporates a range of connectivity options. This includes HDMI inputs, component video inputs, and RS-232 control, allowing for seamless integration with various sources such as Blu-ray players, gaming consoles, and home automation systems.

Additionally, the LS-10D's sleek and compact design makes it an attractive addition to any home theater setup. With its quiet operation and efficient cooling system, users can enjoy their favorite films without the distraction of fan noise.

In conclusion, the Runco LS-10D is a powerful projector that stands out for its exceptional image quality, advanced technologies, and user-friendly features. With its array of capabilities, it provides a premium home cinema experience that is sure to impress even the most discerning movie aficionados.