Schedule Registration and Deletion
Schedule Registration
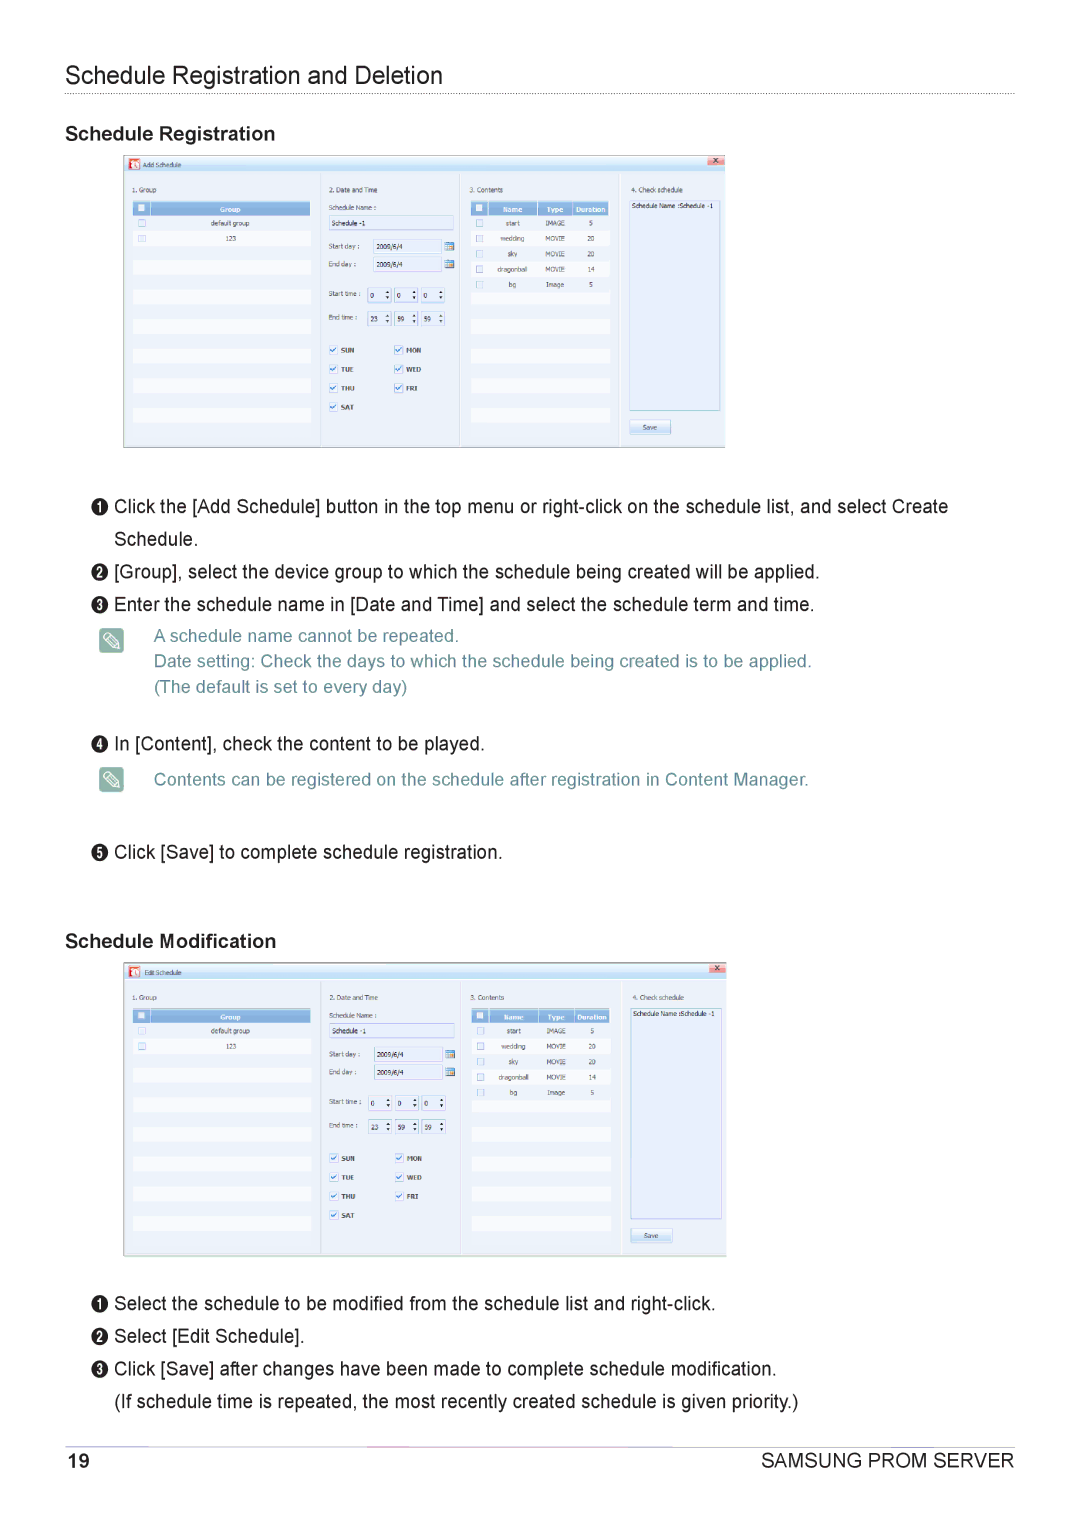
1 Click the [Add Schedule] button in the top menu or
2 [Group], select the device group to which the schedule being created will be applied.
3 Enter the schedule name in [Date and Time] and select the schedule term and time.
A schedule name cannot be repeated.
Date setting: Check the days to which the schedule being created is to be applied. (The default is set to every day)
4 In [Content], check the content to be played.
Contents can be registered on the schedule after registration in Content Manager.
5 Click [Save] to complete schedule registration.
Schedule Modification
1 Select the schedule to be modified from the schedule list and
2 Select [Edit Schedule].
3 Click [Save] after changes have been made to complete schedule modification. (If schedule time is repeated, the most recently created schedule is given priority.)
19 | SAMSUNG PROM SERVER |
