Auto Clock Set
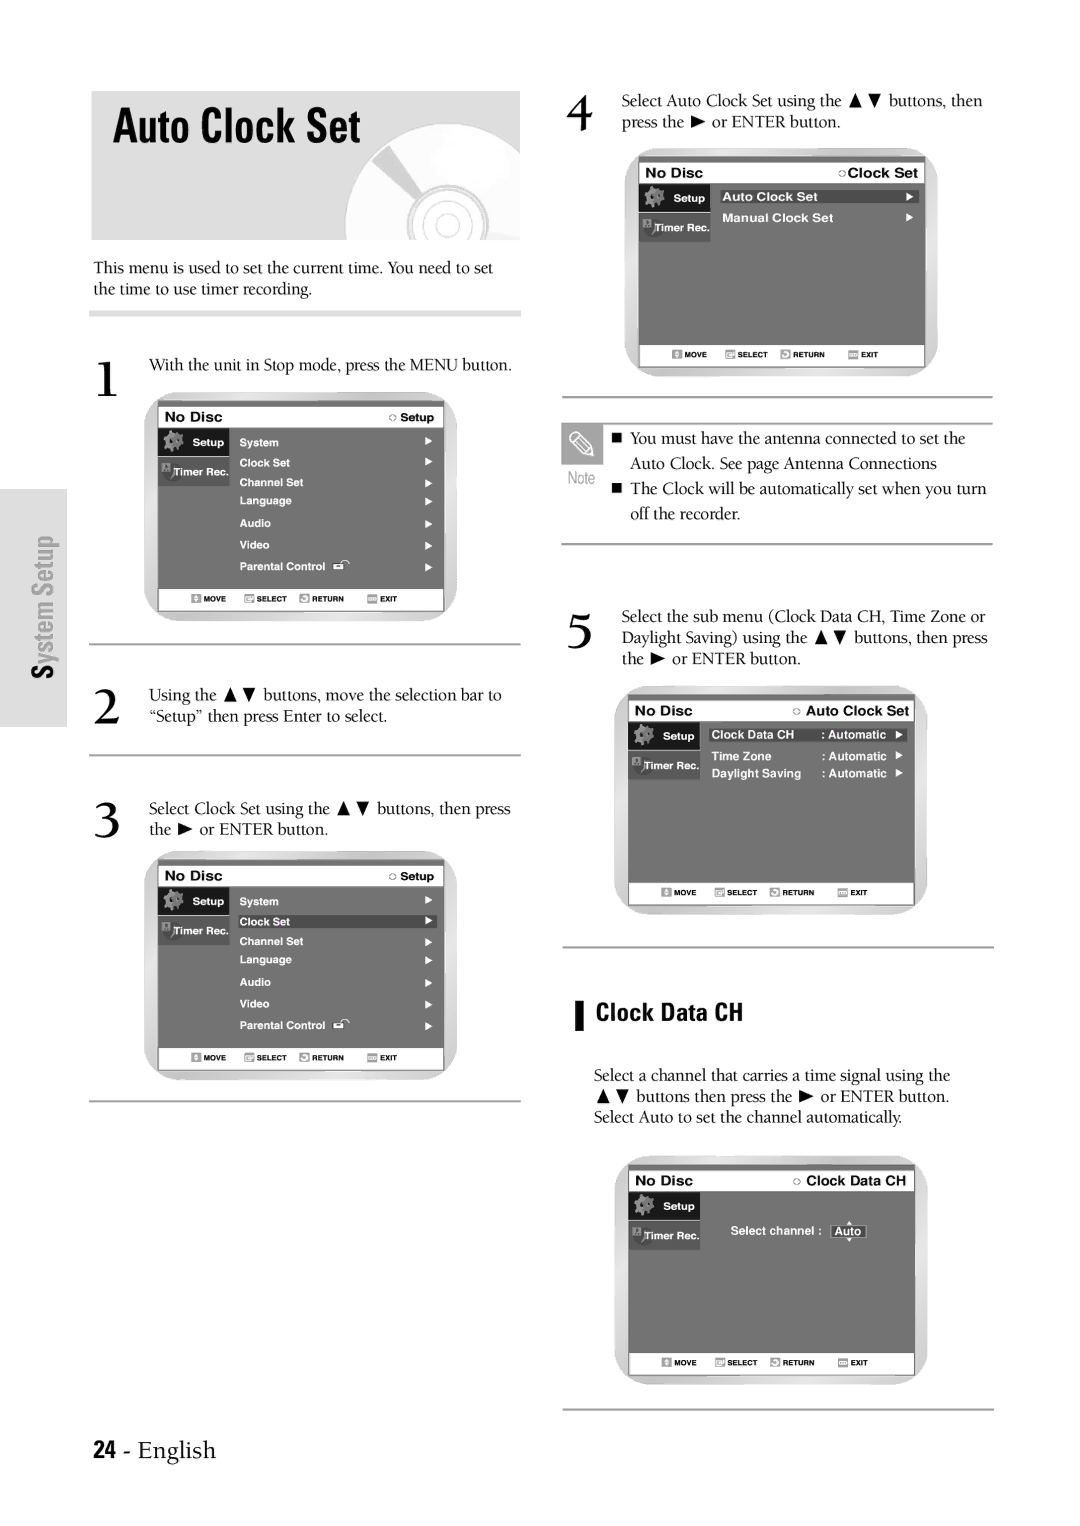
This menu is used to set the current time. You need to set the time to use timer recording.
1 With the unit in Stop mode, press the MENU button.
No Disc
4 | Select Auto Clock Set using the | ❷ buttons, then | |||||
| |||||||
| press the ❿ or ENTER button. |
|
| ||||
|
|
|
|
|
|
|
|
|
|
|
|
|
|
|
|
|
| No Disc | Clock Set |
| |||
|
|
|
|
|
|
|
|
|
|
|
|
| Auto Clock Set |
|
|
|
|
|
|
| Manual Clock Set |
|
|
|
|
|
|
|
|
|
|
|
|
|
|
|
|
|
|
|
|
|
|
|
|
|
|
|
|
|
|
|
|
|
|
|
|
|
|
|
|
|
|
Note
You must have the antenna connected to set the
Auto Clock. See page Antenna Connections
The Clock will be automatically set when you turn
off the recorder.
System Setup
2 | Using the | ❷ buttons, move the selection bar to |
| ||
| “Setup” then press Enter to select. | |
|
|
|
|
|
|
3 | Select Clock Set using the ❷ buttons, then press | |
| ||
the ❿ or ENTER button.
No Disc
Select the sub menu (Clock Data CH, Time Zone or
5 Daylight Saving) using the ❷ buttons, then press the ❿ or ENTER button.
| No Disc | Auto Clock Set |
| |||
|
|
|
|
|
|
|
|
|
| Clock Data CH | : Automatic |
|
|
|
|
| Time Zone | : Automatic |
| |
|
|
|
| |||
|
|
| Daylight Saving | : Automatic |
| |
|
|
|
|
|
|
|
|
|
|
|
|
|
|
|
|
|
|
|
|
|
Clock Data CH
Select a channel that carries a time signal using the
❷buttons then press the ❿ or ENTER button. Select Auto to set the channel automatically.
No Disc | Clock Data CH |
|
|
|
|
|
|
Select channel : Auto
24 - English
