Renaming a Title List
Entry
Follow these directions to rename a title list entry, i.e., to edit the title of a recorded program.
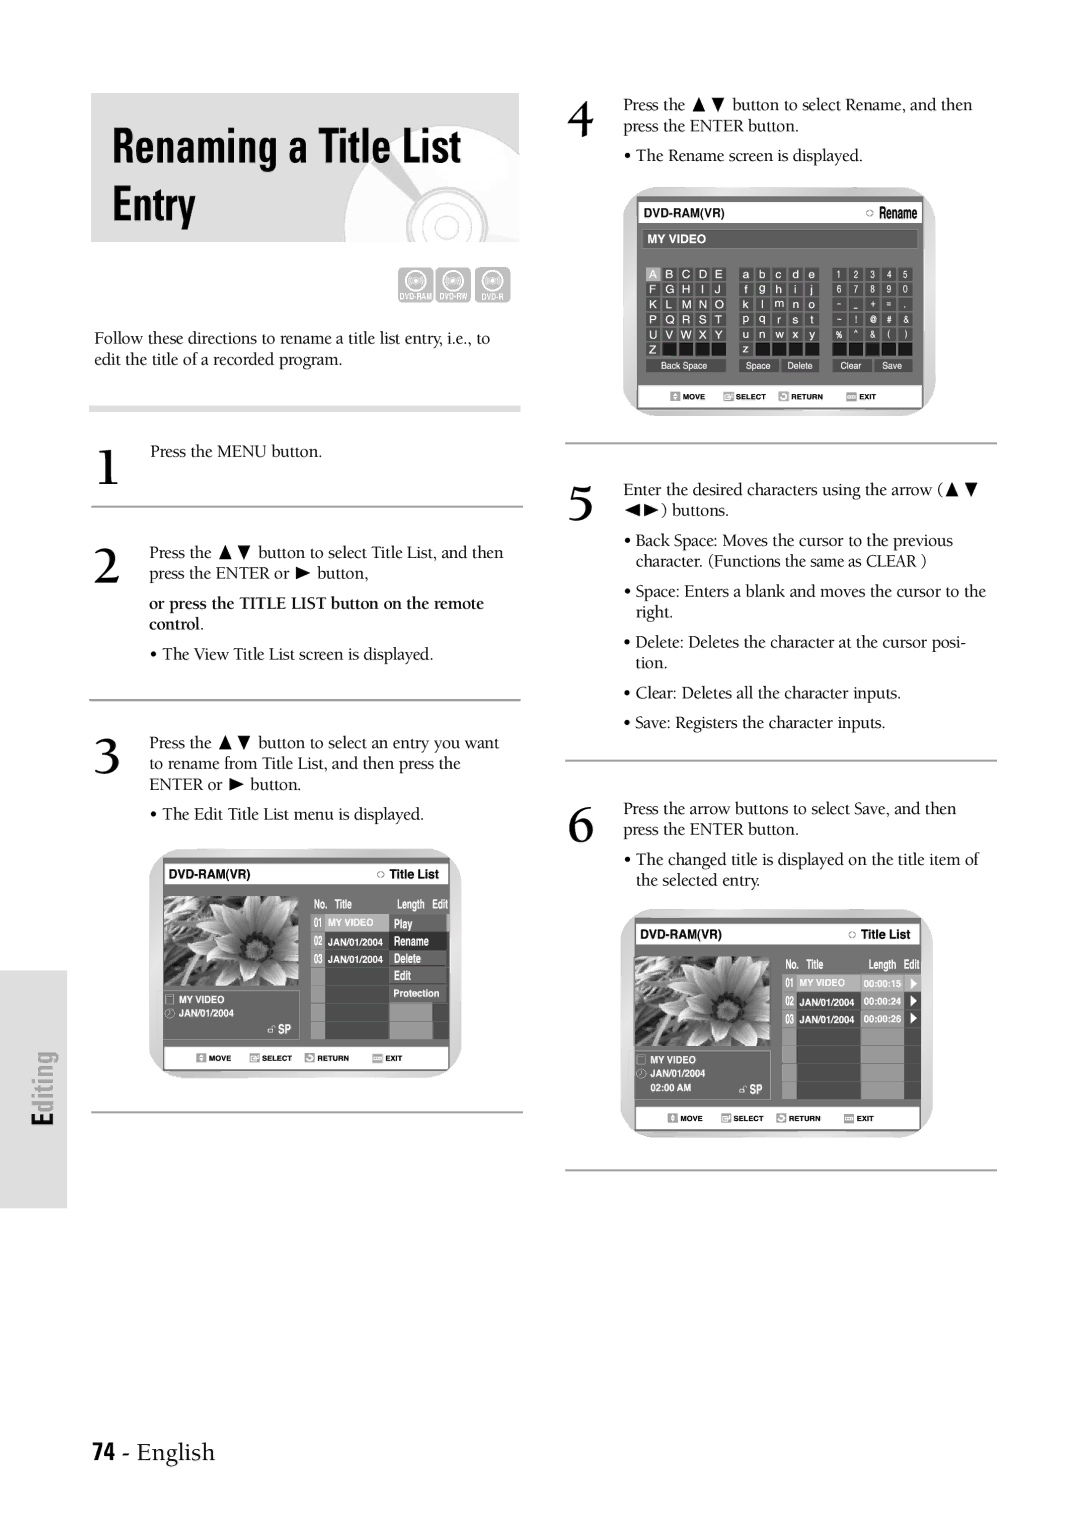
1 Press the MENU button.
2 | Press the ❷ button to select Title List, and then |
press the ENTER or ❿ button, | |
| or press the TITLE LIST button on the remote |
| control. |
| • The View Title List screen is displayed. |
|
|
3 | Press the ❷ button to select an entry you want |
to rename from Title List, and then press the |
ENTER or ❿ button.
• The Edit Title List menu is displayed.
Editing
4 | Press the | ❷ button to select Rename, and then |
press the ENTER button. | ||
• The Rename screen is displayed.
| 5 | Enter the desired characters using the arrow ( ❷ |
|
| ➛❿) buttons. |
| |
|
| • Back Space: Moves the cursor to the previous |
|
|
| character. (Functions the same as CLEAR ) |
|
|
| • Space: Enters a blank and moves the cursor to the |
|
|
| right. |
|
|
| • Delete: Deletes the character at the cursor posi- |
|
|
| tion. |
|
|
| • Clear: Deletes all the character inputs. |
|
|
| • Save: Registers the character inputs. |
|
|
|
|
|
|
|
|
|
| 6 | Press the arrow buttons to select Save, and then | |
| press the ENTER button. | ||
• The changed title is displayed on the title item of the selected entry.
74 - English
