BLANK ALL ABOVE
The available angle for setup ranges from
BLANK ALL BELOW
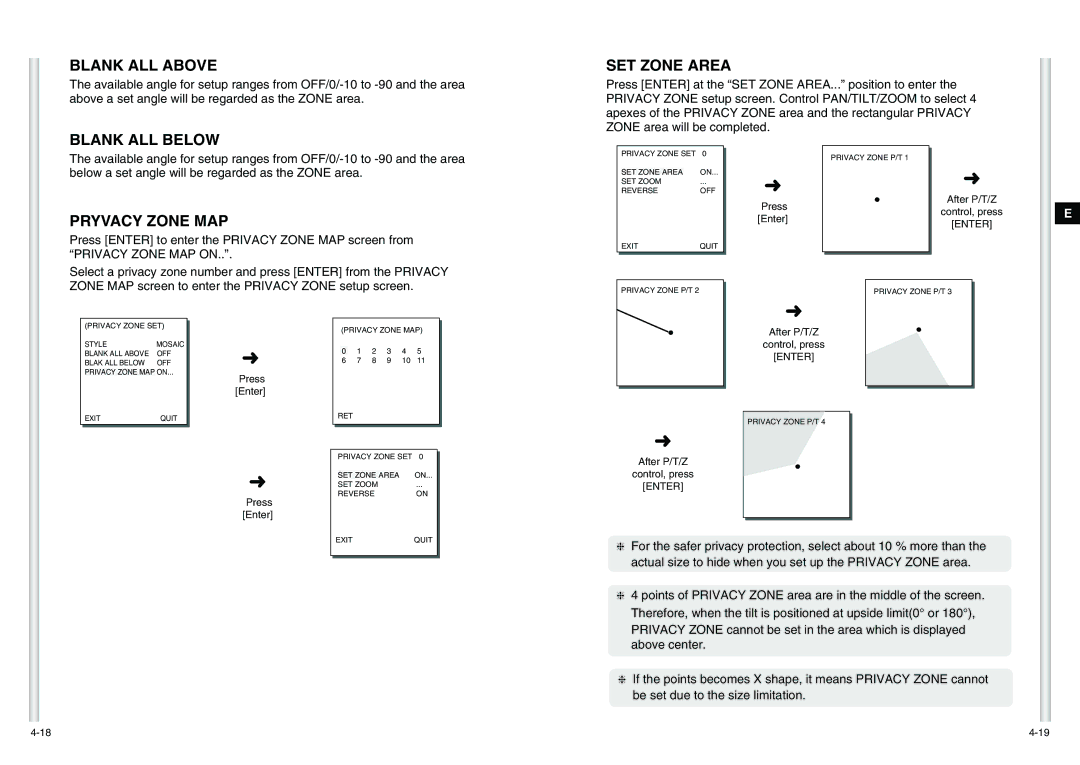
SET ZONE AREA
Press [ENTER] at the “SET ZONE AREA...” position to enter the PRIVACY ZONE setup screen. Control PAN/TILT/ZOOM to select 4 apexes of the PRIVACY ZONE area and the rectangular PRIVACY ZONE area will be completed.
The available angle for setup ranges from
PRYVACY ZONE MAP
PRIVACY ZONE SET 0
SET ZONE AREA | ON... |
SET ZOOM | ... |
REVERSE | OFF |
➜
Press [Enter]
PRIVACY ZONE P/T 1
●
➜
After P/T/Z
control, press
[ENTER]
E
Press [ENTER] to enter the PRIVACY ZONE MAP screen from “PRIVACY ZONE MAP ON..”.
EXITQUIT
Select a privacy zone number and press [ENTER] from the PRIVACY ZONE MAP screen to enter the PRIVACY ZONE setup screen.
PRIVACY ZONE P/T 2
➜
PRIVACY ZONE P/T 3 |
(PRIVACY ZONE SET)
STYLE | MOSAIC |
BLANK ALL ABOVE | OFF |
BLAK ALL BELOW | OFF |
PRIVACY ZONE MAP | ON... |
➜
Press [Enter]
(PRIVACY ZONE MAP)
0 | 1 | 2 | 3 | 4 | 5 |
6 | 7 | 8 | 9 | 10 | 11 |
●
After P/T/Z
control, press
[ENTER]
● |
EXIT | QUIT |
➜
Press [Enter]
RET
PRIVACY ZONE SET 0
SET ZONE AREA | ON... |
SET ZOOM | ... |
REVERSE | ON |
➜
After P/T/Z
control, press
[ENTER]
PRIVACY ZONE P/T 4 |
● |
EXITQUIT
❈For the safer privacy protection, select about 10 % more than the actual size to hide when you set up the PRIVACY ZONE area.
❈4 points of PRIVACY ZONE area are in the middle of the screen. Therefore, when the tilt is positioned at upside limit(0° or 180°), PRIVACY ZONE cannot be set in the area which is displayed above center.
❈If the points becomes X shape, it means PRIVACY ZONE cannot be set due to the size limitation.