■Log in at
■After checking if the camera image works well, click the setup mode button in the right up side of the main screen.
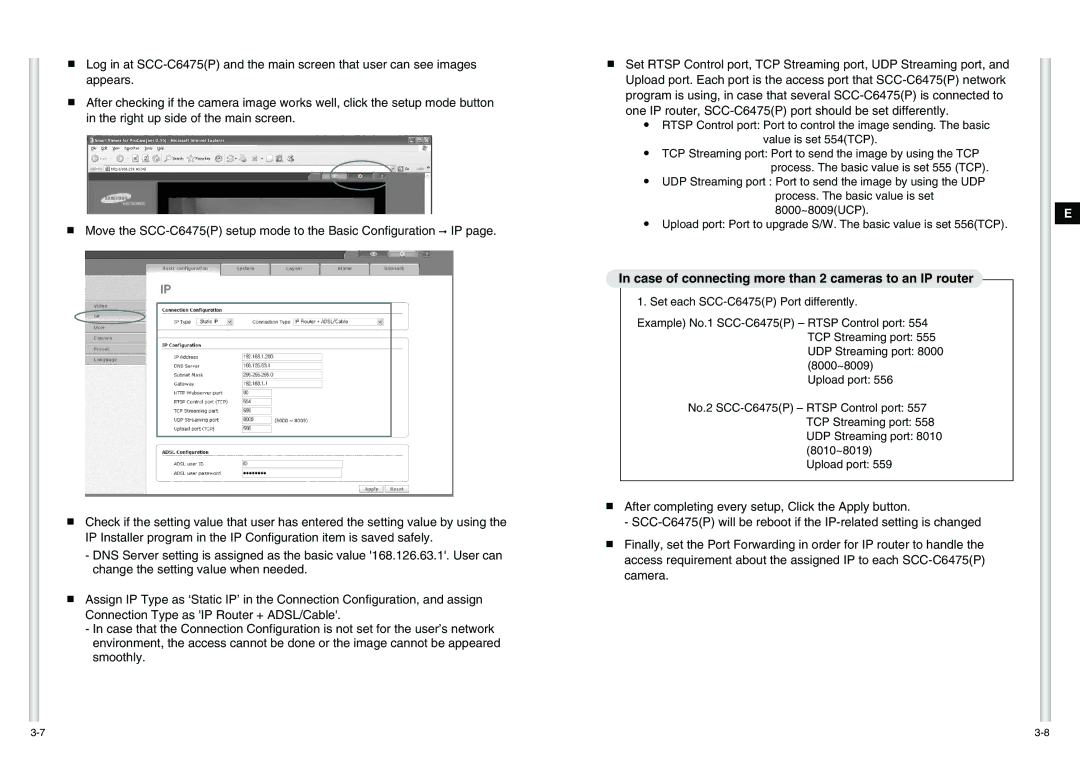
■Move the
■Check if the setting value that user has entered the setting value by using the IP Installer program in the IP Configuration item is saved safely.
-DNS Server setting is assigned as the basic value '168.126.63.1'. User can change the setting value when needed.
■Assign IP Type as ‘Static IP’ in the Connection Configuration, and assign Connection Type as 'IP Router + ADSL/Cable'.
-In case that the Connection Configuration is not set for the user’s network environment, the access cannot be done or the image cannot be appeared smoothly.
■Set RTSP Control port, TCP Streaming port, UDP Streaming port, and Upload port. Each port is the access port that
●RTSP Control port: Port to control the image sending. The basic value is set 554(TCP).
●TCP Streaming port: Port to send the image by using the TCP process. The basic value is set 555 (TCP).
●UDP Streaming port : Port to send the image by using the UDP process. The basic value is set 8000~8009(UCP).
●Upload port: Port to upgrade S/W. The basic value is set 556(TCP).
In case of connecting more than 2 cameras to an IP router
1. Set each
Example) No.1
Upload port: 556
No.2
Upload port: 559
■After completing every setup, Click the Apply button.
-
■Finally, set the Port Forwarding in order for IP router to handle the access requirement about the assigned IP to each
E