Cable Connection
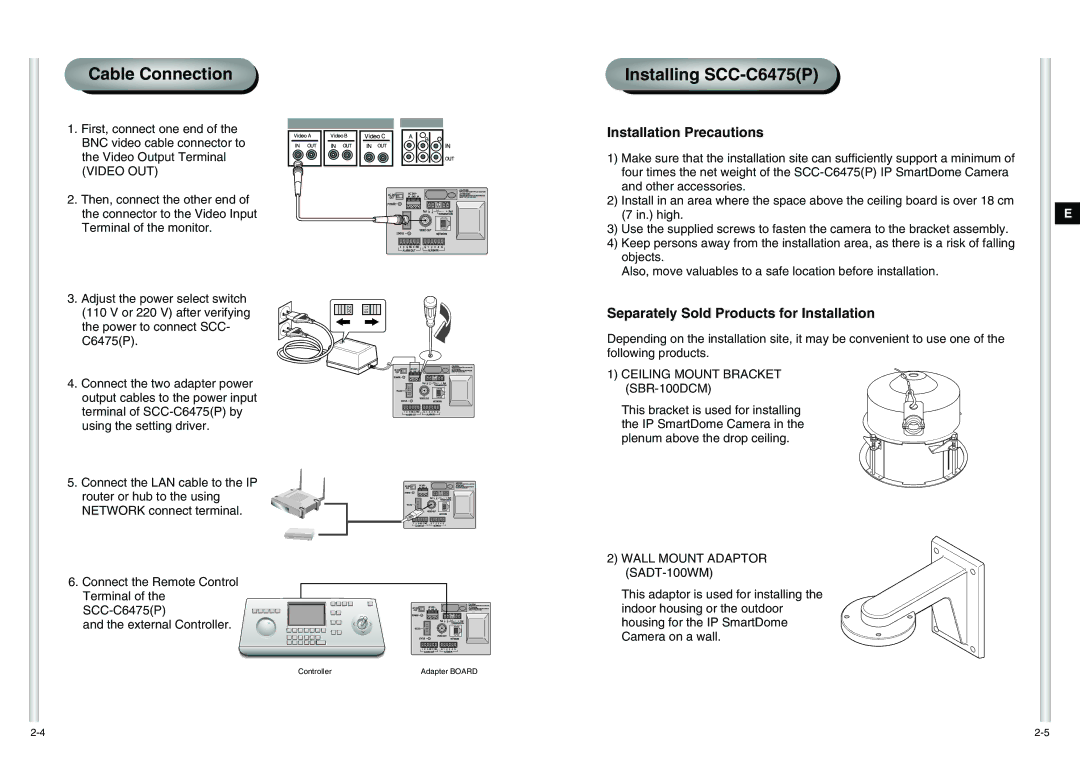
1. First, connect one end of the BNC video cable connector to the Video Output Terminal (VIDEO OUT)
2. Then, connect the other end of the connector to the Video Input Terminal of the monitor.
3. Adjust the power select switch
(110 V or 220 V) after verifying the power to connect SCC- C6475(P).
4. Connect the two adapter power output cables to the power input terminal of
5. Connect the LAN cable to the IP router or hub to the using NETWORK connect terminal.
6.Connect the Remote Control Terminal of the
and the external Controller.
Controller | Adapter BOARD |
Installing SCC-C6475(P)
Installation Precautions
1)Make sure that the installation site can sufficiently support a minimum of four times the net weight of the
2)Install in an area where the space above the ceiling board is over 18 cm (7 in.) high.
3)Use the supplied screws to fasten the camera to the bracket assembly.
4)Keep persons away from the installation area, as there is a risk of falling objects.
Also, move valuables to a safe location before installation.
Separately Sold Products for Installation
Depending on the installation site, it may be convenient to use one of the following products.
1) CEILING MOUNT BRACKET (SBR-100DCM)
This bracket is used for installing the IP SmartDome Camera in the plenum above the drop ceiling.
2)WALL MOUNT ADAPTOR (SADT-100WM)
This adaptor is used for installing the indoor housing or the outdoor housing for the IP SmartDome Camera on a wall.
E