DIGITAL VIDEO RECORDER
GB |
| GB |
|
7Reservation Record Setup
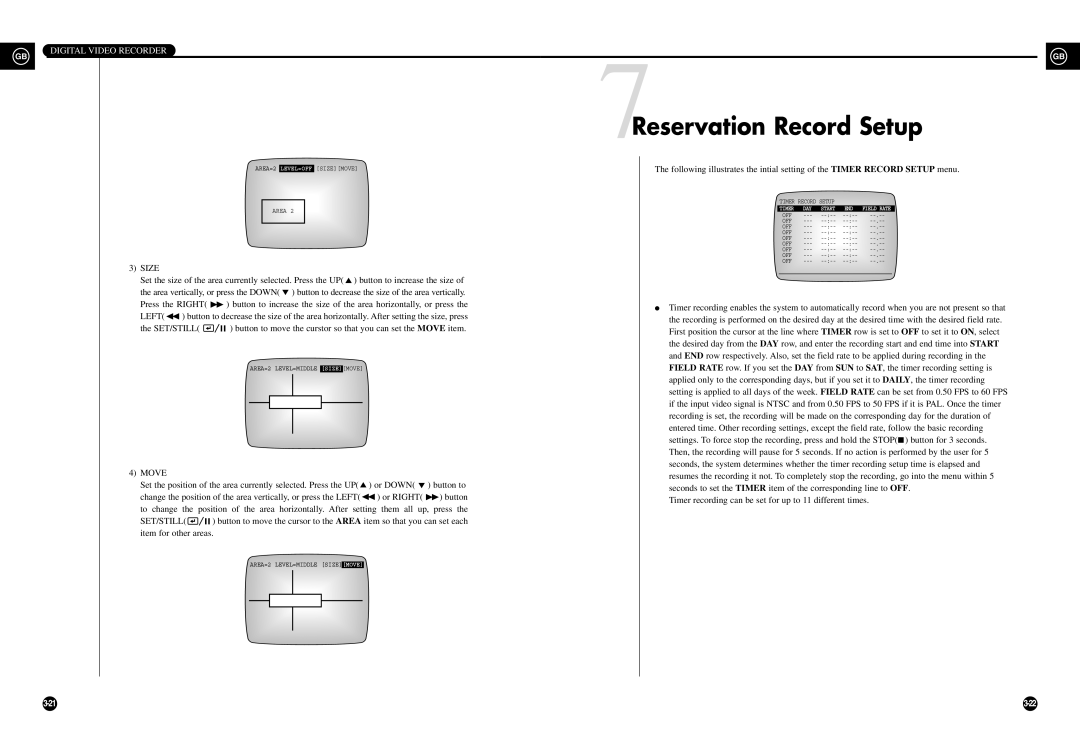
AREA=2 | LEVEL=OFF | [SIZE][MOVE] | The following illustrates the intial setting of the TIMER RECORD SETUP menu. | ||||||||
|
|
|
|
|
| TIMER RECORD SETUP |
|
|
| ||
|
|
|
|
|
|
|
| ||||
| AREA 2 |
|
|
| TIMER | DAY | START | END | FIELD RATE |
| |
|
|
|
| OFF |
| ||||||
|
|
|
|
|
|
| |||||
|
|
|
|
|
| OFF |
| ||||
|
|
|
|
|
| OFF |
| ||||
|
|
|
|
|
| OFF |
| ||||
|
|
|
|
|
| OFF |
| ||||
|
|
|
|
|
| OFF |
| ||||
|
|
|
|
|
| OFF |
| ||||
|
|
|
|
|
| OFF |
| ||||
|
|
|
|
|
| OFF |
| ||||
3)SIZE
Set the size of the area currently selected. Press the UP( ![]() ) button to increase the size of the area vertically, or press the DOWN(
) button to increase the size of the area vertically, or press the DOWN( ![]() ) button to decrease the size of the area vertically.
) button to decrease the size of the area vertically.
Press the RIGHT( |
|
|
| ) button to increase the size of the area horizontally, or press the | ● | Timer recording enables the system to automatically record when you are not present so that | |||||||||||||
LEFT( | ) button to decrease the size of the area horizontally. After setting the size, press | ||||||||||||||||||
| the recording is performed on the desired day at the desired time with the desired field rate. | ||||||||||||||||||
the SET/STILL( |
|
|
| ) button to move the curstor so that you can set the MOVE item. |
| ||||||||||||||
|
|
|
| First position the cursor at the line where TIMER row is set to OFF to set it to ON, select | |||||||||||||||
|
|
|
|
|
|
|
|
|
|
|
|
|
|
|
|
|
| ||
|
|
|
|
|
|
|
|
|
|
|
|
|
|
|
|
|
| the desired day from the DAY row, and enter the recording start and end time into START | |
|
|
|
|
|
|
|
|
|
|
|
|
|
|
|
|
|
| and END row respectively. Also, set the field rate to be applied during recording in the | |
|
|
|
|
|
|
|
| AREA=2 LEVEL=MIDDLE |
|
| [MOVE] |
|
|
| FIELD RATE row. If you set the DAY from SUN to SAT, the timer recording setting is | ||||
|
|
|
|
|
|
| [SIZE] |
|
|
| |||||||||
|
|
|
|
|
|
|
|
|
|
|
|
|
|
|
|
|
| applied only to the corresponding days, but if you set it to DAILY, the timer recording | |
|
|
|
|
|
|
|
|
|
|
|
|
|
|
|
|
|
| ||
|
|
|
|
|
|
|
|
|
|
|
|
|
|
|
|
|
| setting is applied to all days of the week. FIELD RATE can be set from 0.50 FPS to 60 FPS | |
|
|
|
|
|
|
|
|
|
|
|
|
|
|
|
|
|
| if the input video signal is NTSC and from 0.50 FPS to 50 FPS if it is PAL. Once the timer | |
|
|
|
|
|
|
|
|
|
|
|
|
|
|
|
|
|
| ||
|
|
|
|
|
|
|
|
|
|
|
|
|
|
|
|
|
| recording is set, the recording will be made on the corresponding day for the duration of | |
|
|
|
|
|
|
|
|
|
|
|
|
|
|
|
|
|
| entered time. Other recording settings, except the field rate, follow the basic recording | |
|
|
|
|
|
|
|
|
|
|
|
|
|
|
|
|
|
| settings. To force stop the recording, press and hold the STOP(■ ) button for 3 seconds. | |
|
|
|
|
|
|
|
|
|
|
|
|
|
|
|
|
|
| Then, the recording will pause for 5 seconds. If no action is performed by the user for 5 | |
4) MOVE |
|
|
|
|
|
|
|
|
|
|
|
|
|
|
|
|
| seconds, the system determines whether the timer recording setup time is elapsed and | |
|
|
|
|
|
|
|
|
|
|
|
|
|
|
|
|
| resumes the recording it not. To completely stop the recording, go into the menu within 5 | ||
Set the position of the area currently selected. Press the UP( | ) or DOWN( | ) button to |
| ||||||||||||||||
| seconds to set the TIMER item of the corresponding line to OFF. | ||||||||||||||||||
change the position of the area vertically, or press the LEFT( | ) or RIGHT( | ) button |
| ||||||||||||||||
| Timer recording can be set for up to 11 different times. | ||||||||||||||||||
to change the position of the area horizontally. After setting them all up, press the |
| ||||||||||||||||||
|
| ||||||||||||||||||
SET/STILL( |
|
|
| ) button to move the cursor to the AREA item so that you can set each |
|
| |||||||||||||
|
|
|
| ||||||||||||||||
item for other areas. |
|
|
|
| |||||||||||||||
|
|
|
|
|
|
|
| AREA=2 LEVEL=MIDDLE [SIZE] |
|
|
|
|
| ||||||
|
|
|
|
|
|
|
| [MOVE] |
|
|
|
| |||||||
|
|
|
|
|
|
|
|
|
|
|
|
|
|
|
|
|
|
| |
|
|
|
|
|
|
|
|
|
|
|
|
|
|
|
|
|
|
| |
|
|
|
|
|
|
|
|
|
|
|
|
|
|
|
|
|
|
| |
|
|
|
|
|
|
|
|
|
|
|
|
|
|
|
|
|
|
| |
|
|
|
|
|
|
|
|
|
|
|
|
|
|
|
|
|
|
| |