Installation
Lens Installation
Before setting up the projector, install Projection Lens on the projector.
Before installation, check where the projector is used and prepare a suitable lens. For the specifications of Projection Lens, contact sales dealer where you purchased the projector.
- Do not use the optional lens below for this projector. Otherwise damages may result. LENS MODEL NO. :
- Lens installation and replacement should be performed by the qualified service personnel.
-When setting the projector after lens installation, be sure to replace a Lens Cap to protect a surface.
-When carrying or holding up the projector, be careful not to put your hands on lens part. It may damage lens, cabinet, or mechanical parts.
Attaching the Strap
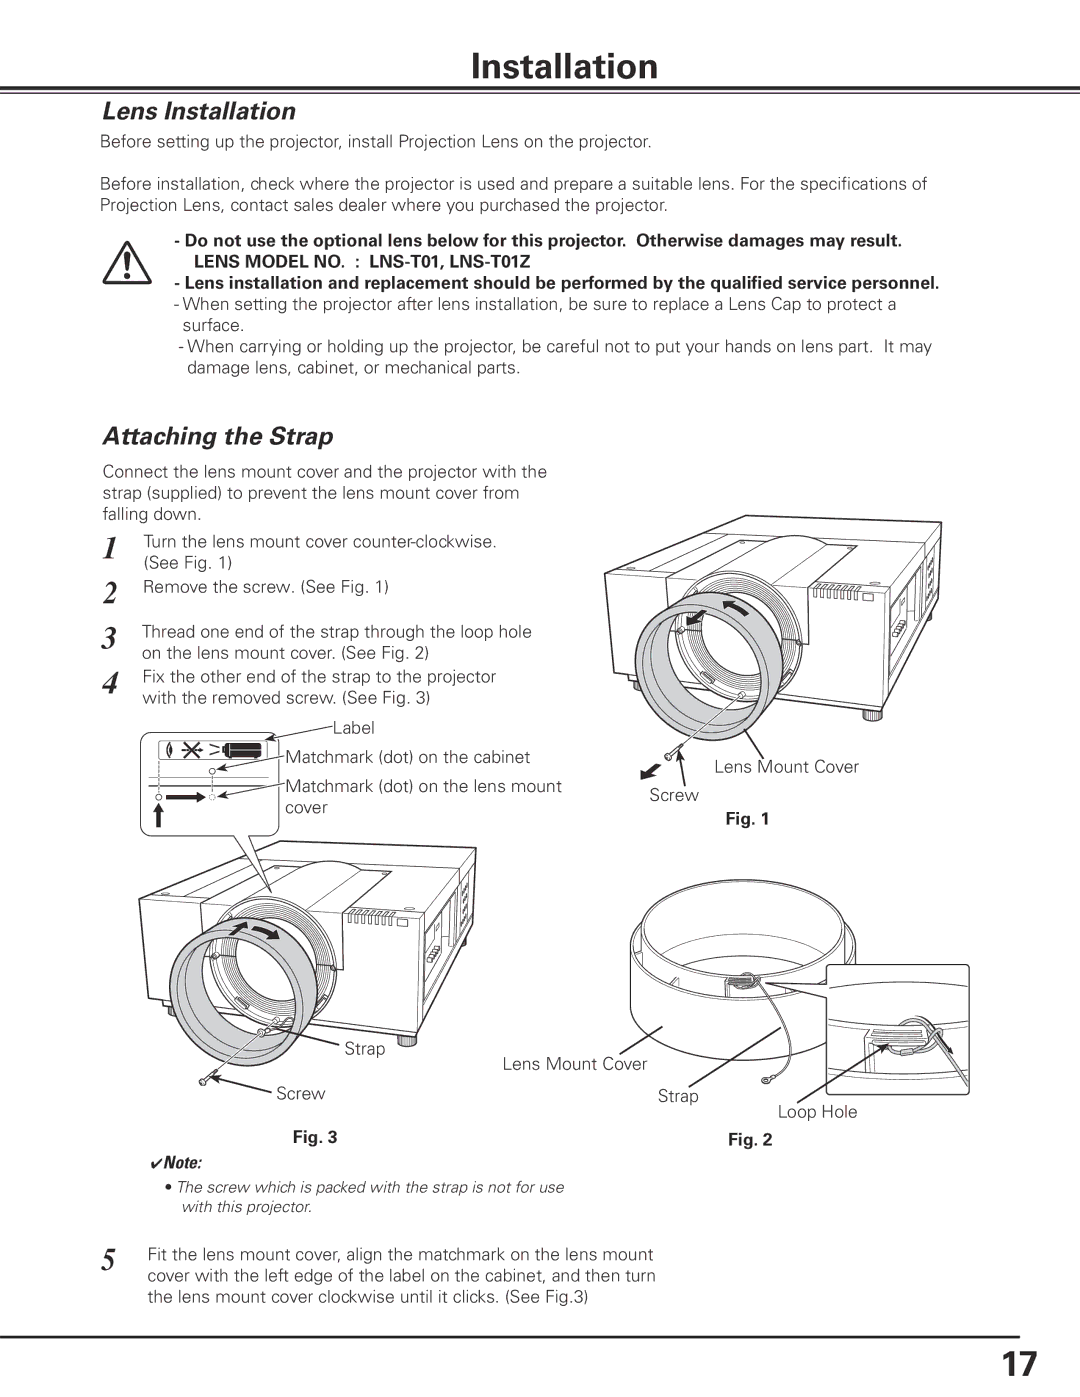
Connect the lens mount cover and the projector with the strap (supplied) to prevent the lens mount cover from falling down.
1
2
3
4 Fix the other end of the strap to the projector with the removed screw. (See Fig. 3)
![]() Label
Label
![]()
![]()
![]()
![]()
![]() Matchmark (dot) on the cabinet
Matchmark (dot) on the cabinet
![]() Matchmark (dot) on the lens mount
Matchmark (dot) on the lens mount ![]()
![]() cover
cover
![]()
![]() Lens Mount Cover Screw
Lens Mount Cover Screw
Fig. 1
| Strap |
|
| Lens Mount Cover |
|
| Screw | Strap |
|
| Loop Hole |
| Fig. 3 | Fig. 2 |
| ✔Note: |
|
| • The screw which is packed with the strap is not for use |
|
| with this projector. |
|
5 | Fit the lens mount cover, align the matchmark on the lens mount |
|
| cover with the left edge of the label on the cabinet, and then turn |
|
the lens mount cover clockwise until it clicks. (See Fig.3)
17