Settings
Background
Select the background color or image when no input signal is detected. Press the Point ed buttons to switch between each option.
Blue | Projects a blue background. |
User | Projects a captured image. |
Black | Projects a black background. |
Lamp mode
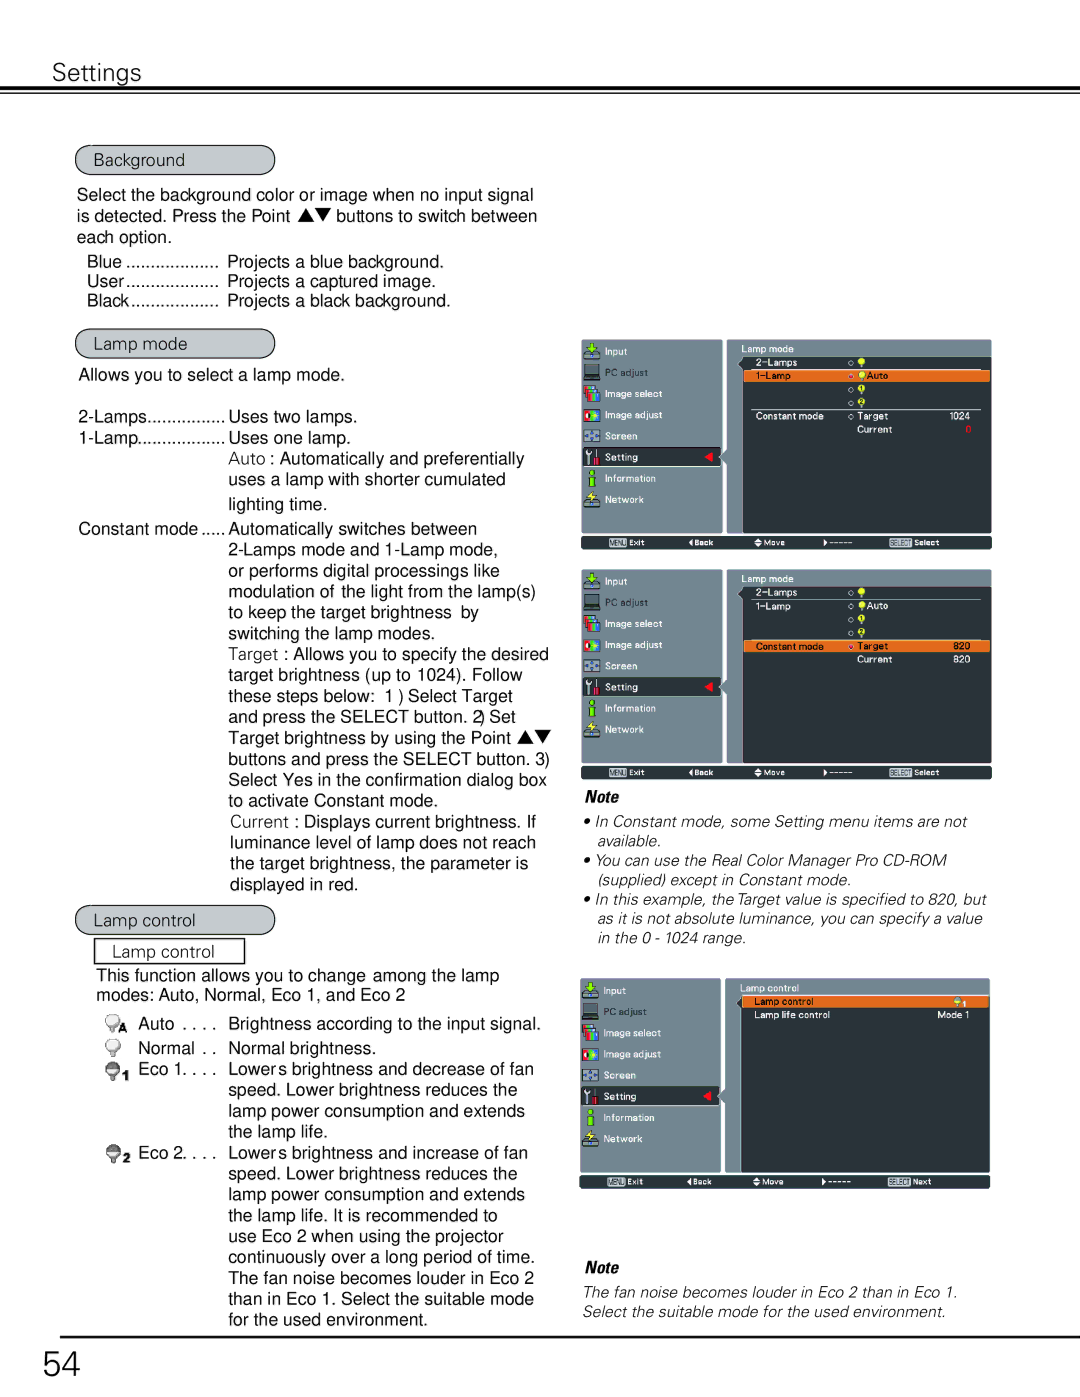
Allows you to select a lamp mode.
Auto: Automatically and preferentially uses a lamp with shorter cumulated
lighting time.
Constant mode..... Automatically switches between
Target: Allows you to specify the desired target brightness (up to 1024). Follow these steps below: 1) Select Target and press the SELECT button. 2) Set Target brightness by using the Point ed buttons and press the SELECT button. 3) Select Yes in the confirmation dialog box to activate Constant mode.
Current: Displays current brightness. If luminance level of lamp does not reach the target brightness, the parameter is displayed in red.
Lamp control
Lamp control
This function allows you to change among the lamp modes: Auto, Normal, Eco 1, and Eco 2
Auto . . | Brightness according to the input signal. |
Normal . | Normal brightness. |
Eco 1 . | . Lowers brightness and decrease of fan |
| speed. Lower brightness reduces the |
| lamp power consumption and extends |
| the lamp life. |
Eco 2 . | . Lowers brightness and increase of fan |
| speed. Lower brightness reduces the |
| lamp power consumption and extends |
| the lamp life. It is recommended to |
| use Eco 2 when using the projector |
| continuously over a long period of time. |
| The fan noise becomes louder in Eco 2 |
| than in Eco 1. Select the suitable mode |
| for the used environment. |
✔Note
•In Constant mode, some Setting menu items are not available.
•You can use the Real Color Manager Pro
•In this example, the Target value is specified to 820, but as it is not absolute luminance, you can specify a value in the 0 - 1024 range.
✔Note
The fan noise becomes louder in Eco 2 than in Eco 1. Select the suitable mode for the used environment.
54
