Menu settings (continued)
3 Control ID setting
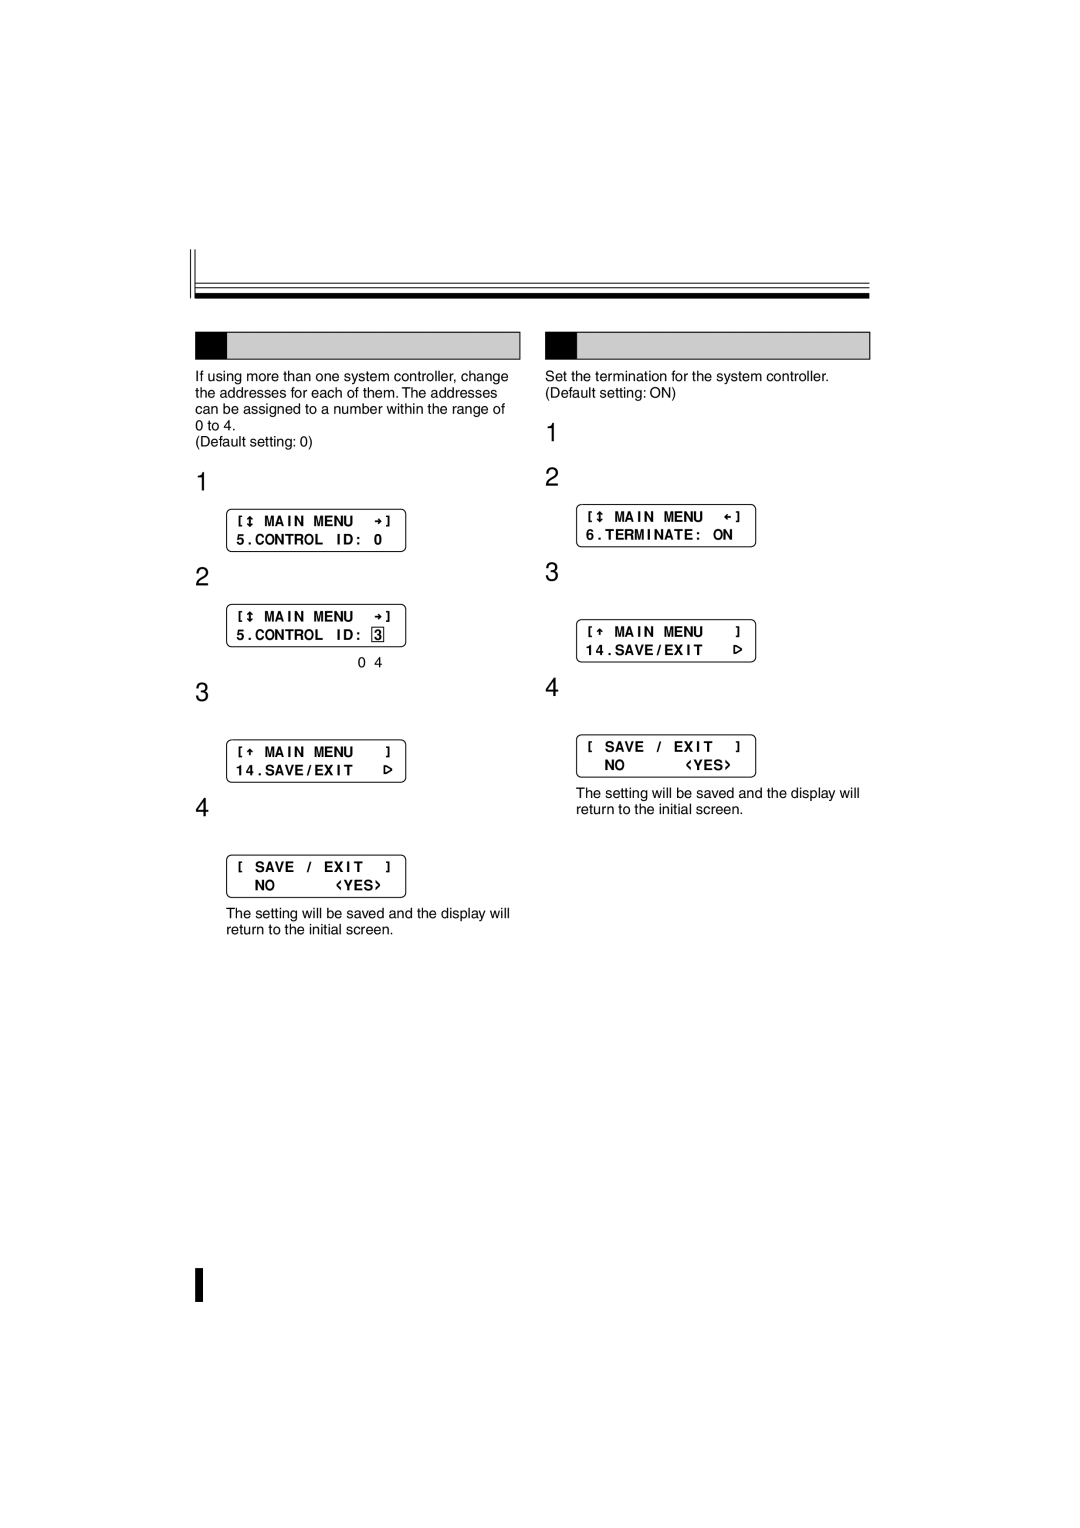
If using more than one system controller, change the addresses for each of them. The addresses can be assigned to a number within the range of 0 to 4.
(Default setting: 0)
1Move the joystick up or down to select “5. CONTROL ID”.
ó
[ñ MAIN MENU †] 5.CONTROL ID: 0
2Move the joystick to the left or right to assign the address (Example: 3).
ó
[ñ MAIN MENU †] 5.CONTROL ID: 3
Available settings: 0−4
3Move the joystick up or down to select “14. SAVE/EXIT”, and then move the joystick to the right.
[ó MAIN MENU ]
14.SAVE/EXIT ·
4Move the joystick to the left or right to select “YES”, and then press the ENT button.
[SAVE / EXIT ]
NO <YES>
The setting will be saved and the display will return to the initial screen.
![]() 15 Preparations
15 Preparations
4 Termination setting
Set the termination for the system controller. (Default setting: ON)
1Move the joystick up or down to select “6. TERMINATE”.
2Move the joystick to the left or right to set the termination.
ó | í] |
[ñ MAIN MENU |
6.TERMINATE: ON
3Move the joystick up or down to select “14. SAVE/EXIT”, and then move the joystick to the right.
[ó MAIN MENU ]
14.SAVE/EXIT ·
4Move the joystick to the left or right to select “YES”, and then press the ENT button.
[SAVE / EXIT ]
NO <YES>
The setting will be saved and the display will return to the initial screen.
