proper operating procedures
ALWAYS SUPPORT
WORKPIECES
Figure 51
WOR K SUPPORT
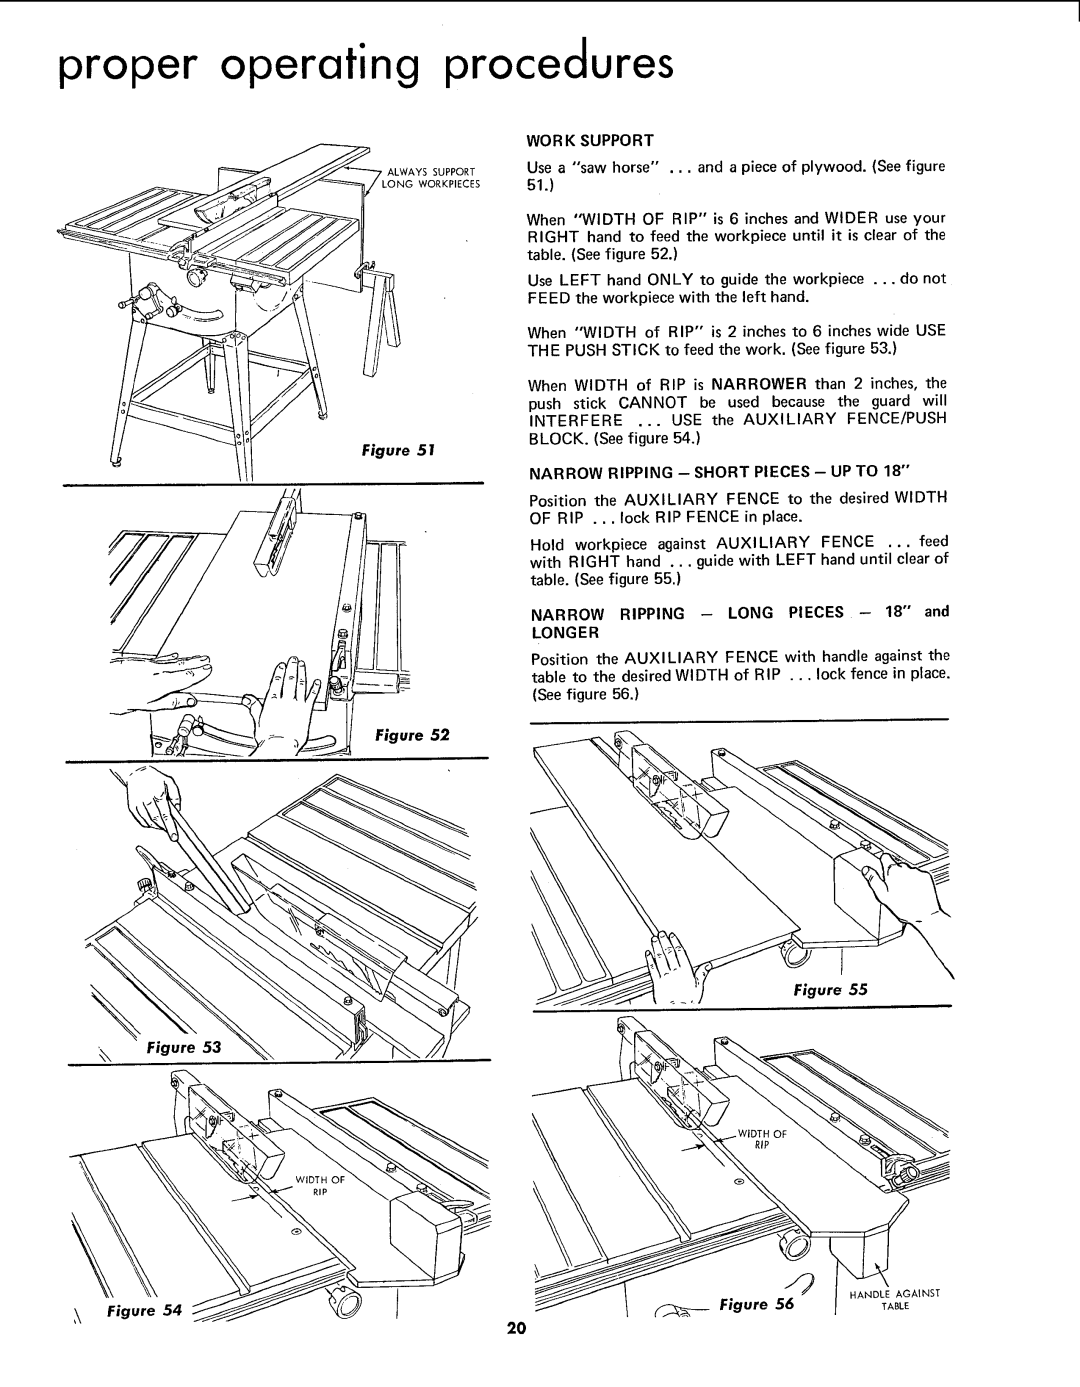
Use a "saw horse" ,.. and a piece of plywood. (See figure
51.)
When "WIDTH OF RIP" is 6 inches and WIDER use your RIGHT hand to feed the workpiece until it is clear of the table. (See figure 52.)
Use LEFT hand ONLY to guide the workpiece ... do not
FEED the workpiece with the left hand.
When "WIDTH of RIP" is 2 inches to 6 inches wide USE
THE PUSH STICK to feed the work. (See figure 53.)
When WIDTH of RIP is NARROWER than 2 inches, the push stick CANNOT be used because the guard will
INTERFERE ... USE the AUXILIARY FENCE/PUSH BLOCK. (See figure 54.)
NARROW RIPPING - SHORT PIECES - UP TO 18"
Position the AUXILIARY FENCE to the desired WIDTH
OF RIP . .. lock RIP FENCE in place.
Hold workpiece against AUXILIARY FENCE ... feed with RIGHT hand ... guide with LEFT hand until clear of table. (See figure 55.)
NARROW RIPPING - LONG PIECES - 18" and
LONGER
Position the AUXILIARY FENCE with handle against the table to the desired WIDTH of RIP ... lock fence in place. (See figure 56.)
Figure 52
I
Figure 55
Figure 53
Figure 54
I
Figure 56
HANDLE AGAINST
TABLE
2O
