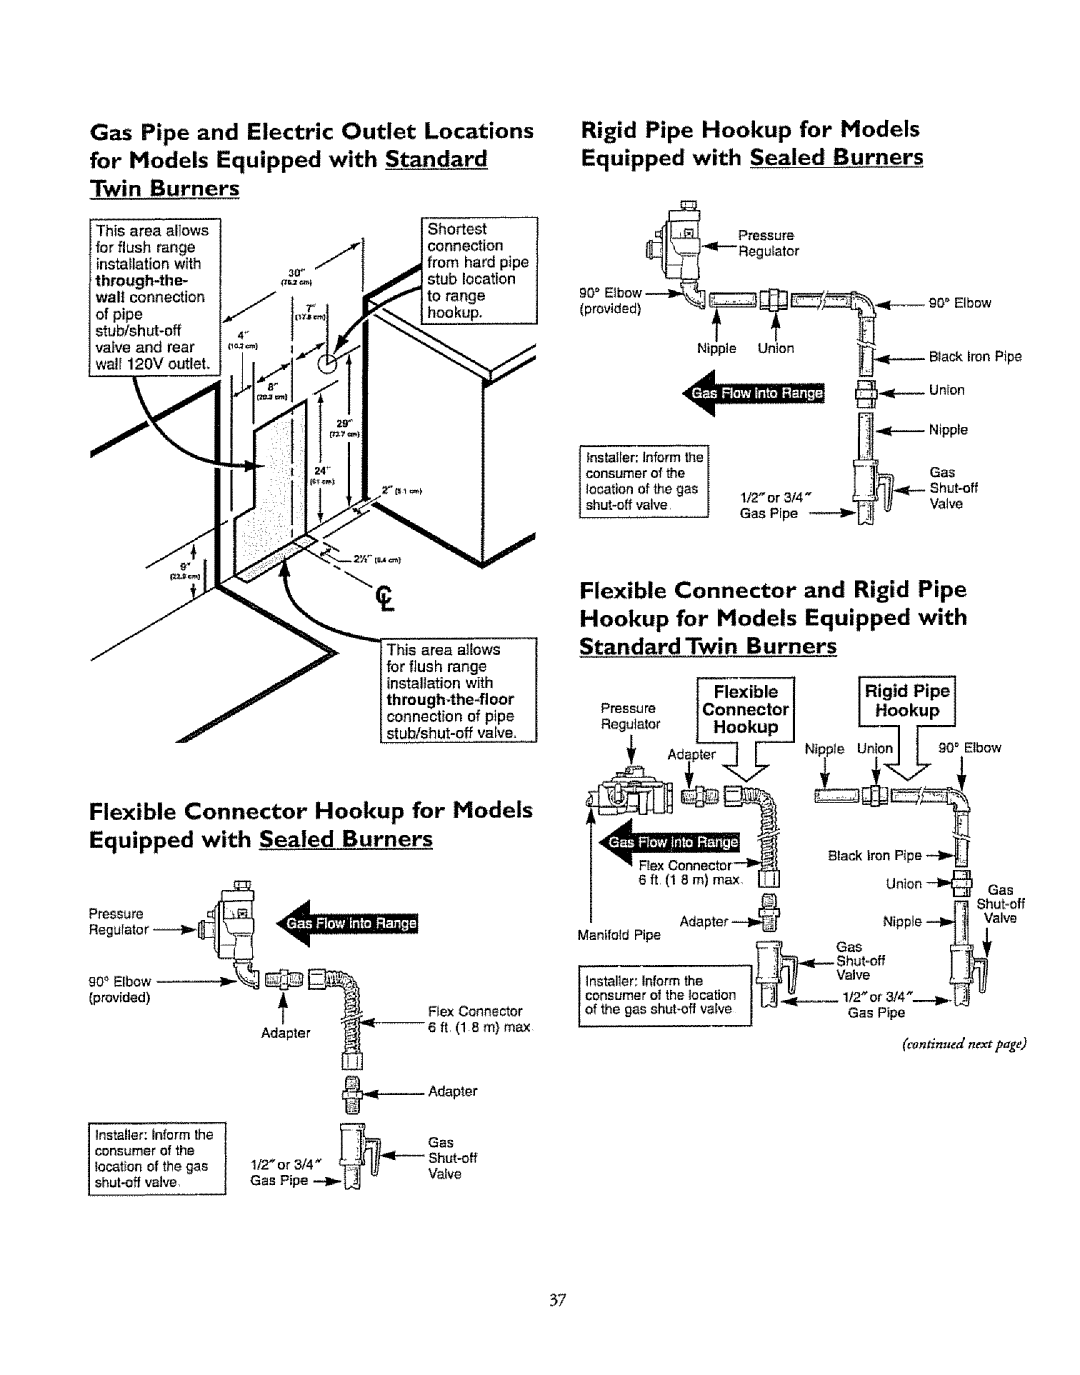
Gas | Pipe | and Electric | Outlet | Locations | Rigid | Pipe | Hookup for | Models |
| ||||
for | Models | Equipped | with Standard | Equipped | with | Sealed | Burners |
| |||||
Twin | Burners |
|
|
|
|
|
|
|
|
| |||
This area | allows |
| Shortest |
| __ |
| Pressure |
|
| ||||
for flush | range |
|
| connection |
|
|
|
|
|
| |||
installation | with |
| from | hard pipe | o |
| Regulator |
|
| ||||
|
| stub | location |
|
|
| |||||||
walt connection |
| to range |
|
|
|
|
|
| |||||
of pipe |
|
|
|
| hookup. |
|
|
|
|
|
| ||
|
|
|
|
|
|
|
|
|
| ||||
vafve and | rear |
|
|
|
|
|
| Nippte | Union | Black iron Pipe | |||
wall 120V | outleL |
|
|
|
|
| |||||||
|
|
|
|
|
|
|
|
| |||||
consumer of the |
| t | 1_'_ | Gas | ||
location | of the gas | . | _ | |||
valve | [ | GasPipe1!2or 314"__ | _ | |||
|
|
|
|
|
| |
Flexible Connector and Rigid Pipe
This area allows
Hookup for Models Equipped with Standard Twin Burners
for flush range |
|
|
|
|
| |
installation | with |
| I | Flexible | i | I Rigid Pipe i |
th |
| |||||
Pressure | Connectorl |
| [ Hookup J | |||
connection | of pipe | I | ||||
valve, | Regulator | I | Hookup |
| ||
Flexible Connector Hookup for Models
Equipped with Sealed Burners
Pressure
(provided)
i Installer: inform the consumer of the _ocation of the gas
|
|
| 6ft (1gin) | maX, | _ |
|
| Gas | |
|
|
|
| r_ |
|
|
| I_ | Shut=off |
|
|
| Adapter_r |
|
| Nipple | _iVa,ve | ||
|
|
| Manifotd Pipe | _ |
|
| Gas |
| _' |
|
|
|
|
| _P | _,.J | |||
|
|
| n,ta,Ior:,nformme! 1!I Va,ve |
| |||||
|
|
| I consumer of the location | I | 112"or | 3/4_.l | i]j _ | ||
_ |
| Flex Connector | Jof the gas | va ve | J "4" | _ | Gas | Pipe _ | _ |
|
|
| |||||||
Adapter | _ | 6 ft, (1 8 m} max |
|
|
|
|
| (continued next page) | |
|
|
|
|
|
|
| |||
| dapter |
|
|
|
|
|
|
| |
| _., | Gas |
|
|
|
|
|
|
|
1/2"or 3/4 _" | _ |
|
|
|
|
|
|
| |
Gas Pipe _ | _ | Valve |
|
|
|
|
|
|
|
37