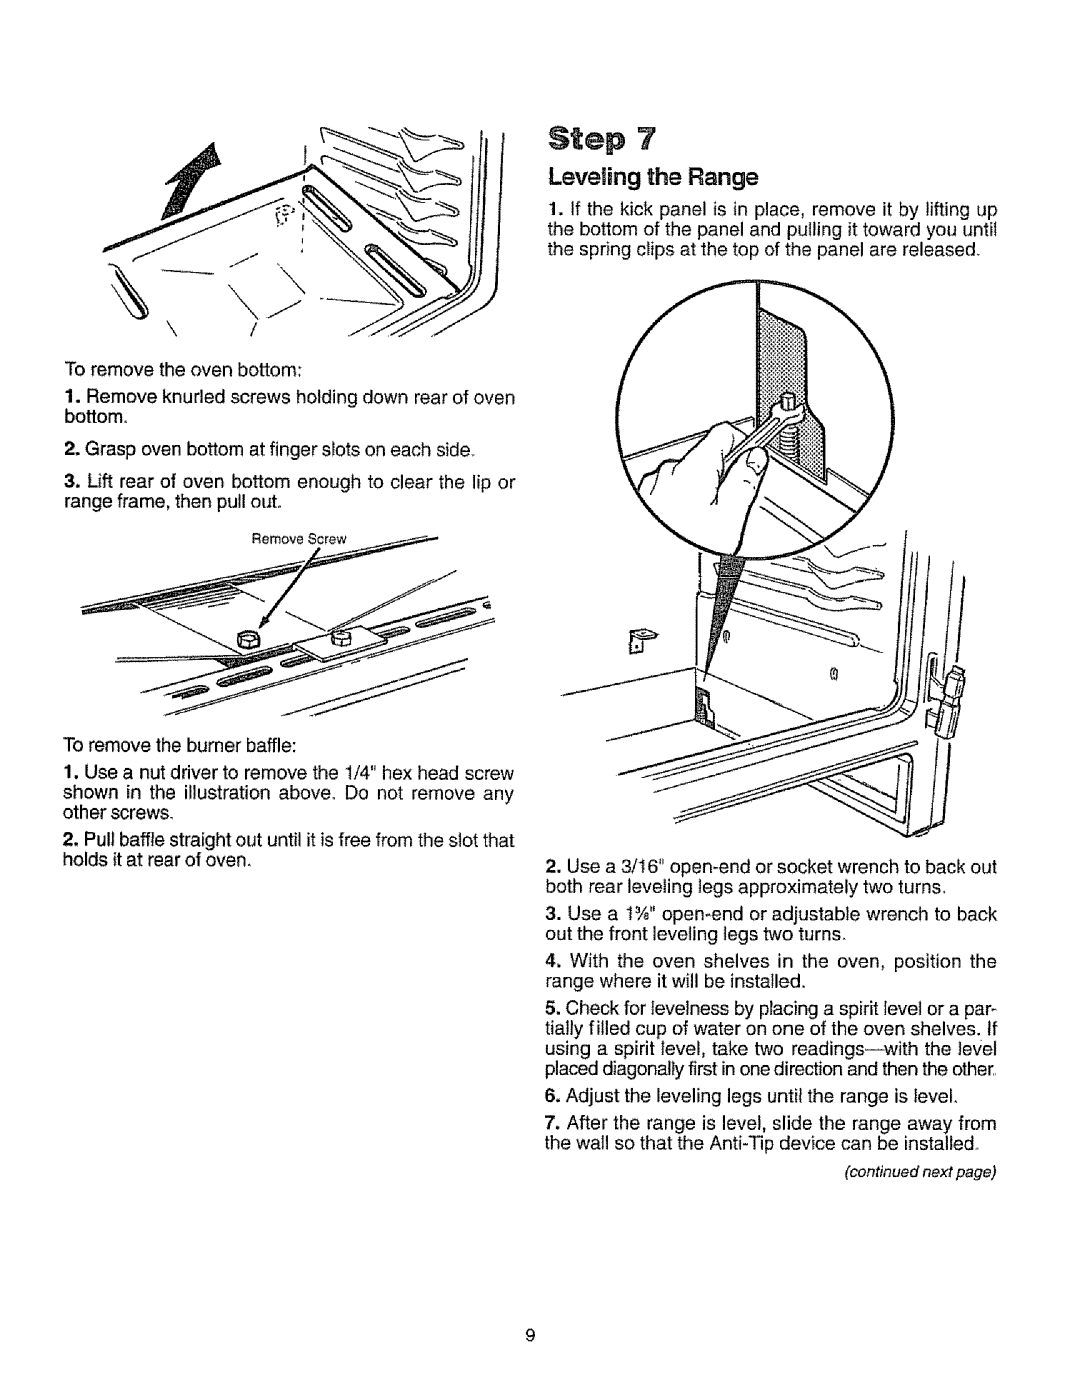
Toremovethe ovenbottom:
1.Removeknurledscrewsholdingdownrearof oven bottom.
2.Graspovenbottomat fingerslotson eachside,
3.Lift rear of oven bottomenoughto clearthe lip or rangeframe,thenpullout°
Remove Screw
To remove the burner baffle:
1. Use a nut driver to remove the 1/4" hex head screw
shown in the illustration above° Do not remove any other screws.
2.Pull baffle straight out until it is free from the slot that holds it at rear of oven.
Step ?
Leveling the Range
1.If the kick panel is in place, remove it by lifting up the bottom of the panel and pulling it toward you until the spring clips at the top of the panel are released.
2.Use a 3/16"
3.Use a t¾"
4.With the oven shelves in the oven, position the range where it will be installed.
5.Check for levelness by placing a spirit level or a par_ tially filled cup of water on one of the oven shelves. If
using a spirit level, take two
6.Adjust the leveling legs until the range is level.
7.After the range is level, slide the range away from the wall so that the
(continued next page)
