ADJUSTMENTS
This section explains how to adjust the weight system.See the EXERCISE GUIDELINES on page 30 for important informationabout how to get the mostbenefit from your exemise program. Also, refer to the accompanyingexer- cise guide to see the correctform for each exercise.
Make sure all parts are properly tightenedeach time the weightsystem is used. Replace any worn parts immediate- ly. The weight system can be cleaned with a damp cloth and a mild,
CHANGING THE WEIGHT SETTING
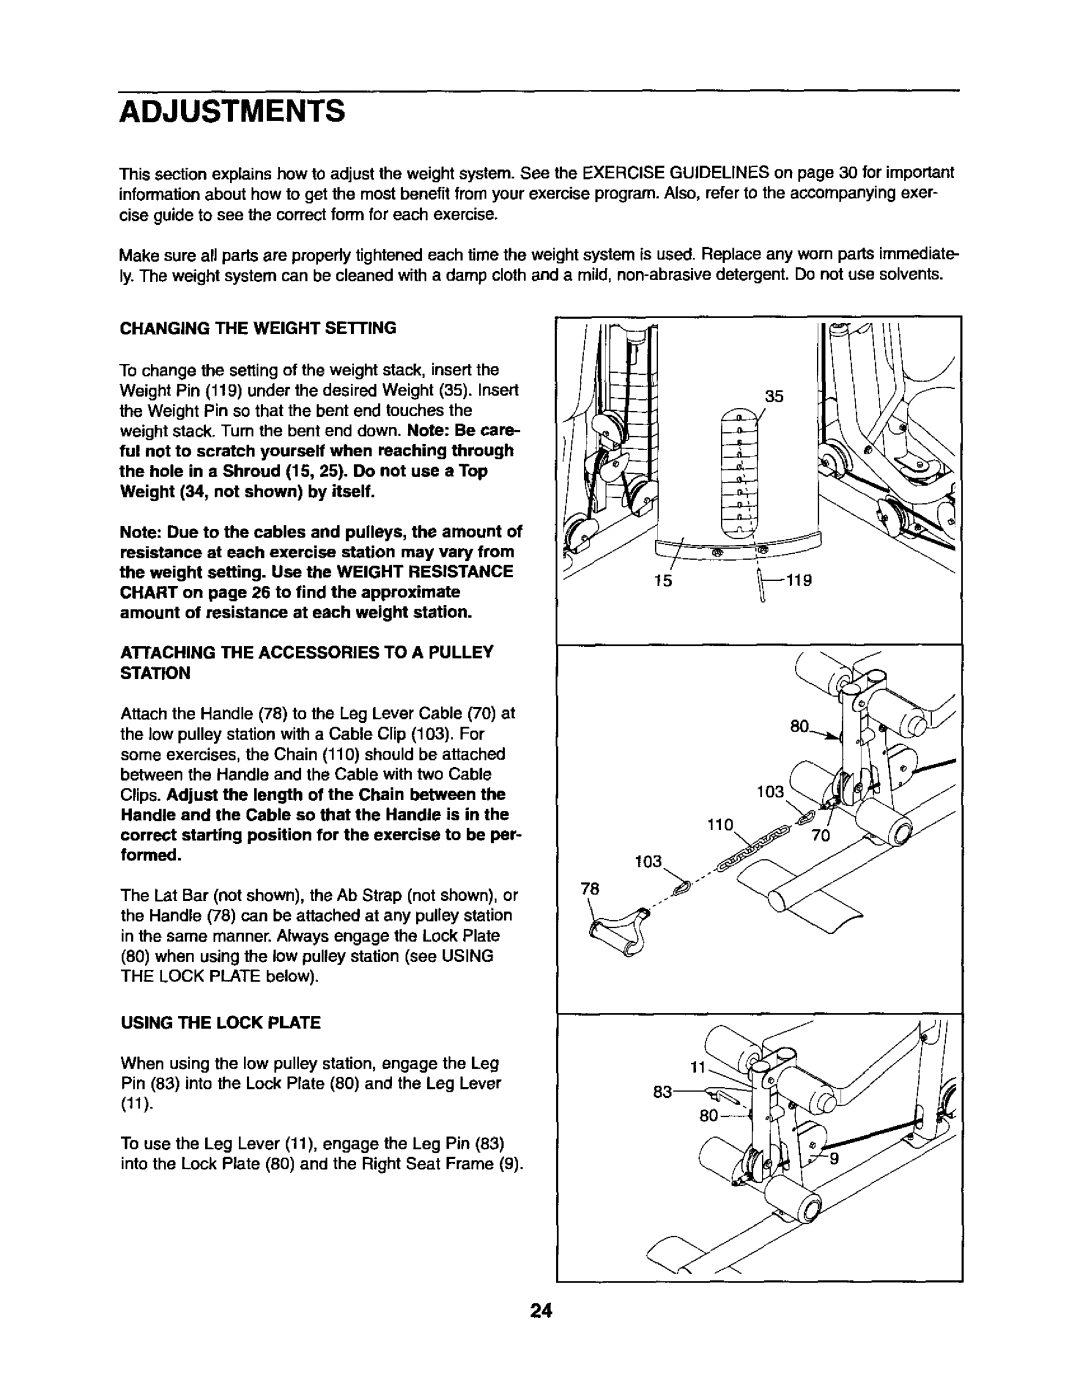
To change the settingof the weight stack, insertthe
Weight Pin (119) under the desired Weight (35). Insert the Weight Pin so that the bent end touches the weight stack. Turn the bent end down. Note: Be care- ful not to scratch yourself when reaching through the hole in a Shroud (15, 25). Do not use a Top Weight (34, not shown) by itself.
Note: Due to the cables and pulleys, the amount of resistance at each exercise station may vary from the weight setting. Use the WEIGHT RESISTANCE CHART on page 26 to find the approximate amount of resistance at each weight station.
Attach the Handle (78) to the Leg Lever Cable (70) at the low pulley station with a Cable Clip (103). For some exercises, the Chain (110) should be attached between the Handle and the Cable with two Cable
Clips. Adjust the length of the Chain between the Handle and the Cable so that the Handle is in the
correct starting position for the exercise to be per- formed.
15
1191
110
\
103
The Lat Bar (not shown), the Ab Strap (not shown), or the Handle (78) can be attached at any pulley station in the same manner. Always engage the Lock Plate
(80)when usingthe low pulley station (see USING THE LOCK PLATE below).
USING THE LOCK PLATE
When using the low pulley station, engage the Leg
Pin (83) into the Lock Plate (80) and the Leg Lever
(11).
78
To use the Leg Lever (11), engage the Leg Pin (83) intothe Lock Plate (80) and the Right Seat Frame (9).
24
