USING THE REMOTE CONTROL
LOADING BATTERIES
Use two
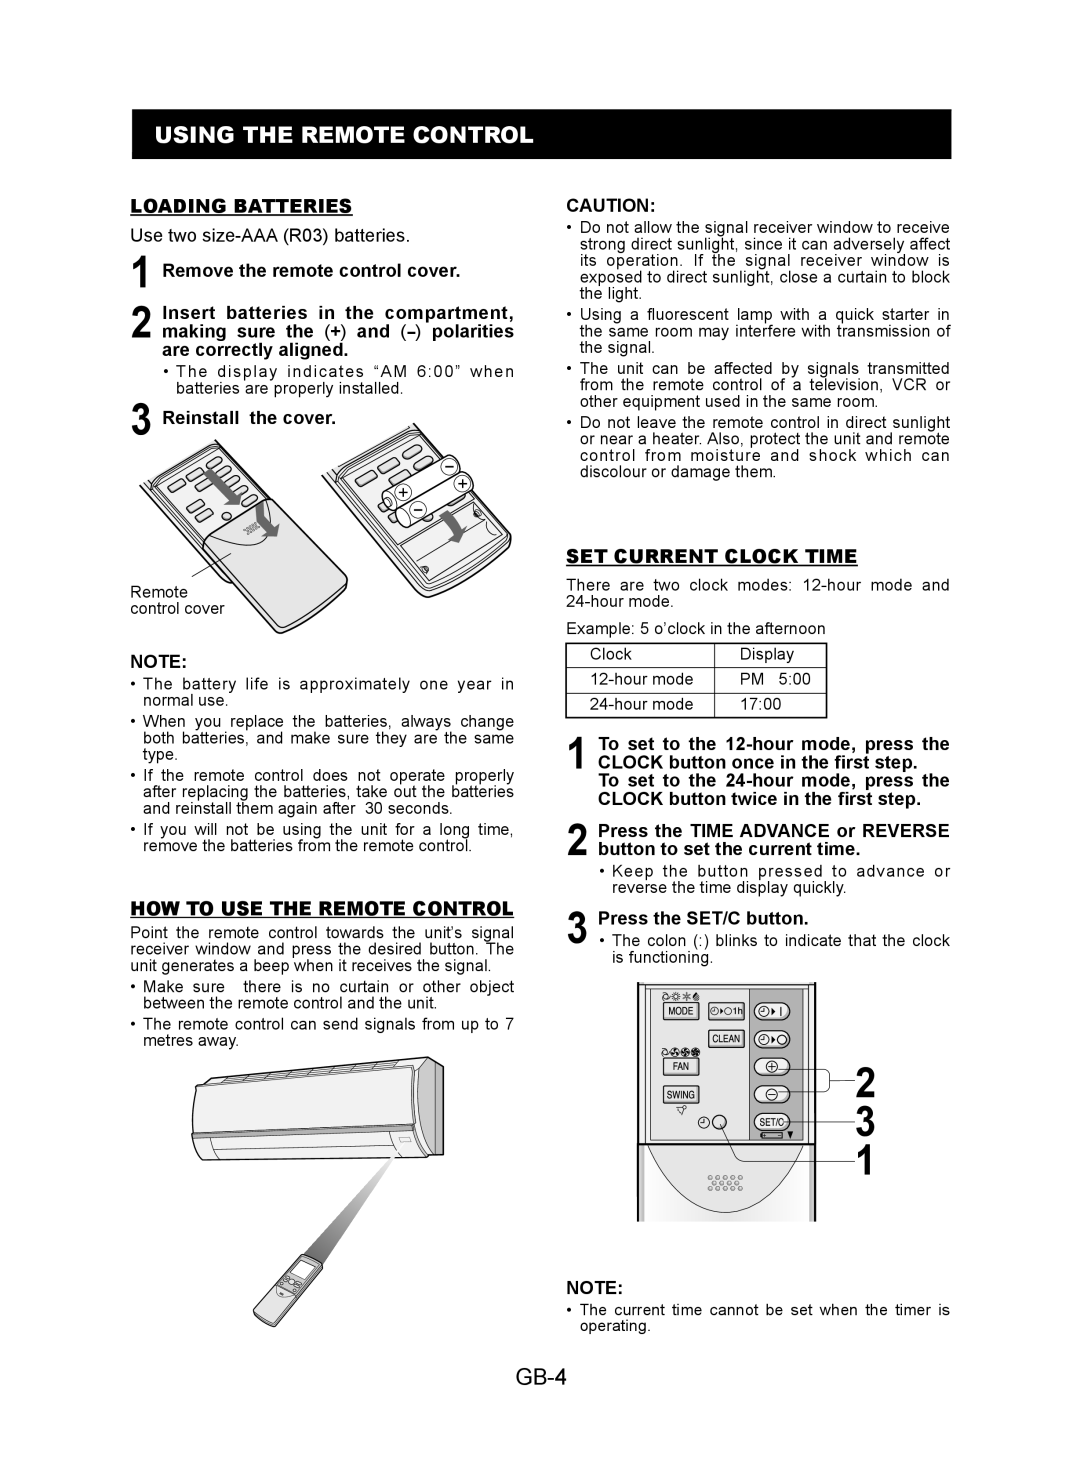
1 Remove the remote control cover.
2 Insert batteries in the compartment, making sure the (+) and
•The display indicates “AM 6:00” when batteries are properly installed.
3 Reinstall the cover. 

Remote control cover
NOTE:
•The battery life is approximately one year in normal use.
•When you replace the batteries, always change both batteries, and make sure they are the same type.
•If the remote control does not operate properly after replacing the batteries, take out the batteries and reinstall them again after 30 seconds.
•If you will not be using the unit for a long time, remove the batteries from the remote control.
HOW TO USE THE REMOTE CONTROL
Point the remote control towards the unit’s signal receiver window and press the desired button. The unit generates a beep when it receives the signal.
•Make sure there is no curtain or other object between the remote control and the unit.
•The remote control can send signals from up to 7 metres away.
CAUTION:
•Do not allow the signal receiver window to receive strong direct sunlight, since it can adversely affect its operation. If the signal receiver window is exposed to direct sunlight, close a curtain to block the light.
•Using a fluorescent lamp with a quick starter in the same room may interfere with transmission of the signal.
•The unit can be affected by signals transmitted from the remote control of a television, VCR or other equipment used in the same room.
•Do not leave the remote control in direct sunlight or near a heater. Also, protect the unit and remote control from moisture and shock which can discolour or damage them.
SET CURRENT CLOCK TIME
There are two clock modes:
Example: 5 o’clock in the afternoon
Clock | Display |
PM 5:00 | |
|
|
17:00 |
1 To set to the
CLOCK button once in the first step.
To set to the
2 Press the TIME ADVANCE or REVERSE button to set the current time.
•Keep the button pressed to advance or reverse the time display quickly.
3 Press the SET/C button.
• The colon (:) blinks to indicate that the clock is functioning.
![]()
![]() 2
2
3
1
NOTE:
•The current time cannot be set when the timer is operating.