Caution:
Turn off all other equipment before making this connection.
Notes:
zRefer to the operation manual of the equipment to be connected.
zInsert the plugs fully to avoid fuzzy pictures or noise.
„Connecting the TV
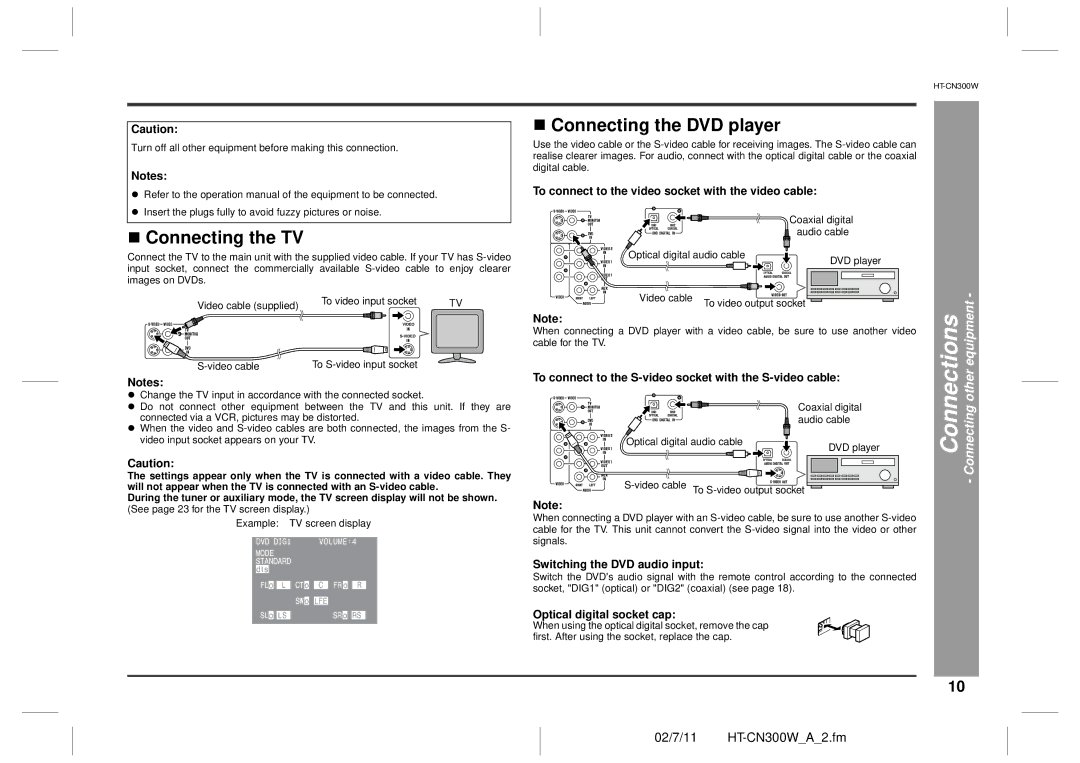
Connect the TV to the main unit with the supplied video cable. If your TV has
Video cable (supplied) | To video input socket | TV |
To |
Notes:
zChange the TV input in accordance with the connected socket.
zDo not connect other equipment between the TV and this unit. If they are connected via a VCR, pictures may be distorted.
zWhen the video and
Caution:
The settings appear only when the TV is connected with a video cable. They will not appear when the TV is connected with an
During the tuner or auxiliary mode, the TV screen display will not be shown.
(See page 23 for the TV screen display.)
Example: TV screen display
„Connecting the DVD player
Use the video cable or the
To connect to the video socket with the video cable:
Coaxial digital
audio cable
Optical digital audio cable
DVD player
Video cable | To video output socket |
|
Note:
When connecting a DVD player with a video cable, be sure to use another video cable for the TV.
To connect to the S-video socket with the S-video cable:
Coaxial digital audio cable
Optical digital audio cable
DVD player
Note:
When connecting a DVD player with an
Switching the DVD audio input:
Switch the DVD's audio signal with the remote control according to the connected socket, "DIG1" (optical) or "DIG2" (coaxial) (see page 18).
Optical digital socket cap:
When using the optical digital socket, remove the cap first. After using the socket, replace the cap.
Connections | Connecting other equipment - |
| - |
|
|
10
