Connecting to the AC socket
„Setting the AC voltage selector
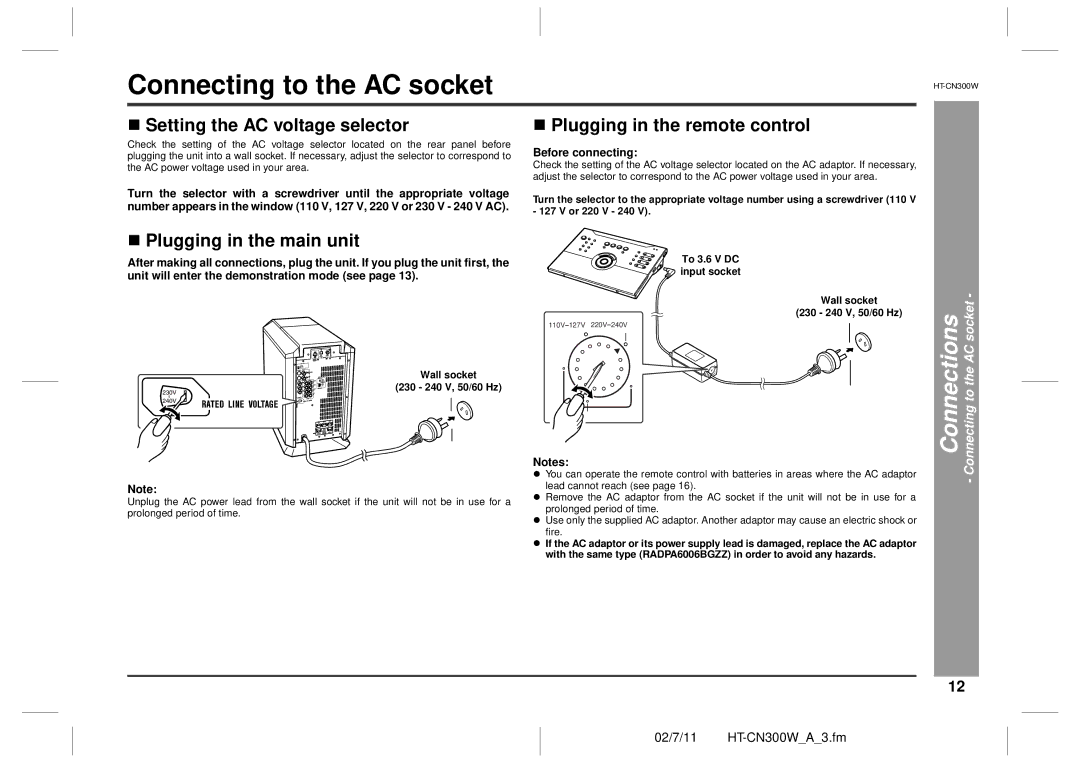
Check the setting of the AC voltage selector located on the rear panel before plugging the unit into a wall socket. If necessary, adjust the selector to correspond to the AC power voltage used in your area.
Turn the selector with a screwdriver until the appropriate voltage number appears in the window (110 V, 127 V, 220 V or 230 V - 240 V AC).
„Plugging in the remote control
Before connecting:
Check the setting of the AC voltage selector located on the AC adaptor. If necessary, adjust the selector to correspond to the AC power voltage used in your area.
Turn the selector to the appropriate voltage number using a screwdriver (110 V - 127 V or 220 V - 240 V).
„ Plugging in the main unit
After making all connections, plug the unit. If you plug the unit first, the unit will enter the demonstration mode (see page 13).
110V 127V 220V 240V
Wall socket
(230 - 240 V, 50/60 Hz)
To 3.6 V DC input socket
Wall socket
(230 - 240 V, 50/60 Hz)
Connecting to the AC socket -
Connections
Note:
Unplug the AC power lead from the wall socket if the unit will not be in use for a prolonged period of time.
Notes:
zYou can operate the remote control with batteries in areas where the AC adaptor lead cannot reach (see page 16).
zRemove the AC adaptor from the AC socket if the unit will not be in use for a prolonged period of time.
zUse only the supplied AC adaptor. Another adaptor may cause an electric shock or fire.
zIf the AC adaptor or its power supply lead is damaged, replace the AC adaptor with the same type (RADPA6006BGZZ) in order to avoid any hazards.
-
12
02/7/11