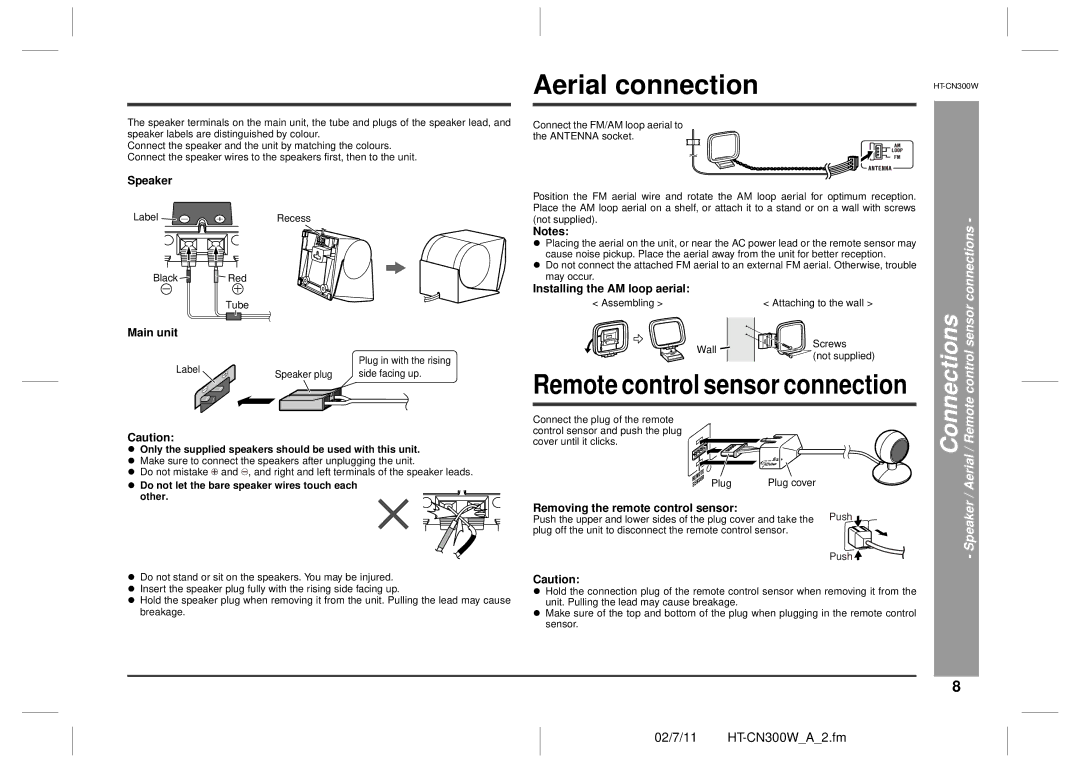
The speaker terminals on the main unit, the tube and plugs of the speaker lead, and speaker labels are distinguished by colour.
Connect the speaker and the unit by matching the colours. Connect the speaker wires to the speakers first, then to the unit.
Speaker
Label | Recess |
Black | Red |
Tube
Main unit
Label |
| Plug in with the rising | |
Speaker plug | side facing up. | ||
|
Caution:
zOnly the supplied speakers should be used with this unit.
zMake sure to connect the speakers after unplugging the unit.
zDo not mistake ![]() and
and ![]() , and right and left terminals of the speaker leads.
, and right and left terminals of the speaker leads.
zDo not let the bare speaker wires touch each other.
zDo not stand or sit on the speakers. You may be injured.
zInsert the speaker plug fully with the rising side facing up.
zHold the speaker plug when removing it from the unit. Pulling the lead may cause breakage.
Aerial connection | |
|
Connect the FM/AM loop aerial to the ANTENNA socket.
Position the FM aerial wire and rotate the AM loop aerial for optimum reception. |
| ||
Place the AM loop aerial on a shelf, or attach it to a stand or on a wall with screws |
| ||
(not supplied). |
| - | |
Notes: |
| connections | |
|
| ||
z Placing the aerial on the unit, or near the AC power lead or the remote sensor may |
| ||
cause noise pickup. Place the aerial away from the unit for better reception. |
| ||
z Do not connect the attached FM aerial to an external FM aerial. Otherwise, trouble |
| ||
may occur. |
|
| |
Installing the AM loop aerial: |
|
| |
< Assembling > | < Attaching to the wall > | Connections sensorcontrolRemote/ | |
Wall | Screws | ||
| |||
(not supplied) |
| ||
|
| ||
Remote control sensor connection |
| ||
Connect the plug of the remote |
|
| |
control sensor and push the plug |
|
| |
cover until it clicks. |
| Aerial/ | |
Plug | Plug cover | ||
Speaker- | |||
Removing the remote control sensor: |
| ||
Push the upper and lower sides of the plug cover and take the Push |
| ||
plug off the unit to disconnect the remote control sensor. |
| ||
| Push |
| |
Caution:
zHold the connection plug of the remote control sensor when removing it from the unit. Pulling the lead may cause breakage.
zMake sure of the top and bottom of the plug when plugging in the remote control sensor.
8