Installing the speakers on the wall
wall -
Front, centre and surround speakers can be mounted on the wall and their angle can be adjusted. Each speaker needs 3 screws to be mounted (not supplied).
The design of the speakers allows them to be hung on the wall.
Be sure to use the type and size of the screw that are shown below.
3.2 mm (1/8")
5 mm (3/16") ![]()
9 mm (3/8")
Min. 22 mm (7/8")
1 Drive one screw into the wall for each speaker, as shown in the illustration.
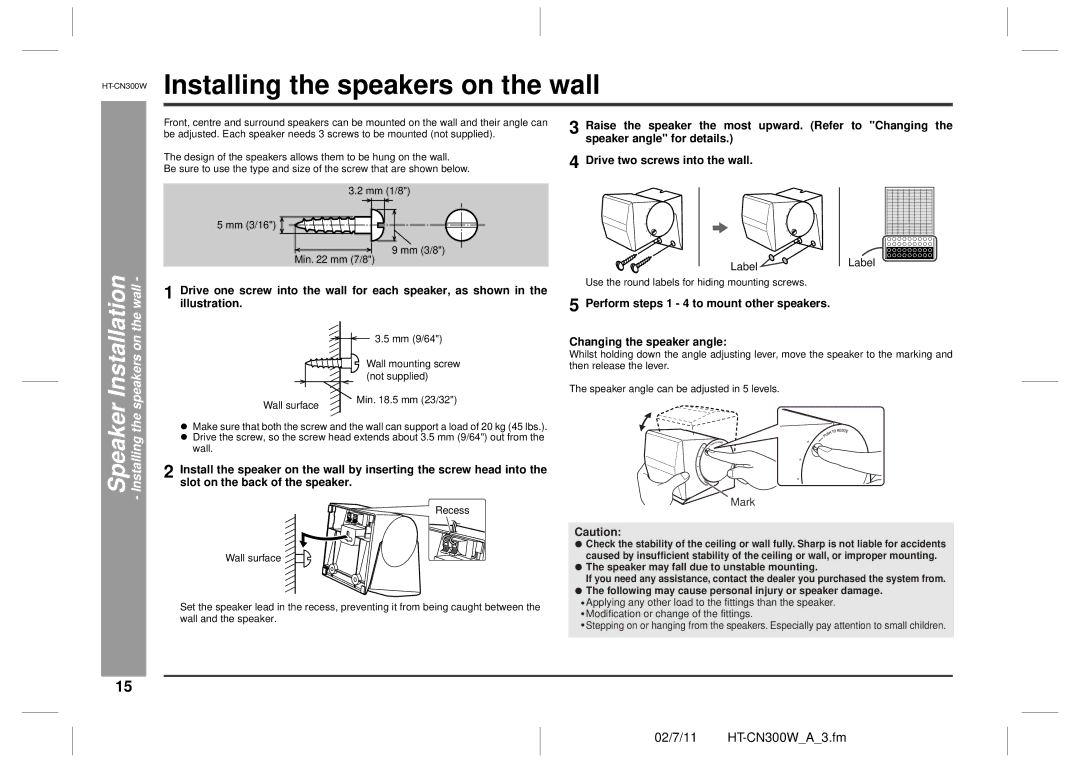
3 Raise the speaker the most upward. (Refer to "Changing the speaker angle" for details.)
4 Drive two screws into the wall.
Label ![]() Label
Label ![]()
Use the round labels for hiding mounting screws.
5 Perform steps 1 - 4 to mount other speakers.
Speaker Installation - Installing the speakers on the
| 3.5 mm (9/64") |
| Wall mounting screw |
| (not supplied) |
Wall surface | Min. 18.5 mm (23/32") |
|
zMake sure that both the screw and the wall can support a load of 20 kg (45 lbs.).
zDrive the screw, so the screw head extends about 3.5 mm (9/64") out from the wall.
2 Install the speaker on the wall by inserting the screw head into the slot on the back of the speaker.
Recess
Wall surface ![]()
![]()
![]()
Set the speaker lead in the recess, preventing it from being caught between the wall and the speaker.
Changing the speaker angle:
Whilst holding down the angle adjusting lever, move the speaker to the marking and then release the lever.
The speaker angle can be adjusted in 5 levels.
Mark
Caution:
![]() Check the stability of the ceiling or wall fully. Sharp is not liable for accidents caused by insufficient stability of the ceiling or wall, or improper mounting.
Check the stability of the ceiling or wall fully. Sharp is not liable for accidents caused by insufficient stability of the ceiling or wall, or improper mounting.
 The speaker may fall due to unstable mounting.
If you need any assistance, contact the dealer you purchased the system from. ![]() The following may cause personal injury or speaker damage.
The following may cause personal injury or speaker damage.
![]() Applying any other load to the fittings than the speaker.
Applying any other load to the fittings than the speaker.
![]() Modification or change of the fittings.
Modification or change of the fittings.
![]() Stepping on or hanging from the speakers. Especially pay attention to small children.
Stepping on or hanging from the speakers. Especially pay attention to small children.
15
02/7/11