•For more information on recording programmes, see sections “Instant Recording”, “Timeshifting”, “Electronic Programme Guide”, “Recordings” or “Recording Timers” in the following parts.
•Recorded programmes are split into 4GB partitions.
•Recorded programmes are stored in the following directory of the connected USB disk: \DVR\RECS. All recordings are indicated with a number. A text (txt) file is created for each recording. This text file includes information such as broadcaster, programme, and recording time.
•Timeshifting may be stopped according to USB device write speed. If the USB device speed is not enough for video stream bitrate, timeshifting may be stopped and recording may fail. If HD service bitrate is greater than 13 Mbp/sec. some freeze can be seen during timeshifting on both USB disk and on external HDD.
•Recordings of HD programmes can occupy bigger size on the USB disk depending on the broadcast’s resolution. For this reason it is recommended to use USB hard disk drives for recording HD programmes.
•Do not plug out the USB/HDD during the recording. This may harm the connected USB/HDD.
•Multipartiton support is available. Maximum two different partitions are supported. If the disk have more than two partitions, crash may occur. First partition of the usb disk is used for PVR ready features. It also must be formatted as primary partition to be used for PVR ready features.
•Some stream packets may not be recorded because of signal problems, so sometimes video may freezes during playback.
•Record, Play, Pause, Display (for PlayListDialog) keys could not be used when teletext is ON. If a recording starts from timer when teletext is ON, teletext is automatically turned off. Also teletext usage is disabled when there is ongoing recording or playback.
•Radio record is not supported.
•The Tv can record programmes up to ten hours.
•For
English
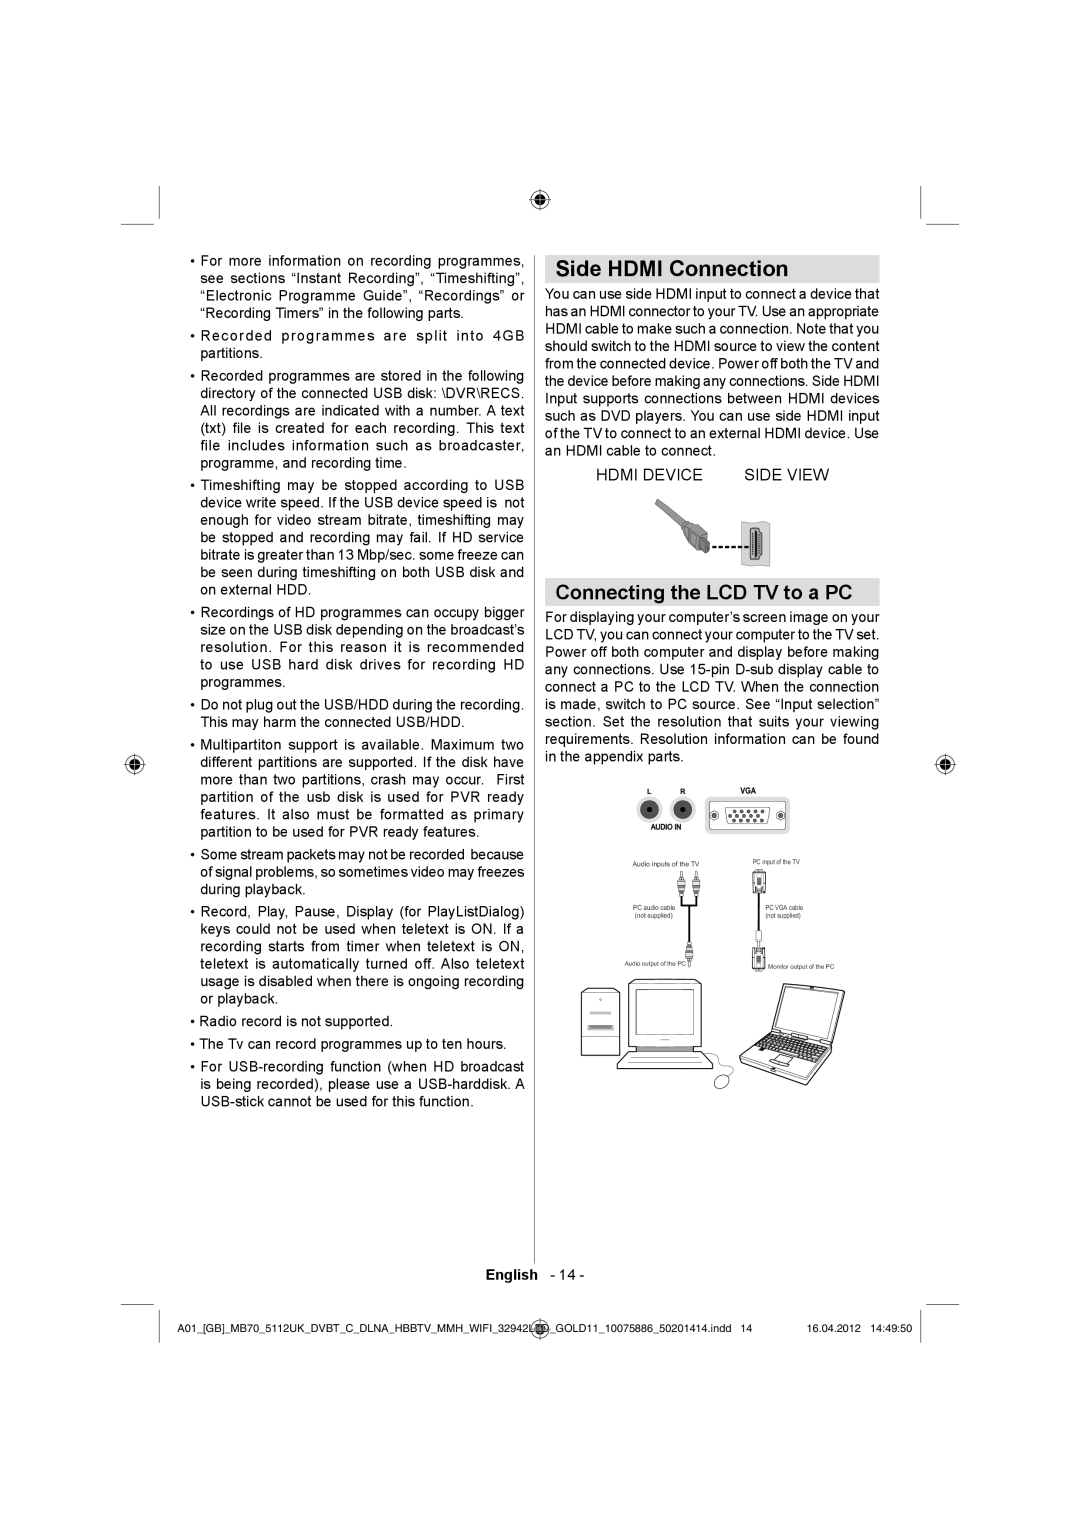
Side HDMI Connection
You can use side HDMI input to connect a device that has an HDMI connector to your TV. Use an appropriate HDMI cable to make such a connection. Note that you should switch to the HDMI source to view the content from the connected device. Power off both the TV and the device before making any connections. Side HDMI Input supports connections between HDMI devices such as DVD players. You can use side HDMI input of the TV to connect to an external HDMI device. Use an HDMI cable to connect.
HDMI DEVICE | SIDE VIEW |
Connecting the LCD TV to a PC
For displaying your computer’s screen image on your LCD TV, you can connect your computer to the TV set. Power off both computer and display before making any connections. Use
Audio inputs of the TV | PC input of the TV |
| |
PC audio cable | PC VGA cable |
(not supplied) | (not supplied) |
Audio output of the PC | Monitor output of the PC |
|
- 14 -
A01_[GB]_MB70_5112UK_DVBT_C_DLNA_HBBTV_MMH_WIFI_32942LED | _GOLD11_10075886_50201414.indd 14 | 16.04.2012 14:49:50 |
|
|
|