Basic adjustment settings (Analogue)
Auto installation
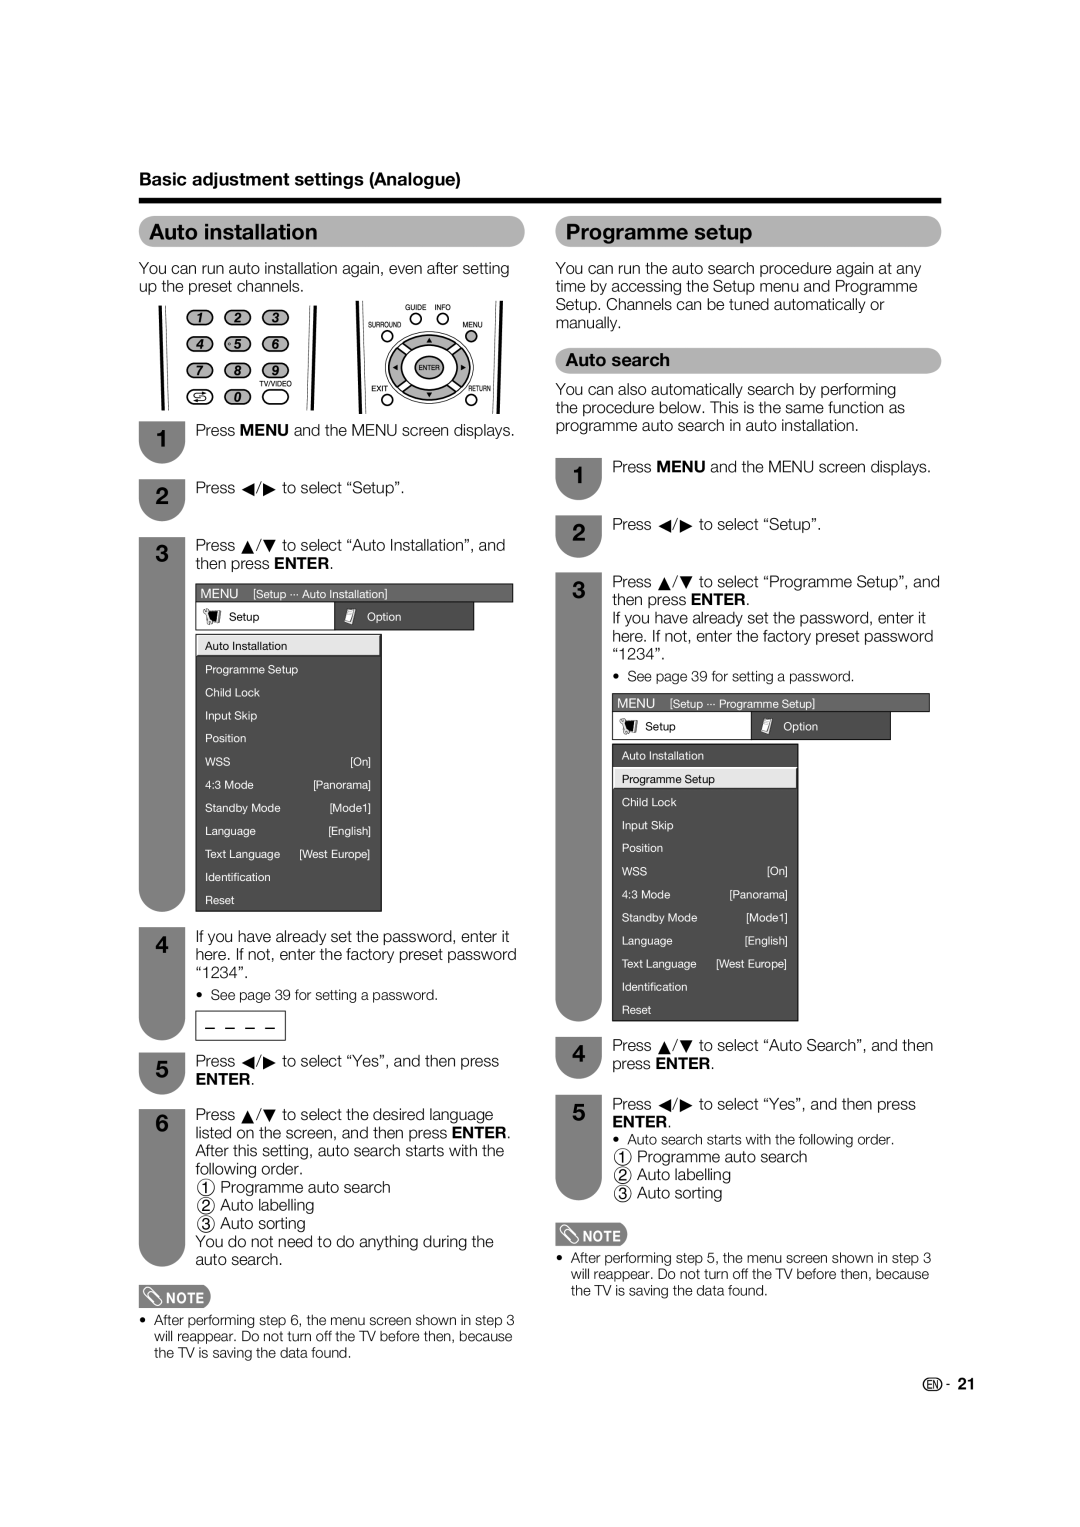
You can run auto installation again, even after setting up the preset channels.
1Press MENU and the MENU screen displays.
2Press c/d to select “Setup”.
3Press a/b to select “Auto Installation”, and then press ENTER.
MENU [Setup ... Auto Installation]
Setup | Option |
Auto Installation
Programme Setup |
|
Child Lock |
|
Input Skip |
|
Position |
|
WSS | [On] |
4:3 Mode | [Panorama] |
Standby Mode | [Mode1] |
Language | [English] |
Text Language | [West Europe] |
Identification |
|
Reset |
|
4If you have already set the password, enter it here. If not, enter the factory preset password “1234”.
• See page 39 for setting a password.
5Press c/d to select “Yes”, and then press
ENTER.
Press a/b to select the desired language
6listed on the screen, and then press ENTER. After this setting, auto search starts with the
following order.
1 Programme auto search
2 Auto labelling
3 Auto sorting
You do not need to do anything during the auto search.
![]() NOTE
NOTE
•After performing step 6, the menu screen shown in step 3 will reappear. Do not turn off the TV before then, because the TV is saving the data found.
Programme setup
You can run the auto search procedure again at any time by accessing the Setup menu and Programme Setup. Channels can be tuned automatically or manually.
Auto search
You can also automatically search by performing the procedure below. This is the same function as programme auto search in auto installation.
1Press MENU and the MENU screen displays.
2Press c/d to select “Setup”.
3Press a/b to select “Programme Setup”, and then press ENTER.
If you have already set the password, enter it here. If not, enter the factory preset password “1234”.
• See page 39 for setting a password.
MENU [Setup ... Programme Setup]
Setup | Option |
Auto Installation
Programme Setup
Child Lock |
|
Input Skip |
|
Position |
|
WSS | [On] |
4:3 Mode | [Panorama] |
Standby Mode | [Mode1] |
Language | [English] |
Text Language | [West Europe] |
Identification |
|
Reset |
|
4Press a/b to select “Auto Search”, and then press ENTER.
Press c/d to select “Yes”, and then press
5ENTER.
• Auto search starts with the following order.
1 Programme auto search
2 Auto labelling
3 Auto sorting
![]() NOTE
NOTE
•After performing step 5, the menu screen shown in step 3 will reappear. Do not turn off the TV before then, because the TV is saving the data found.
![]() 21
21
