Conexión del monitor y encendido/
apagado del mismo
Precaución:
-Antes de realizar la conexión, asegúrese de que tanto el monitor como el ordenador están apagados.
-Tenga cuidado de no doblar excesivamente el cable ni utilizar cables de prolongación ya que ello podría llevar a un funcionamiento anómalo.
Para guardar el cable
En caso de ser necesario, el exceso de cable podrá guardarse en la base.
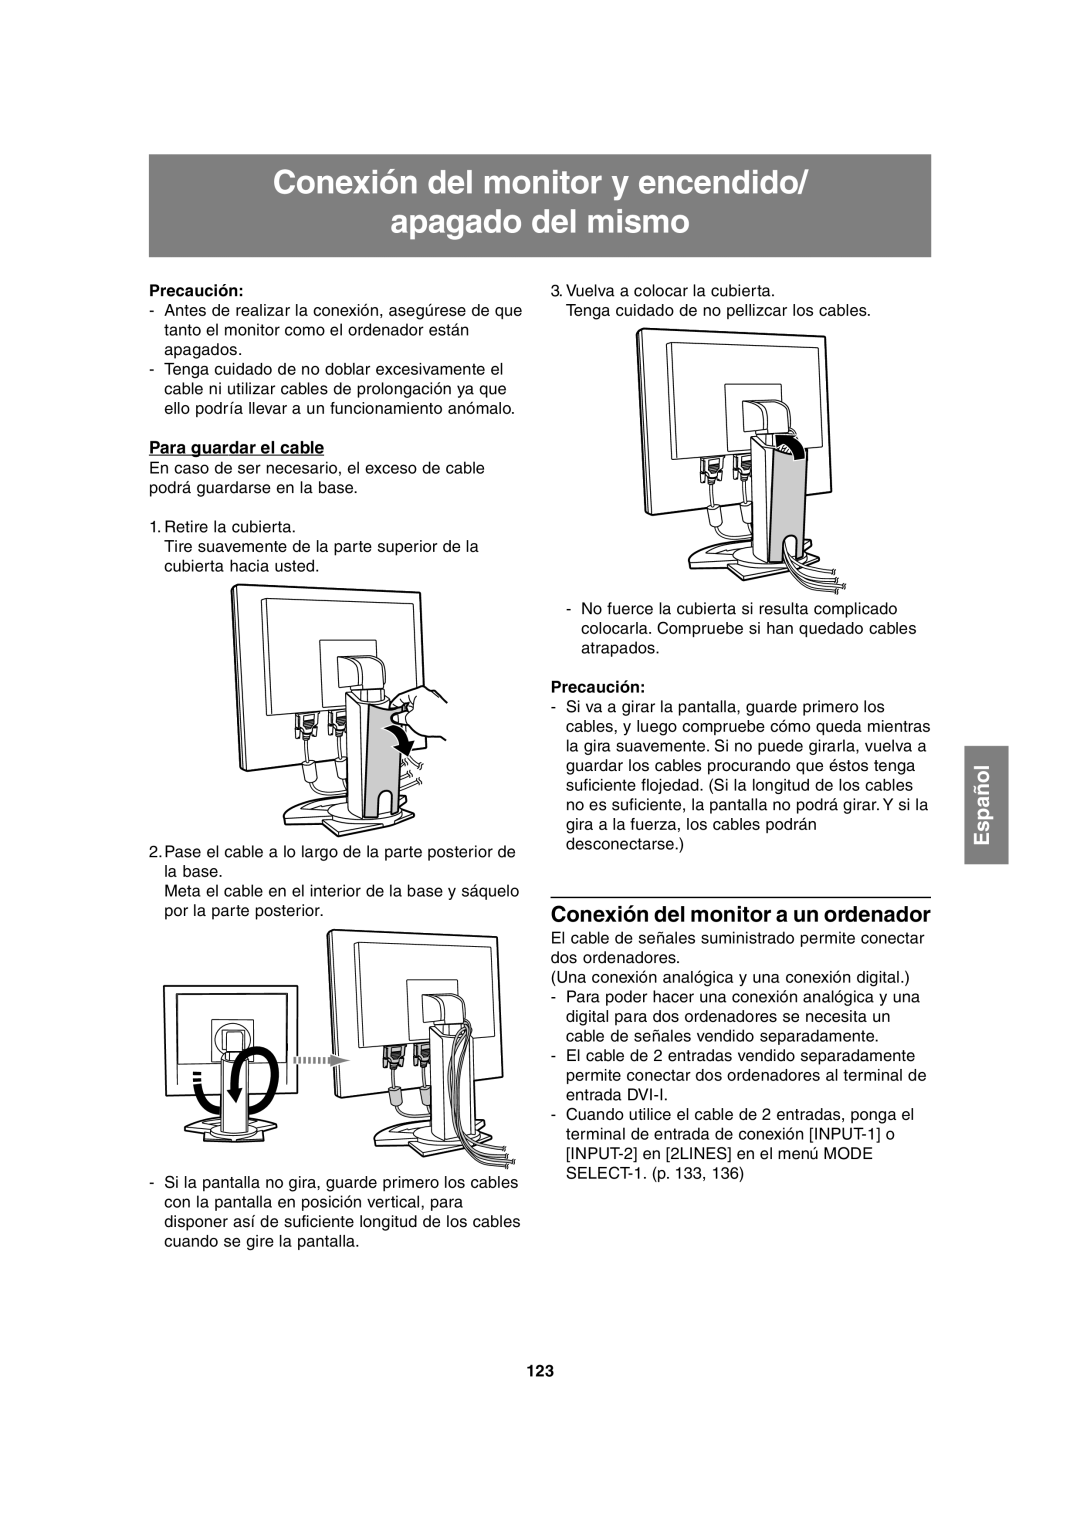
1.Retire la cubierta.
Tire suavemente de la parte superior de la cubierta hacia usted.
2.Pase el cable a lo largo de la parte posterior de la base.
Meta el cable en el interior de la base y sáquelo por la parte posterior.
-Si la pantalla no gira, guarde primero los cables con la pantalla en posición vertical, para disponer así de suficiente longitud de los cables cuando se gire la pantalla.
3.Vuelva a colocar la cubierta.
Tenga cuidado de no pellizcar los cables.
-No fuerce la cubierta si resulta complicado colocarla. Compruebe si han quedado cables atrapados.
Precaución:
-Si va a girar la pantalla, guarde primero los cables, y luego compruebe cómo queda mientras la gira suavemente. Si no puede girarla, vuelva a guardar los cables procurando que éstos tenga suficiente flojedad. (Si la longitud de los cables no es suficiente, la pantalla no podrá girar. Y si la gira a la fuerza, los cables podrán desconectarse.)
Conexión del monitor a un ordenador
El cable de señales suministrado permite conectar dos ordenadores.
(Una conexión analógica y una conexión digital.)
-Para poder hacer una conexión analógica y una digital para dos ordenadores se necesita un cable de señales vendido separadamente.
-El cable de 2 entradas vendido separadamente permite conectar dos ordenadores al terminal de entrada
-Cuando utilice el cable de 2 entradas, ponga el terminal de entrada de conexión
Español