Adjusting the screen display (With digital connection)
COOL ..... Color tone bluer than standard
•........... Color tone slightly bluer than standard STD ........ Color tone standard setting
•........... Color tone slightly redder than standard WARM .... Color tone redder than standard
USER
button for | |
| button for red |
button for purple | |
| button for green |
button for yellow | |
| button for blue |
GAMMA
Adjust so that dark and bright images are easy to see. If the screen is dark and hard to see, increase the numerical value. If it is bright and hard to see,
lower the numerical value. (![]()
![]() buttons)
buttons)
HUE
Hue can be adjusted. (![]()
![]() buttons)
buttons)
SATURATION
Color saturation can be adjusted. (![]()
![]() buttons) At the minimum value, the screen is black and white.
buttons) At the minimum value, the screen is black and white.
6 COLORS
Hue (HUE) and saturation (SATURATION) may be adjusted by color. (RED, YELLOW, GREEN, CYAN,
BLUE, MAGENTA)
1.After selecting [6 COLORS], press the ![]() button. The color selecting menu appears.
button. The color selecting menu appears.
2.Use the ![]() button to select the color to be adjusted and press the
button to select the color to be adjusted and press the ![]() button.
button.
3.Use the ![]() button to select the item to be
button to select the item to be
adjusted and adjust by pressing the ![]()
![]() buttons.
buttons.
4.Press the MENU button.
The display returns to the color selecting menu. To adjust other colors, repeat the procedure from 2.
5.Press the MENU button to return to the COLOR CONTROL menu.
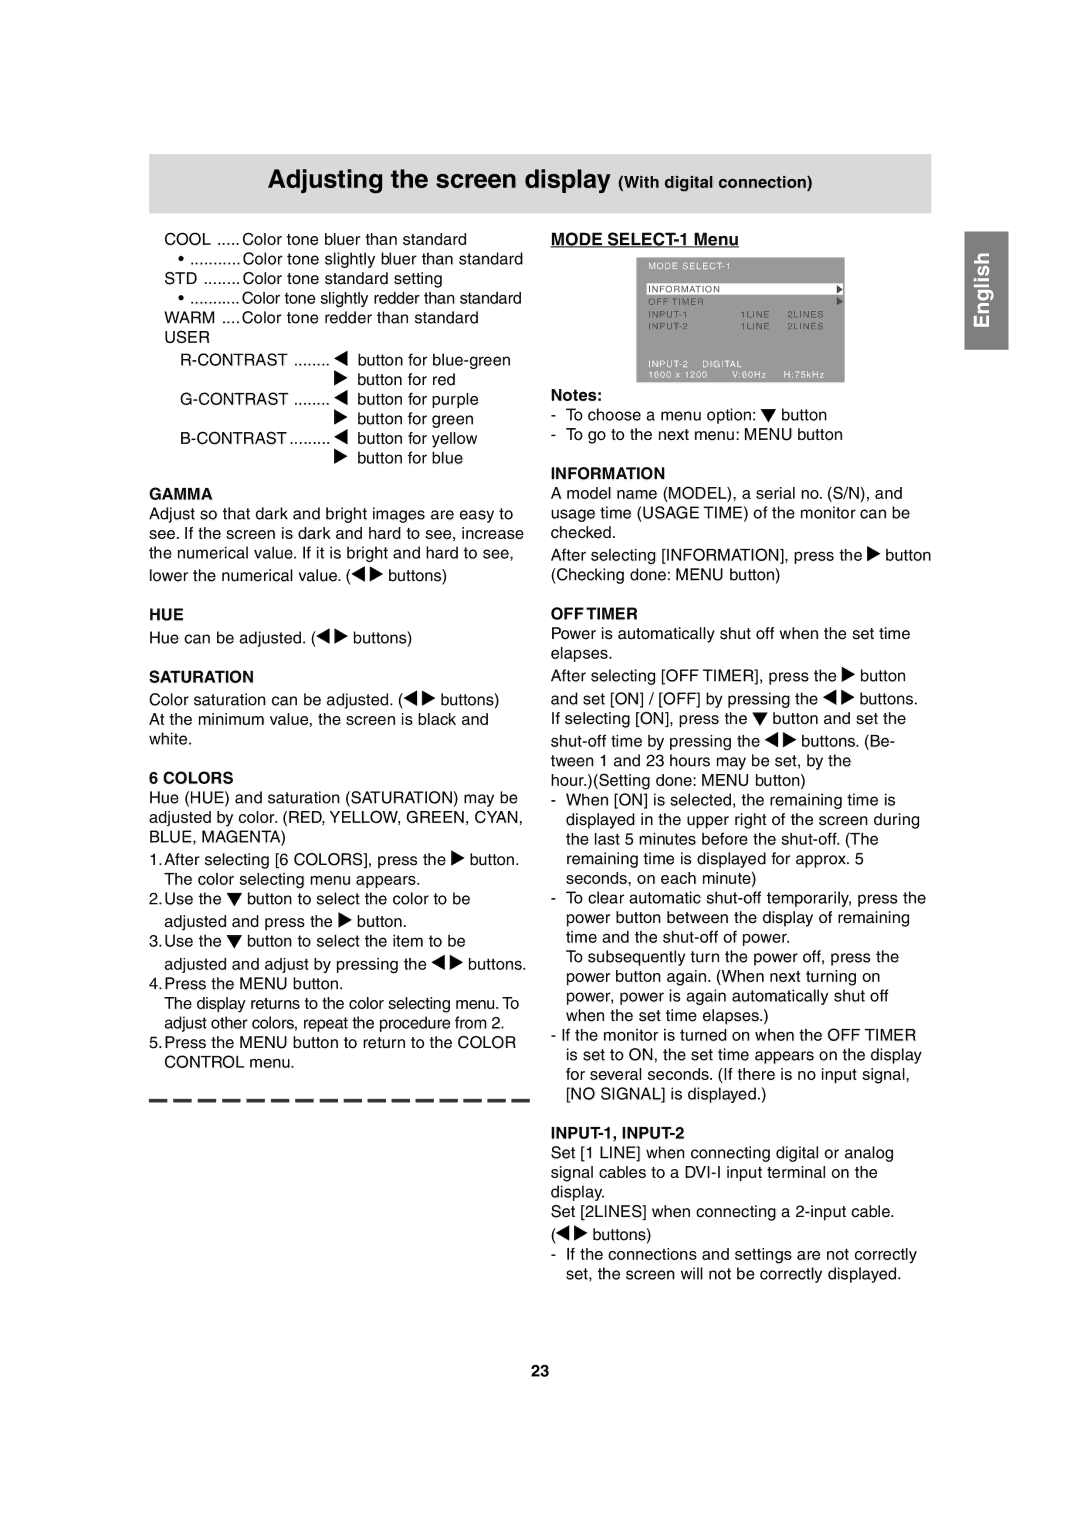
MODE SELECT-1 Menu
| MODE SELECT- 1 |
|
| |
|
|
|
| |
| INFORMATION |
|
| |
| OFF TIMER |
|
| |
| INPUT- 1 |
| 1LINE | 2LINES |
| INPUT- 2 |
| 1LINE | 2LINES |
| INPUT- 2 | DIGITAL |
| |
| 1600 x 1200 | V:60Hz | H:75kHz | |
|
|
|
|
|
Notes:
-To choose a menu option: ![]() button
button
-To go to the next menu: MENU button
INFORMATION
A model name (MODEL), a serial no. (S/N), and usage time (USAGE TIME) of the monitor can be checked.
After selecting [INFORMATION], press the ![]() button (Checking done: MENU button)
button (Checking done: MENU button)
OFF TIMER
Power is automatically shut off when the set time elapses.
After selecting [OFF TIMER], press the ![]() button
button
and set [ON] / [OFF] by pressing the ![]()
![]() buttons. If selecting [ON], press the
buttons. If selecting [ON], press the ![]() button and set the
button and set the
![]()
![]() buttons. (Be- tween 1 and 23 hours may be set, by the hour.)(Setting done: MENU button)
buttons. (Be- tween 1 and 23 hours may be set, by the hour.)(Setting done: MENU button)
-When [ON] is selected, the remaining time is displayed in the upper right of the screen during the last 5 minutes before the
-To clear automatic
To subsequently turn the power off, press the power button again. (When next turning on power, power is again automatically shut off when the set time elapses.)
-If the monitor is turned on when the OFF TIMER is set to ON, the set time appears on the display for several seconds. (If there is no input signal, [NO SIGNAL] is displayed.)
INPUT-1, INPUT-2
Set [1 LINE] when connecting digital or analog signal cables to a
Set [2LINES] when connecting a
(![]()
![]() buttons)
buttons)
-If the connections and settings are not correctly set, the screen will not be correctly displayed.
English
23