Editing onto another tape
You can create your own video programs by editing with any other VCRs that have DV IN or video/audio inputs. Note that cassette memory data is not recorded on the edited tape.
You can edit with little deterioration of picture and sound quality when using the DV connecting cable (not supplied). Data code of the source tape is dubbed on the edited tape at the same time.
Before editing
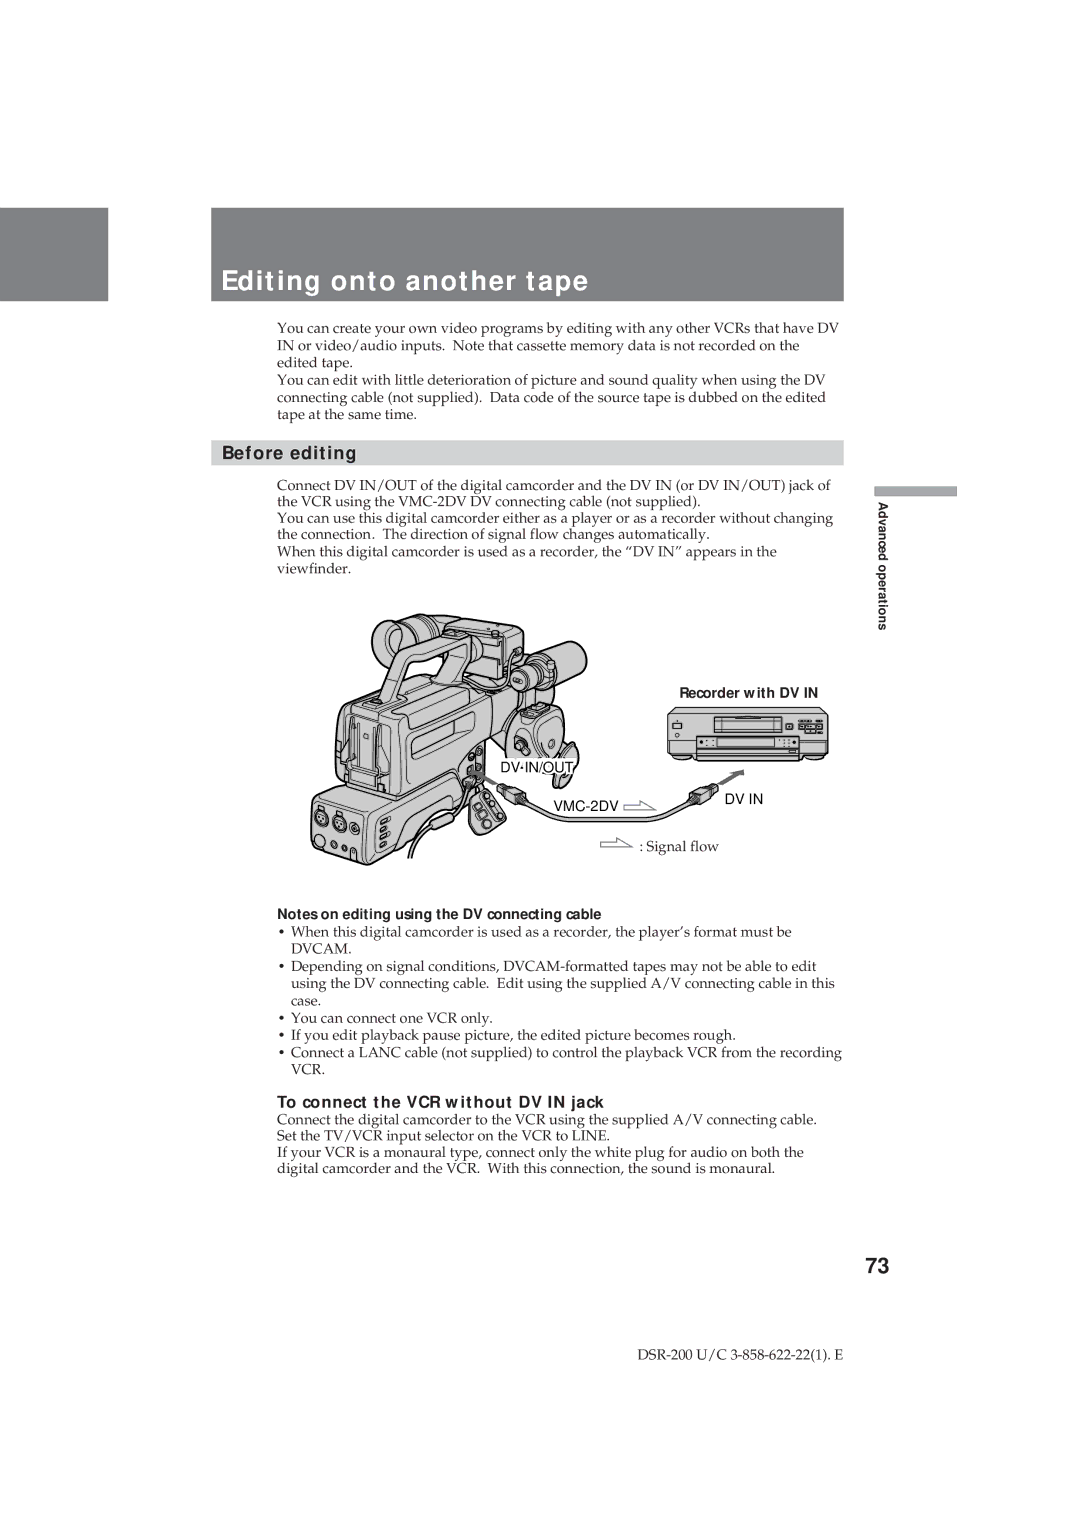
Connect DV IN/OUT of the digital camcorder and the DV IN (or DV IN/OUT) jack of the VCR using the
You can use this digital camcorder either as a player or as a recorder without changing the connection. The direction of signal flow changes automatically.
When this digital camcorder is used as a recorder, the “DV IN” appears in the viewfinder.
Recorder with DV IN
DV IN/OUT
| DV IN |
| |
| : Signal flow |
Notes on editing using the DV connecting cable
•When this digital camcorder is used as a recorder, the player’s format must be
DVCAM.
•Depending on signal conditions,
•You can connect one VCR only.
•If you edit playback pause picture, the edited picture becomes rough.
•Connect a LANC cable (not supplied) to control the playback VCR from the recording VCR.
To connect the VCR without DV IN jack
Connect the digital camcorder to the VCR using the supplied A/V connecting cable. Set the TV/VCR input selector on the VCR to LINE.
If your VCR is a monaural type, connect only the white plug for audio on both the digital camcorder and the VCR. With this connection, the sound is monaural.
Advanced operations
73