Basic operations
Camera recording
Make sure that the power source is installed and a cassette is inserted and that AUTO LOCK is set to ON. When AUTO LOCK is set to ON, all settings are automatically adjusted to best suit your shooting environment. Before you record
When you use the digital camcorder for the first time, power on it and reset the date and time to your time before you start recording (p. 79).
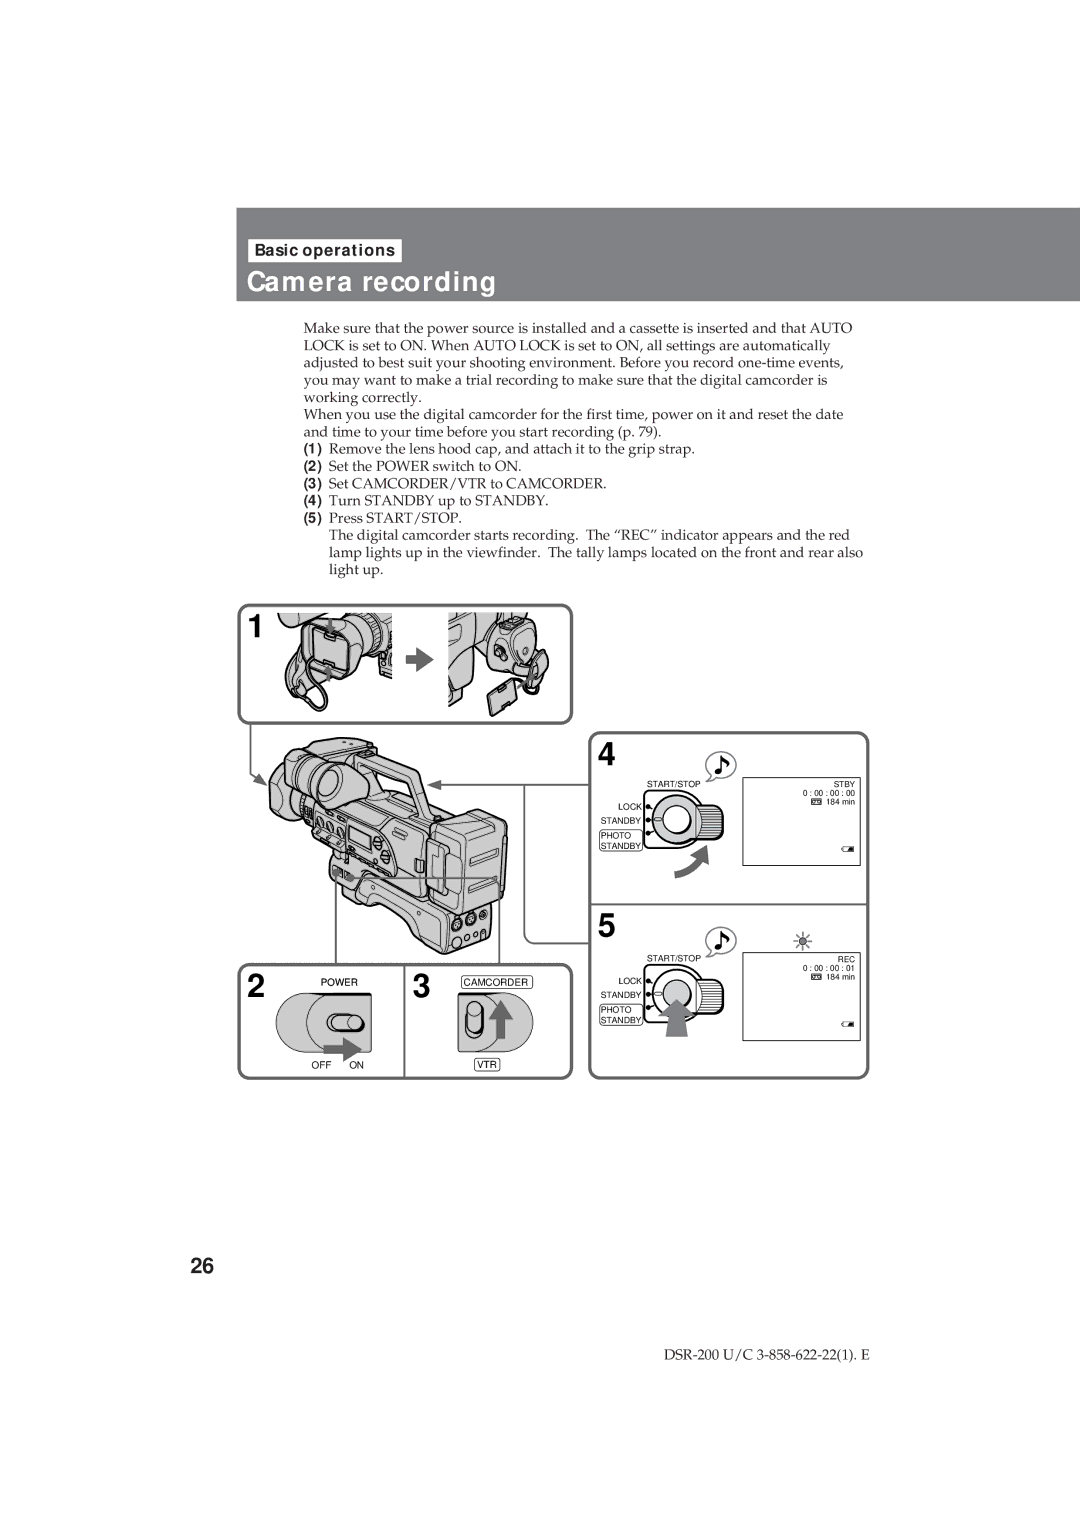
(1) Remove the lens hood cap, and attach it to the grip strap.
(2) Set the POWER switch to ON.
(3) Set CAMCORDER/VTR to CAMCORDER.
(4) Turn STANDBY up to STANDBY.
(5) Press START/STOP.
The digital camcorder starts recording. The “REC” indicator appears and the red lamp lights up in the viewfinder. The tally lamps located on the front and rear also light up.
1 
![]()
4
START/STOP
LOCK ![]()
STANDBY ![]()
PHOTO
STANDBY
STBY 0 : 00 : 00 : 00 ![]() 184 min
184 min
5
START/STOP
2 | POWER | 3 | CAMCORDER | LOCK |
STANDBY |
PHOTO
STANDBY
REC 0 : 00 : 00 : 01 ![]() 184 min
184 min
OFF ON | VTR |
26