Installing the TV
Connecting Two VCRs for Tape Editing
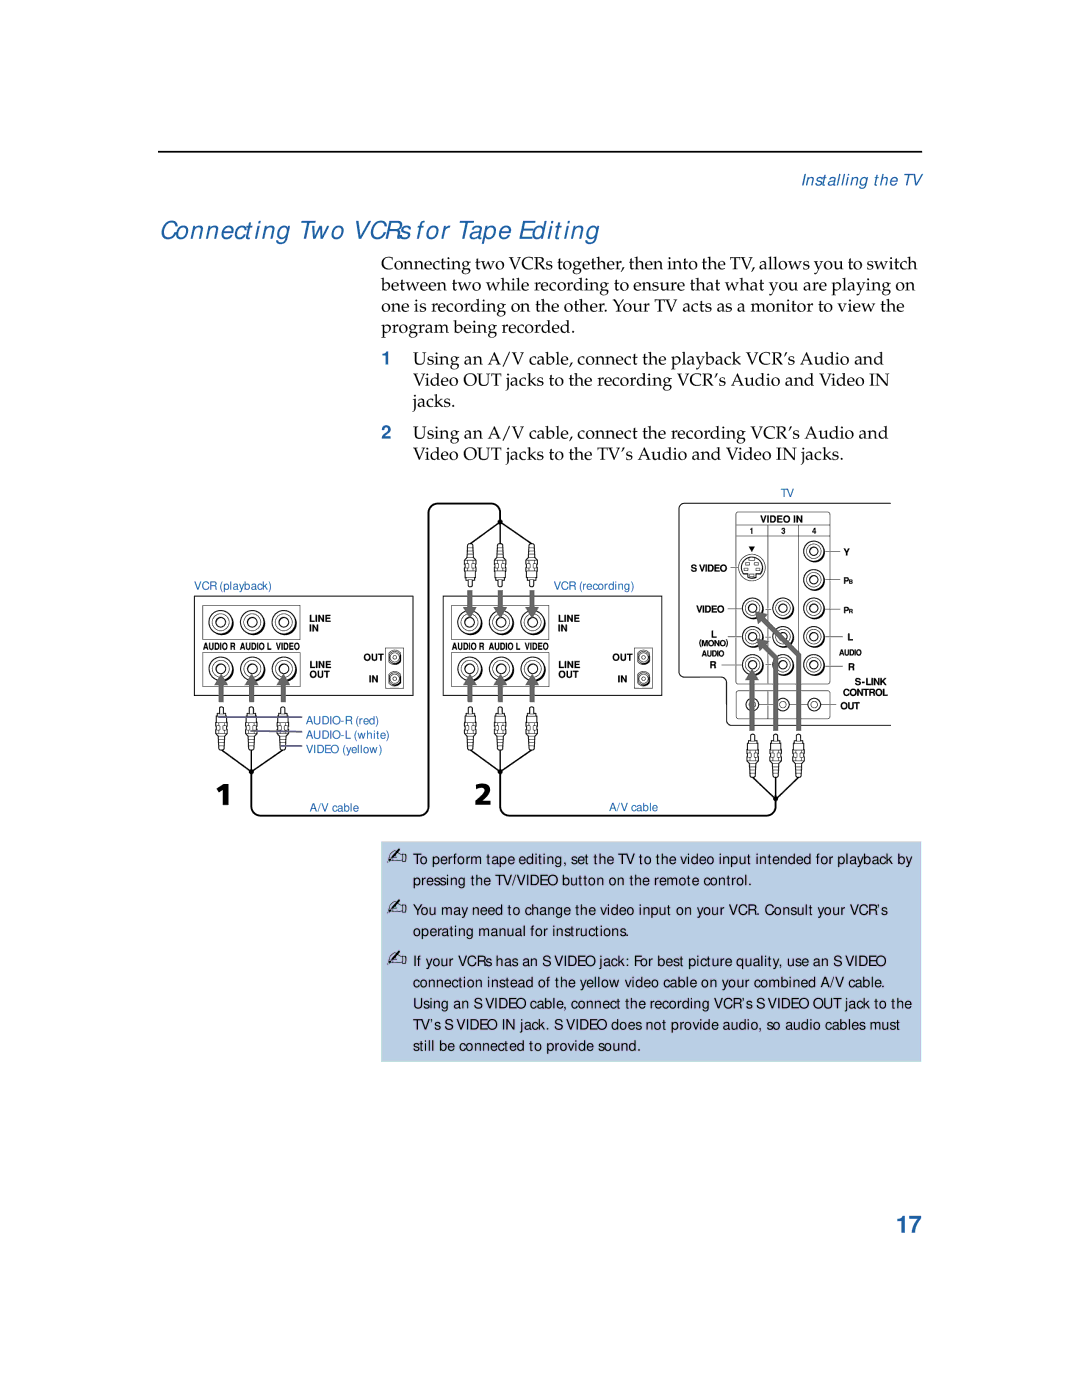
Connecting two VCRs together, then into the TV, allows you to switch between two while recording to ensure that what you are playing on one is recording on the other. Your TV acts as a monitor to view the program being recorded.
1Using an A/V cable, connect the playback VCR’s Audio and Video OUT jacks to the recording VCR’s Audio and Video IN jacks.
2Using an A/V cable, connect the recording VCR’s Audio and Video OUT jacks to the TV’s Audio and Video IN jacks.
TV
VCR (playback) | VCR (recording) |
![]()
![]()
![]()
![]() VIDEO (yellow)
VIDEO (yellow)
A/V cable | A/V cable |
✍To perform tape editing, set the TV to the video input intended for playback by pressing the TV/VIDEO button on the remote control.
✍You may need to change the video input on your VCR. Consult your VCR’s operating manual for instructions.
✍If your VCRs has an S VIDEO jack: For best picture quality, use an S VIDEO connection instead of the yellow video cable on your combined A/V cable. Using an S VIDEO cable, connect the recording VCR’s S VIDEO OUT jack to the TV’s S VIDEO IN jack. S VIDEO does not provide audio, so audio cables must still be connected to provide sound.
17