3. SETUP AND CONNECTIONS
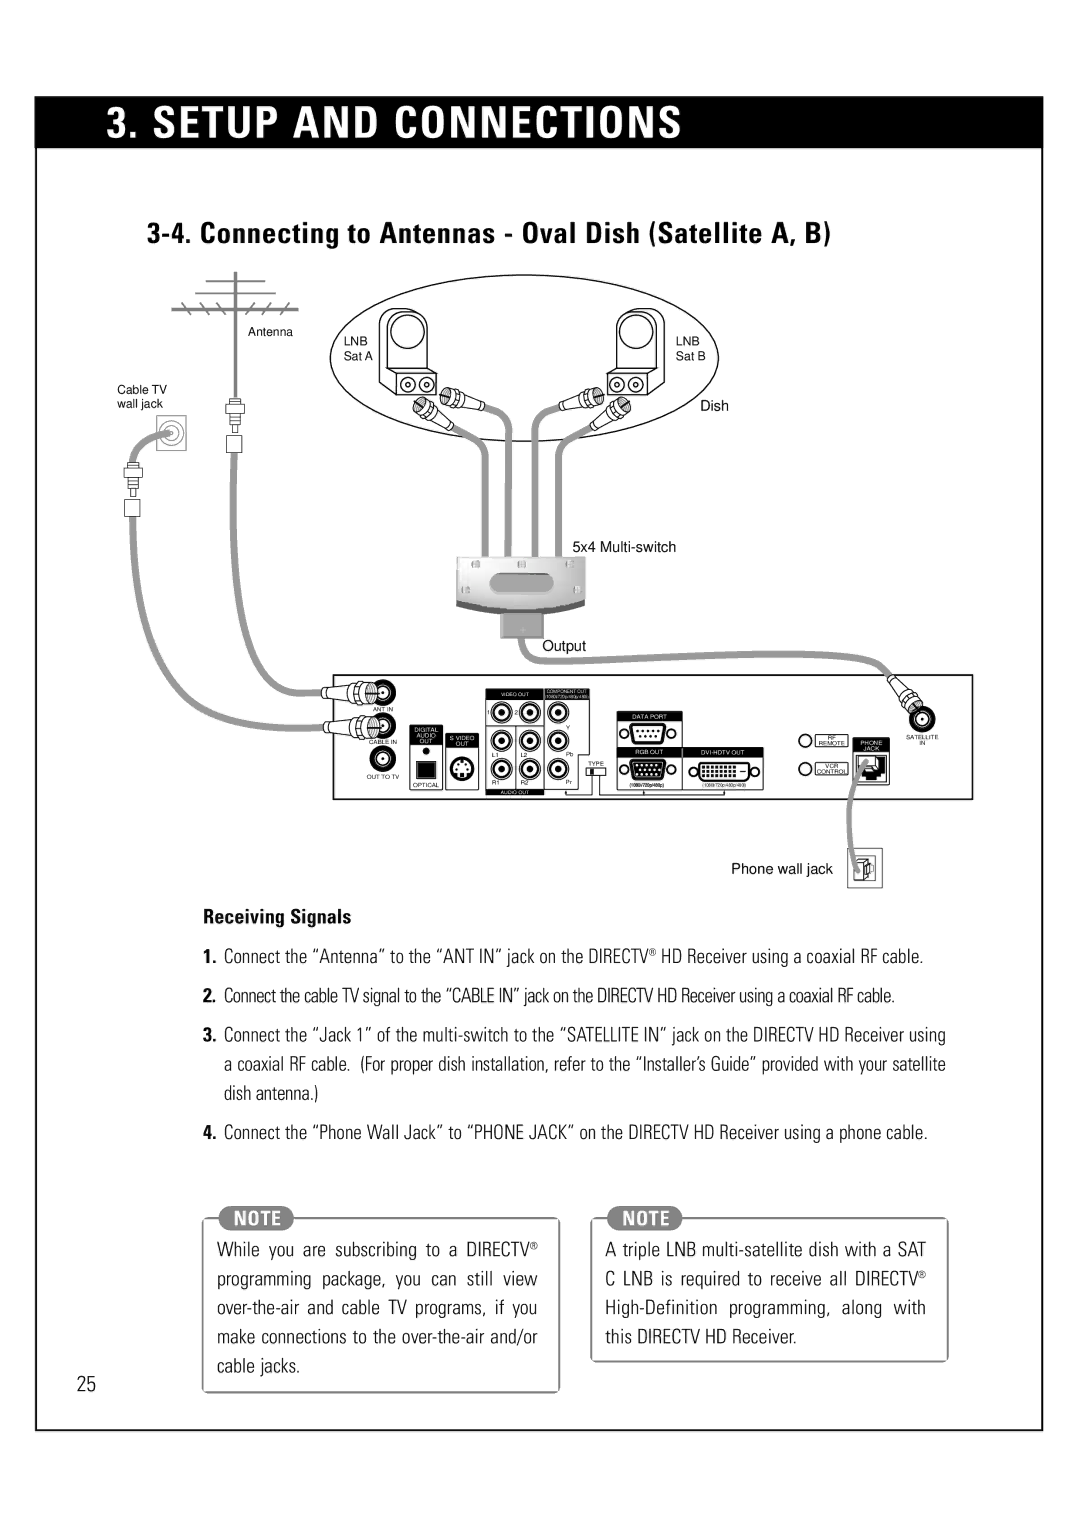
3-4. Connecting to Antennas - Oval Dish (Satellite A, B)
Antenna
Cable TV wall jack
LNB | LNB |
Sat A | Sat B |
Dish
5x4 Multi-switch
|
|
|
| Output |
|
|
|
|
|
|
| VIDEO OUT | COMPONENT OUT |
|
|
|
|
|
|
| (1080i/720p/480p/480i) |
|
|
|
| |
ANT IN |
| 1 | 2 |
|
|
|
|
|
|
|
| DATA PORT |
|
|
| ||
|
|
|
|
|
|
|
| |
| DIGITAL |
|
| Y |
|
|
|
|
| AUDIO | S VIDEO |
|
|
| RF |
| SATELLITE |
CABLE IN | OUT | OUT |
|
|
| REMOTE | PHONE | IN |
|
|
|
| Pb | RGB OUT | JACK |
| |
|
| L1 | L2 |
|
| |||
|
|
|
| TYPE |
| VCR |
|
|
OUT TO TV |
|
|
|
|
| CONTROL |
|
|
| R1 | R2 | Pr |
|
|
|
| |
| OPTICAL | (1080i/720p/480p) | (1080i/720p/480p/480i) |
|
| |||
|
|
| AUDIO OUT |
|
|
|
|
|
Phone wall jack
Receiving Signals
1.Connect the “Antenna” to the “ANT IN” jack on the DIRECTV® HD Receiver using a coaxial RF cable.
2.Connect the cable TV signal to the “CABLE IN” jack on the DIRECTV HD Receiver using a coaxial RF cable.
3.Connect the “Jack 1” of the
4.Connect the “Phone Wall Jack” to “PHONE JACK” on the DIRECTV HD Receiver using a phone cable.
25
NOTE
While you are subscribing to a DIRECTV® programming package, you can still view
NOTE
A triple LNB