3. SETUP AND CONNECTIONS
3-8. Remote Control RF Antenna Connection
Remote Control RF Antenna
ANT IN |
|
| |
| DIGITAL |
| |
| AUDIO | S VIDEO | |
CABLE IN | OUT | ||
OUT | |||
|
|
OUT TO TV
OPTICAL
VIDEO OUT
1 2
L1 | L2 |
R1 R2
AUDIO OUT
COMPONENT OUT (1080i/720p/480p/480i)
| DATA PORT |
Y |
|
Pb | RGB OUT |
| TYPE |
Pr | (1080i/720p/480p) |
|
RF | PHONE | SATELLITE |
REMOTE | IN | |
JACK |
| |
|
| |
VCR |
|
|
CONTROL |
|
|
(1080i/720p/480p/480i) |
|
|
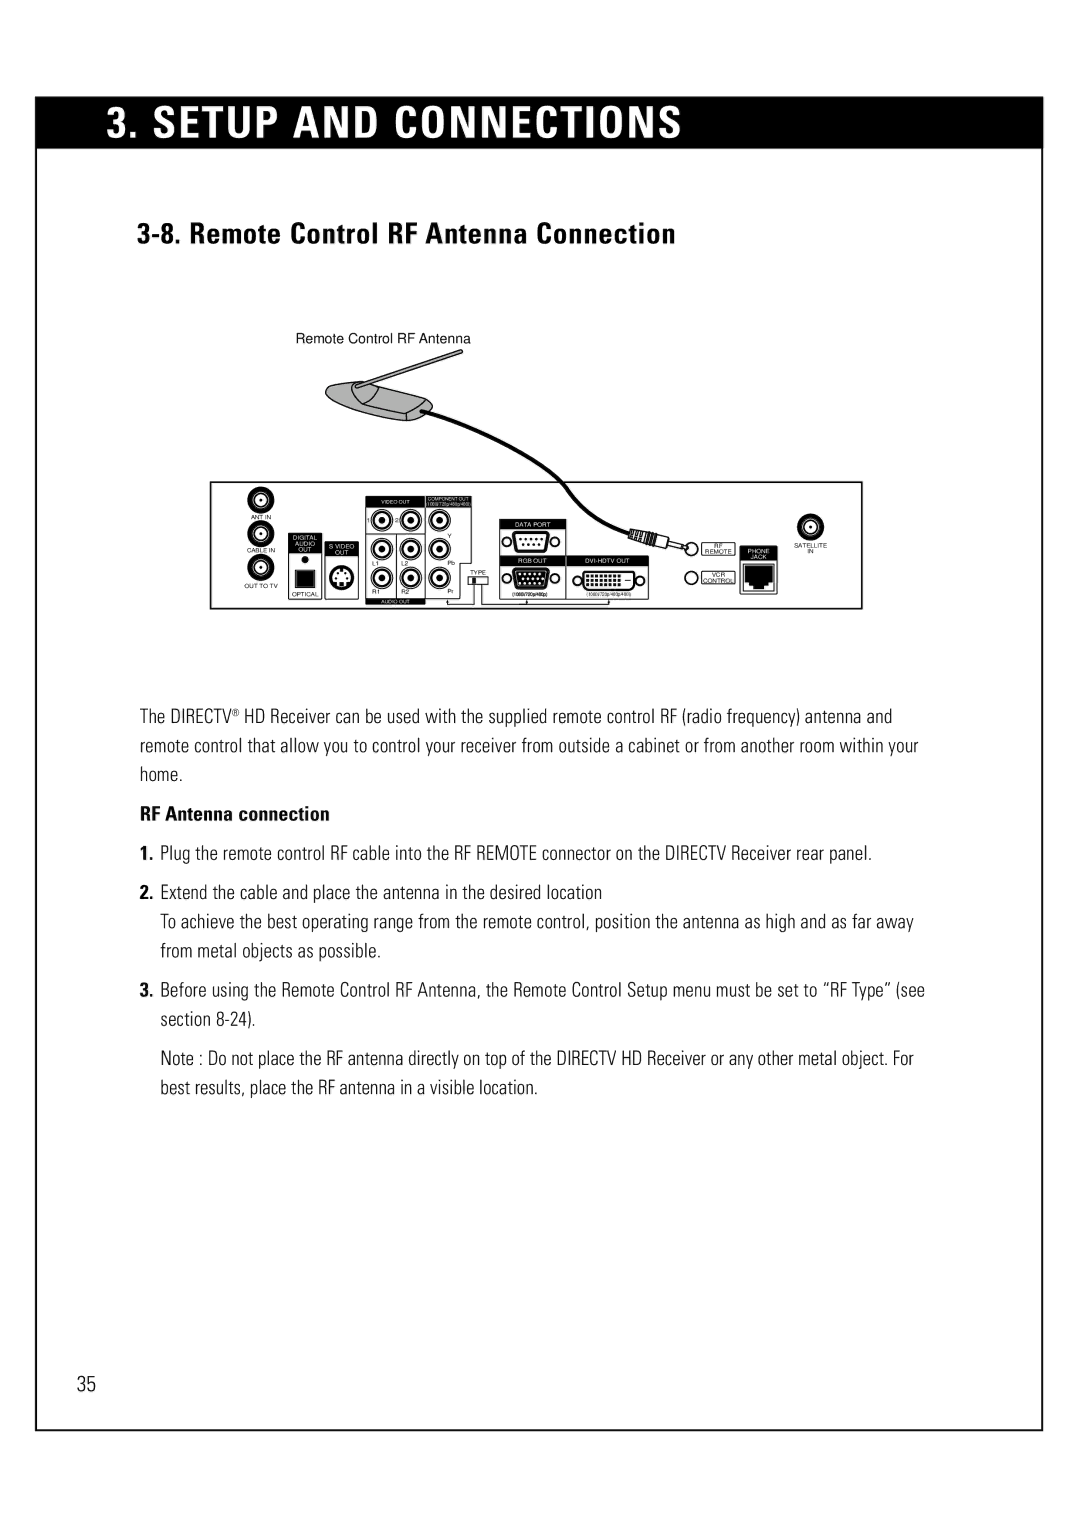
The DIRECTV® HD Receiver can be used with the supplied remote control RF (radio frequency) antenna and remote control that allow you to control your receiver from outside a cabinet or from another room within your home.
RF Antenna connection
1.Plug the remote control RF cable into the RF REMOTE connector on the DIRECTV Receiver rear panel.
2.Extend the cable and place the antenna in the desired location
To achieve the best operating range from the remote control, position the antenna as high and as far away from metal objects as possible.
3.Before using the Remote Control RF Antenna, the Remote Control Setup menu must be set to “RF Type” (see section
Note : Do not place the RF antenna directly on top of the DIRECTV HD Receiver or any other metal object. For best results, place the RF antenna in a visible location.
35
