3-6. VCR Connection - VCR Controller
ANT IN |
|
| |
| DIGITAL |
| |
| AUDIO | S VIDEO | |
CABLE IN | OUT | ||
OUT |
OUT TO TV
OPTICAL
VIDEO OUT
1 2
L1 | L2 |
R1 R2
AUDIO OUT
COMPONENT OUT (1080i/720p/480p/480i)
| DATA PORT |
Y |
|
Pb | RGB OUT |
| |
| TYPE |
Pr | (1080i/720p/480p) |
RF | PHONE | SATELLITE |
REMOTE | IN | |
JACK |
| |
|
| |
VCR |
|
|
CONTROL |
|
|
(1080i/720p/480p/480i) |
|
|
VCR Controller
IR Sensor
VCR (front view)
VCR (side view) 1/2" to 1"
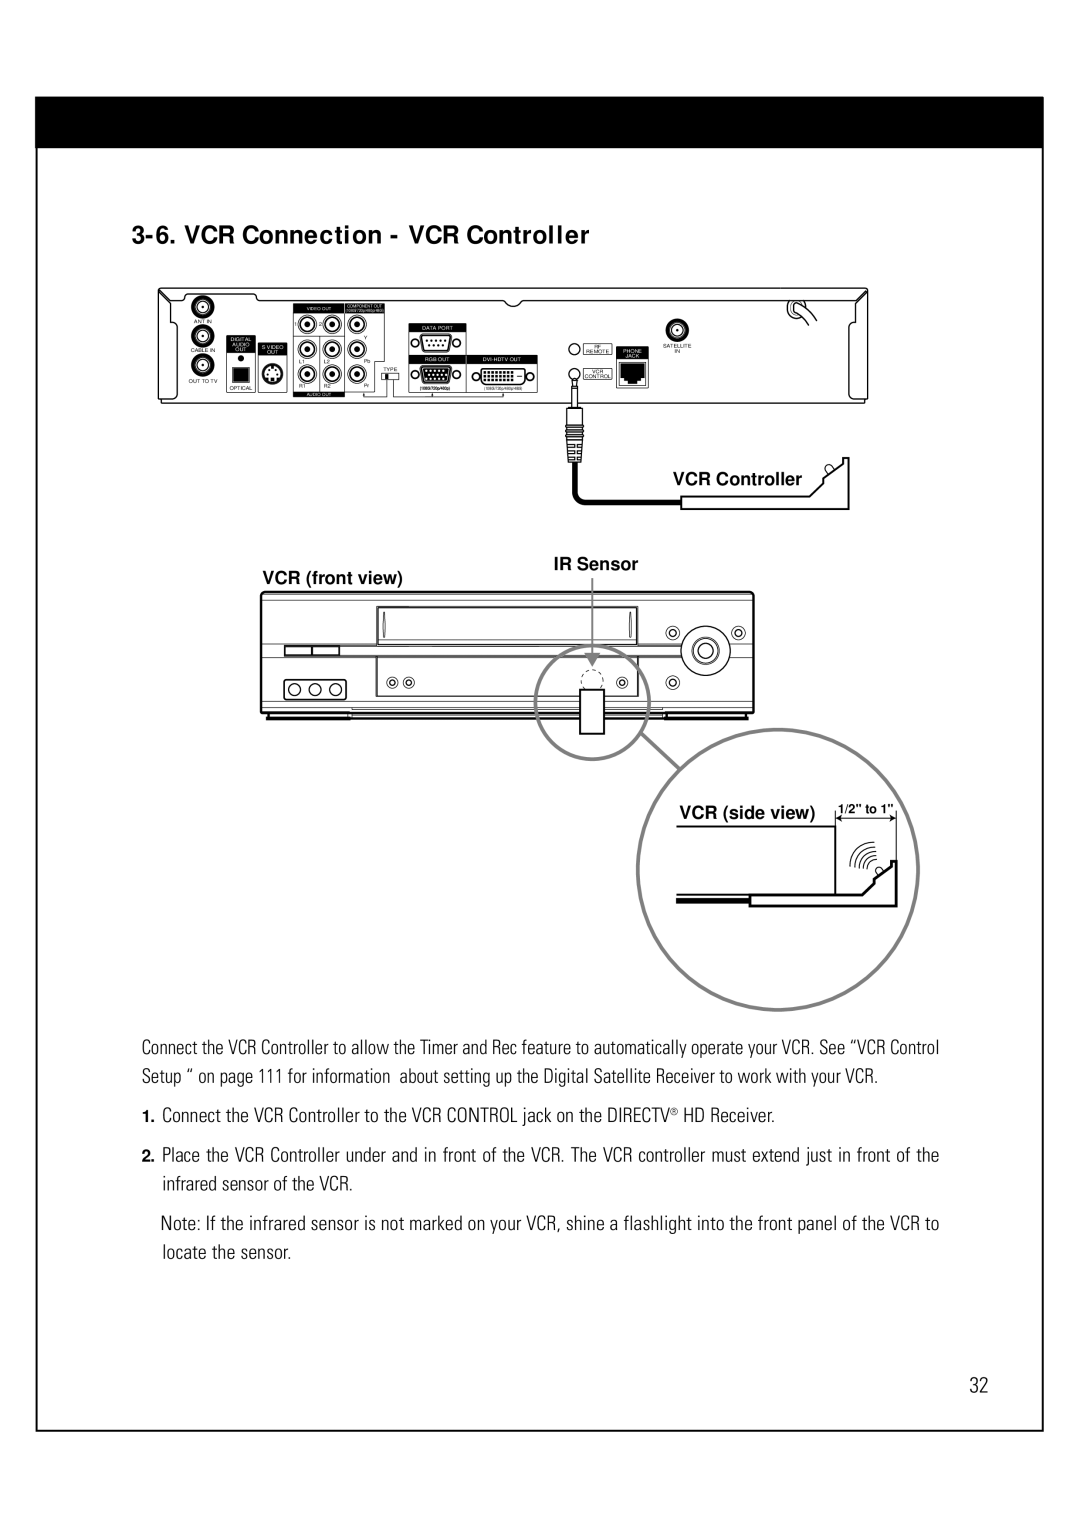
Connect the VCR Controller to allow the Timer and Rec feature to automatically operate your VCR. See “VCR Control Setup “ on page 111 for information about setting up the Digital Satellite Receiver to work with your VCR.
1.Connect the VCR Controller to the VCR CONTROL jack on the DIRECTV® HD Receiver.
2.Place the VCR Controller under and in front of the VCR. The VCR controller must extend just in front of the infrared sensor of the VCR.
Note: If the infrared sensor is not marked on your VCR, shine a flashlight into the front panel of the VCR to locate the sensor.
32
