3. Using the Live Mode
3.7 Start the “Live Viewer 3”
When you get the connection between your projector and PC, the “Live Viewer 3” main menu will be shown on the PC screen.
On the main menu you can configure the settings and operate the functions to send your images to the projector in the Live Mode.
3.7.1 Main menu and Operating buttons
1)Menu Type
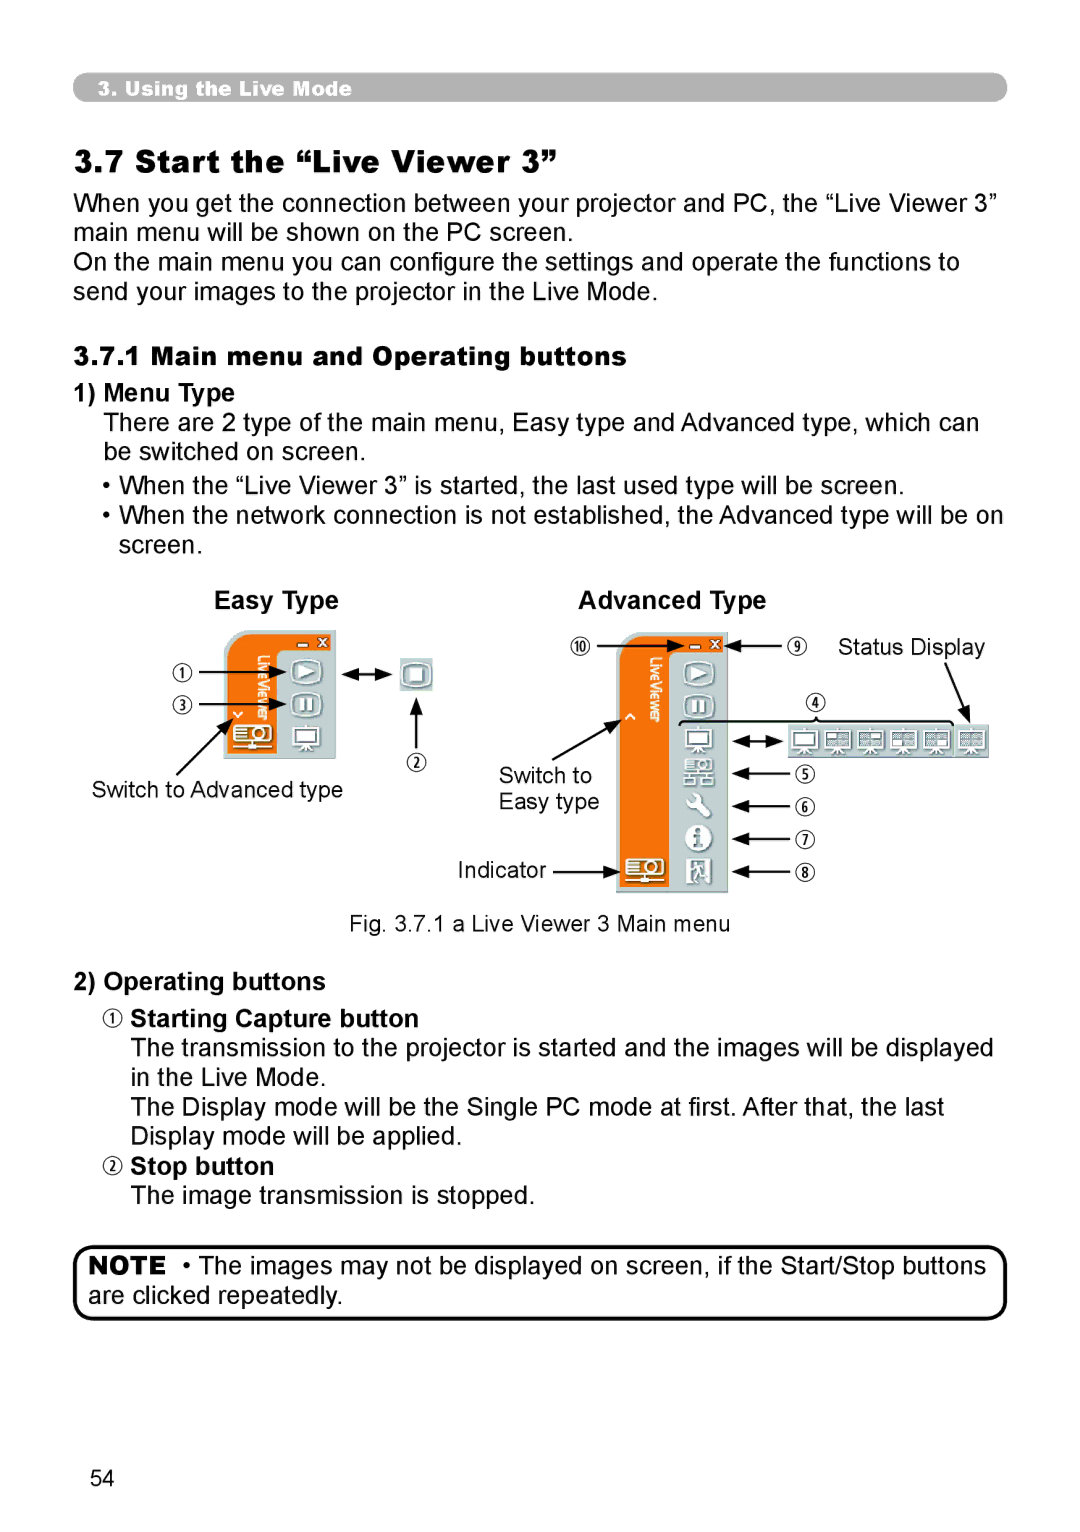
There are 2 type of the main menu, Easy type and Advanced type, which can be switched on screen.
•When the “Live Viewer 3” is started, the last used type will be screen.
•When the network connection is not established, the Advanced type will be on screen.
| Easy Type |
|
|
|
| Advanced Type |
|
| |||||||
q |
|
|
|
|
|
| a |
|
|
|
|
|
| o Status Display | |
|
|
|
|
|
|
|
|
|
| ||||||
|
|
|
|
|
|
|
|
|
|
|
|
|
| r | |
|
|
|
|
|
|
|
|
|
|
|
|
|
| ||
e |
|
|
|
|
|
|
|
|
|
|
|
|
|
| |
|
|
|
|
|
|
|
|
|
|
|
| ||||
|
|
|
|
|
|
|
|
|
|
|
|
| |||
|
|
|
|
|
|
|
|
|
|
|
|
|
|
|
|
Switch to Advanced type |
| w | Switch to |
|
|
| t | ||||||||
|
|
|
|
|
| ||||||||||
|
|
| Easy type |
|
|
| y | ||||||||
|
|
|
|
|
|
|
|
| |||||||
|
|
|
|
|
| Indicator |
|
|
|
|
|
|
|
| u |
|
|
|
|
|
|
|
|
|
|
|
|
|
| ||
|
|
|
|
|
|
|
|
|
|
| i | ||||
|
|
|
|
|
|
|
|
|
| ||||||
Fig. 3.7.1 a Live Viewer 3 Main menu
2)Operating buttons
q Starting Capture button
The transmission to the projector is started and the images will be displayed in the Live Mode.
The Display mode will be the Single PC mode at first. After that, the last Display mode will be applied.
w Stop button
The image transmission is stopped.
NOTE • The images may not be displayed on screen, if the Start/Stop buttons are clicked repeatedly.
54