12
❏Place a piece of the paper onto the printer’s document table and slide its right edge into the printer. Printing will be performed on the side of the paper that is facing up (the one you can see), starting from the top of the paper.
Important!
Do not use wrinkled or curled paper. In case of multiple paper, neatly align the sheets.
Though paper can be inserted either from the front or side of the printer, front paper insertion may result in paper jams, depending on the condition of the paper. Because of this, it is recommended that you always insert paper from the side.
ENGLISH
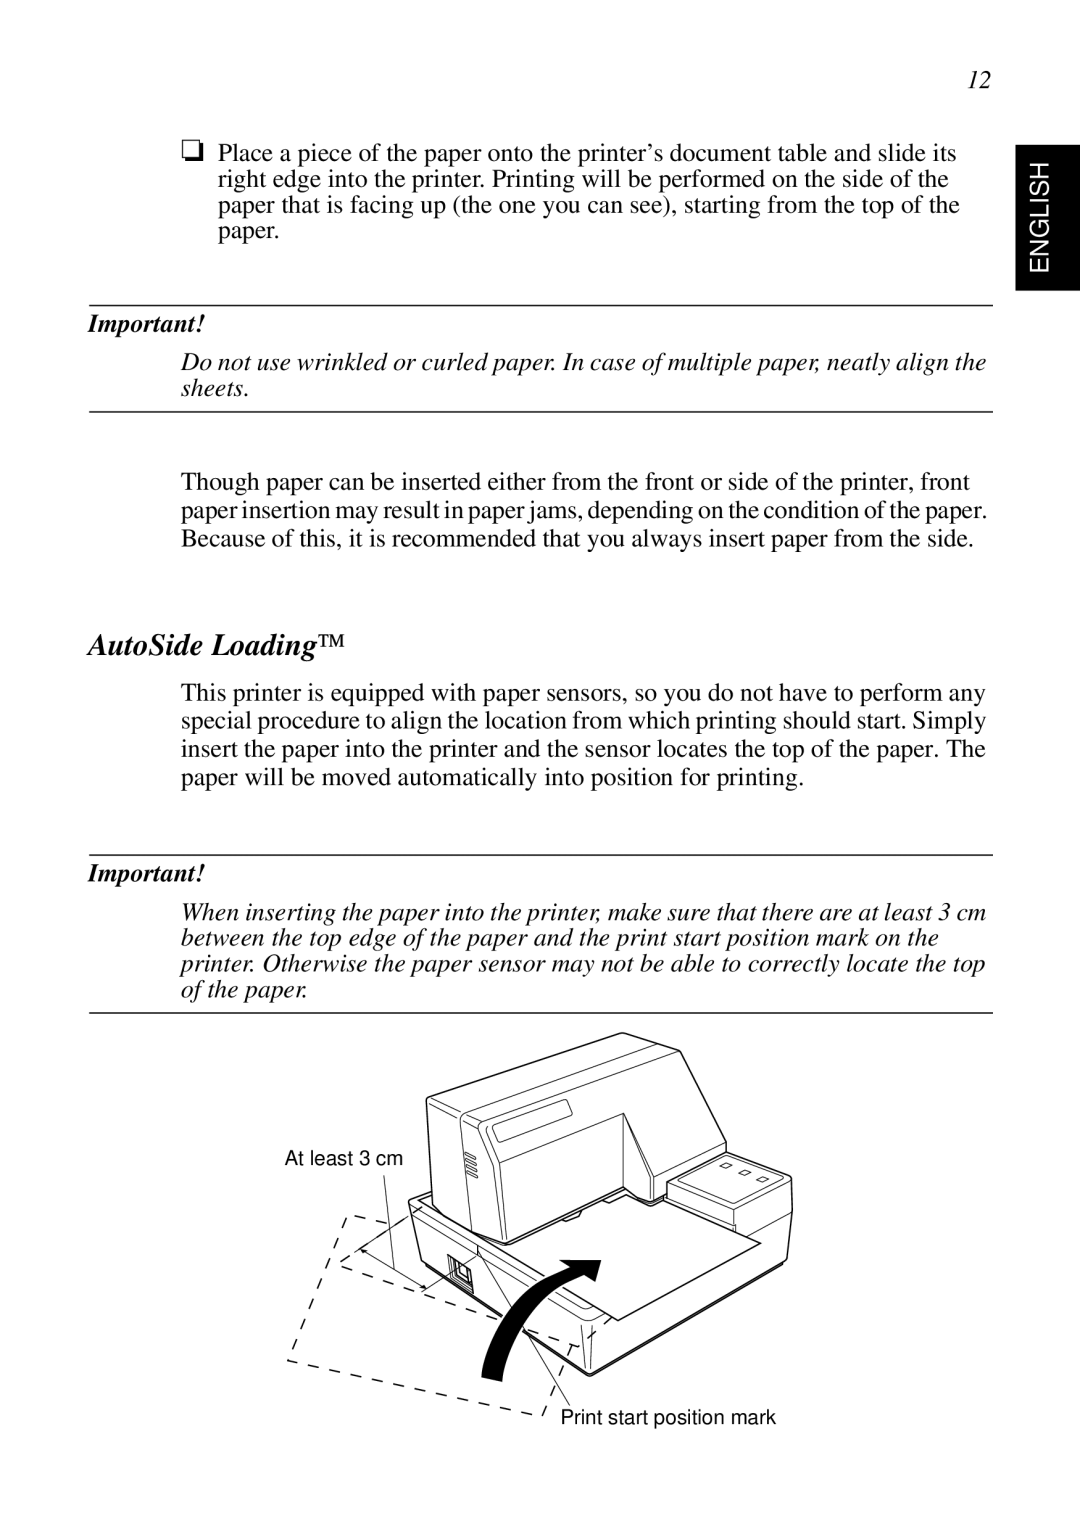
AutoSide Loading
This printer is equipped with paper sensors, so you do not have to perform any special procedure to align the location from which printing should start. Simply insert the paper into the printer and the sensor locates the top of the paper. The paper will be moved automatically into position for printing.
Important!
When inserting the paper into the printer, make sure that there are at least 3 cm between the top edge of the paper and the print start position mark on the printer. Otherwise the paper sensor may not be able to correctly locate the top of the paper.
At least 3 cm
Print start position mark