Screws
Screws
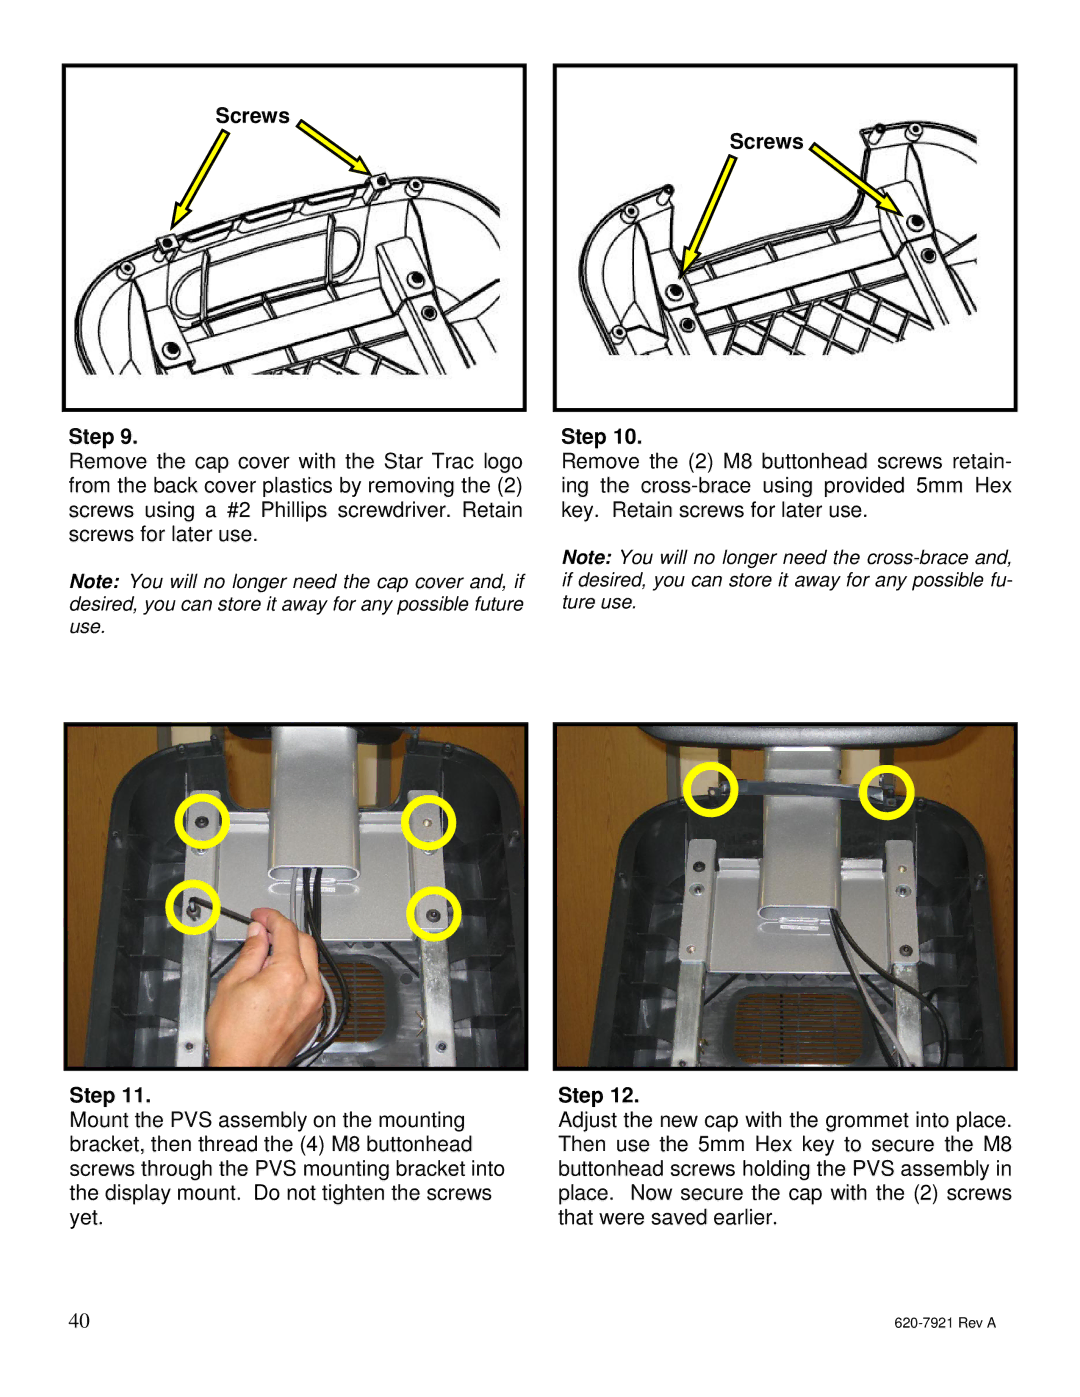
Step 9.
Remove the cap cover with the Star Trac logo from the back cover plastics by removing the (2) screws using a #2 Phillips screwdriver. Retain screws for later use.
Note: You will no longer need the cap cover and, if desired, you can store it away for any possible future use.
Step 11.
Mount the PVS assembly on the mounting bracket, then thread the (4) M8 buttonhead screws through the PVS mounting bracket into the display mount. Do not tighten the screws yet.
40
Step 10.
Remove the (2) M8 buttonhead screws retain- ing the
Note: You will no longer need the
Step 12.
Adjust the new cap with the grommet into place. Then use the 5mm Hex key to secure the M8 buttonhead screws holding the PVS assembly in place. Now secure the cap with the (2) screws that were saved earlier.