APPENDIX
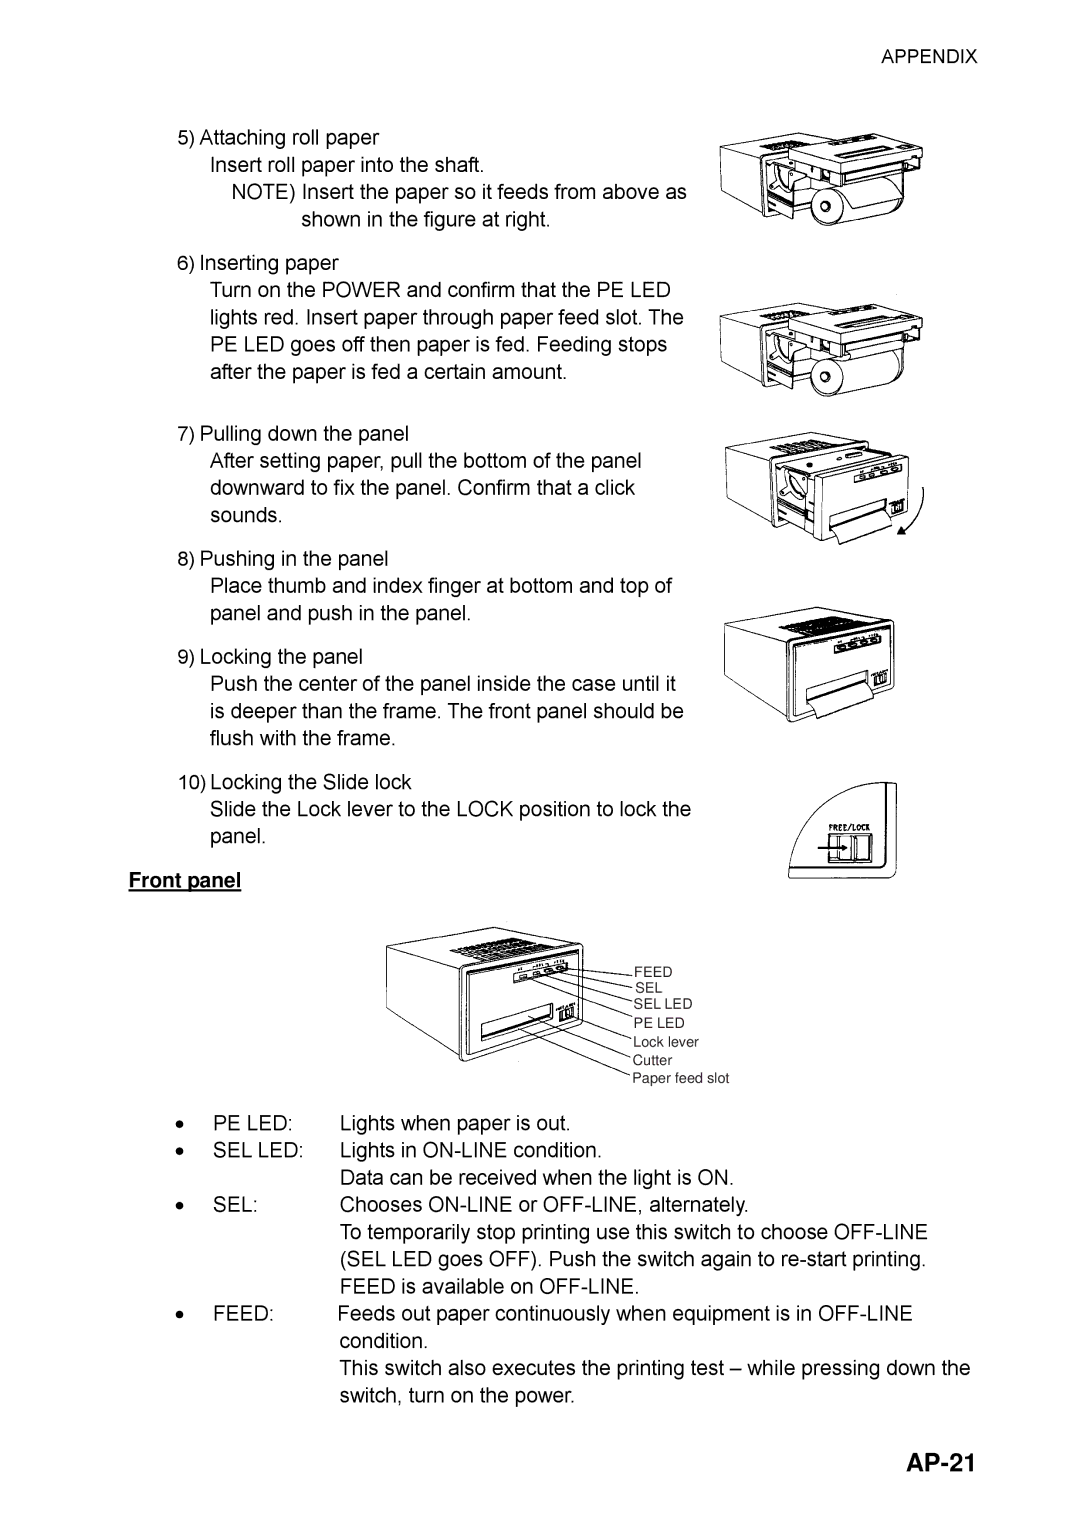
5)Attaching roll paper
Insert roll paper into the shaft.
NOTE) Insert the paper so it feeds from above as shown in the figure at right.
6)Inserting paper
Turn on the POWER and confirm that the PE LED lights red. Insert paper through paper feed slot. The PE LED goes off then paper is fed. Feeding stops after the paper is fed a certain amount.
7)Pulling down the panel
After setting paper, pull the bottom of the panel downward to fix the panel. Confirm that a click sounds.
8)Pushing in the panel
Place thumb and index finger at bottom and top of panel and push in the panel.
9)Locking the panel
Push the center of the panel inside the case until it is deeper than the frame. The front panel should be flush with the frame.
10)Locking the Slide lock
Slide the Lock lever to the LOCK position to lock the panel.
Front panel
|
|
|
|
| FEED |
|
|
|
|
|
| SEL |
|
|
|
|
|
| SEL LED |
|
|
|
|
|
| PE LED |
|
|
|
|
|
| Lock lever |
|
|
|
|
|
| Cutter |
|
• |
|
|
|
| Paper feed slot |
|
|
|
| ||||
|
|
|
|
|
| |
PE LED: | Lights when paper is out. | |||||
• | SEL LED: | Lights in | ||||
• |
| Data can be received when the light is ON. | ||||
SEL: | Chooses | |||||
|
| To temporarily stop printing use this switch to choose | ||||
|
| (SEL LED goes OFF). Push the switch again to | ||||
• |
| FEED is available on | ||||
FEED: | Feeds out paper continuously when equipment is in | |||||
|
| condition. | ||||
|
| This switch also executes the printing test – while pressing down the | ||||
|
| switch, turn on the power. | ||||
