3 – Parts of the Pocketstudio 5
Rear panel
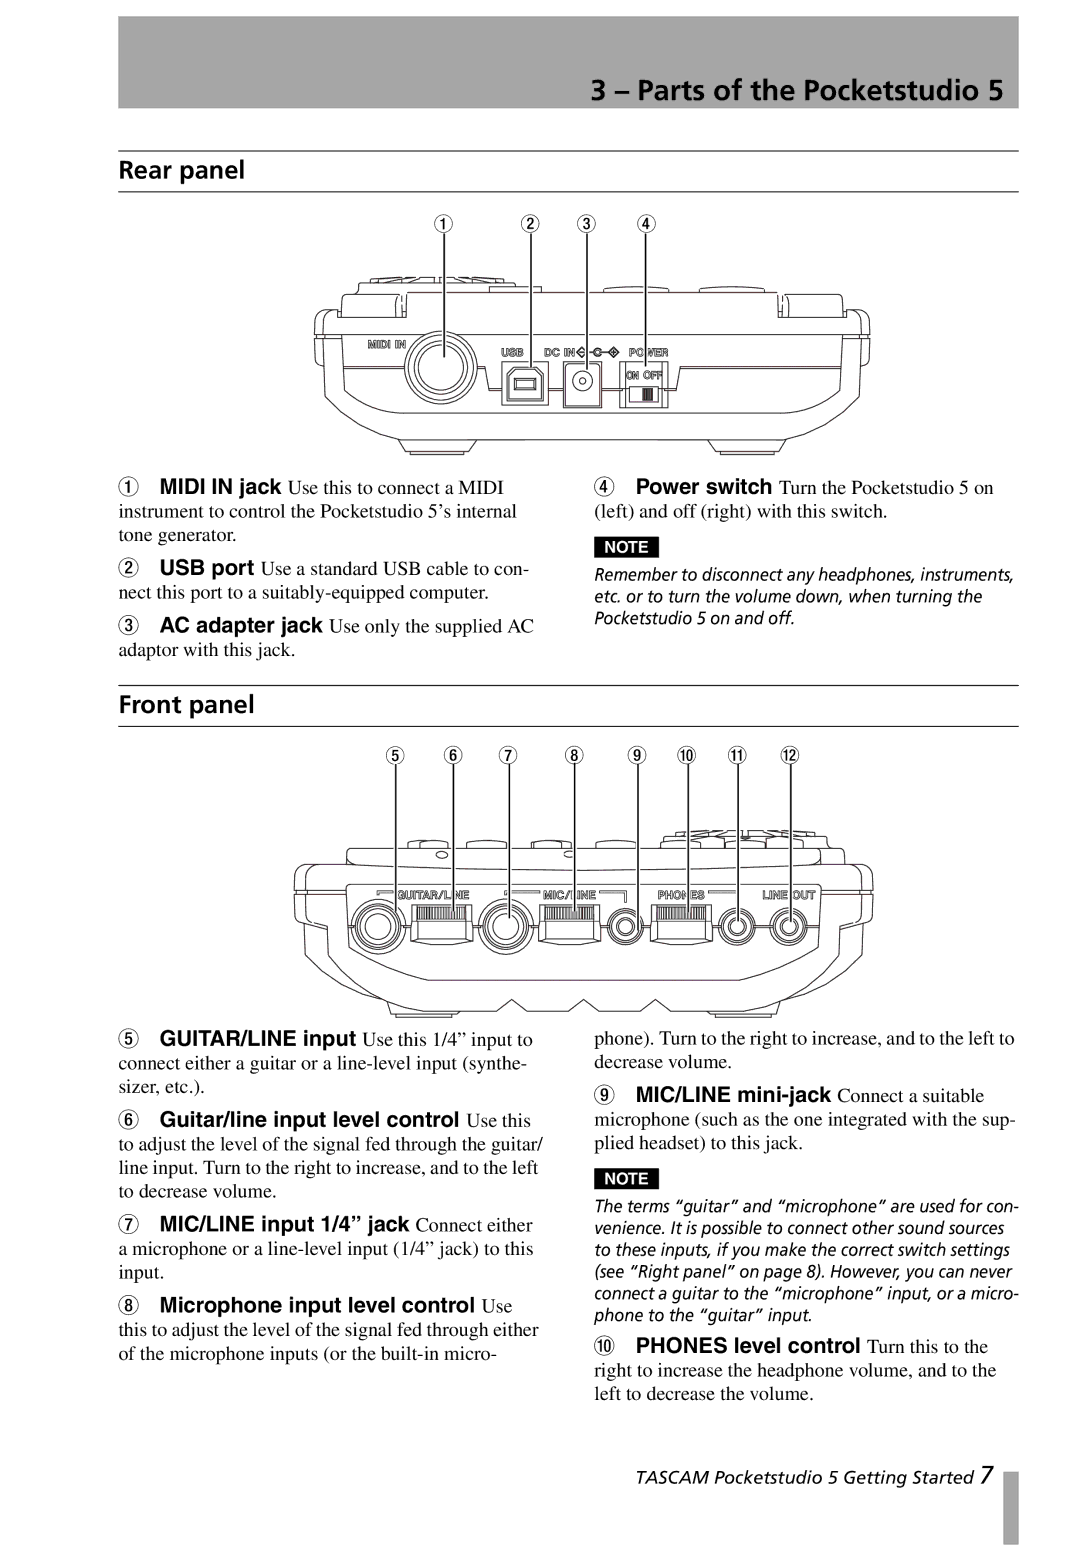
1 | 2 | 3 | 4 |
1MIDI IN jack Use this to connect a MIDI instrument to control the Pocketstudio 5’s internal tone generator.
2USB port Use a standard USB cable to con- nect this port to a
3AC adapter jack Use only the supplied AC adaptor with this jack.
4Power switch Turn the Pocketstudio 5 on (left) and off (right) with this switch.
NOTE
Remember to disconnect any headphones, instruments, etc. or to turn the volume down, when turning the Pocketstudio 5 on and off.
Front panel
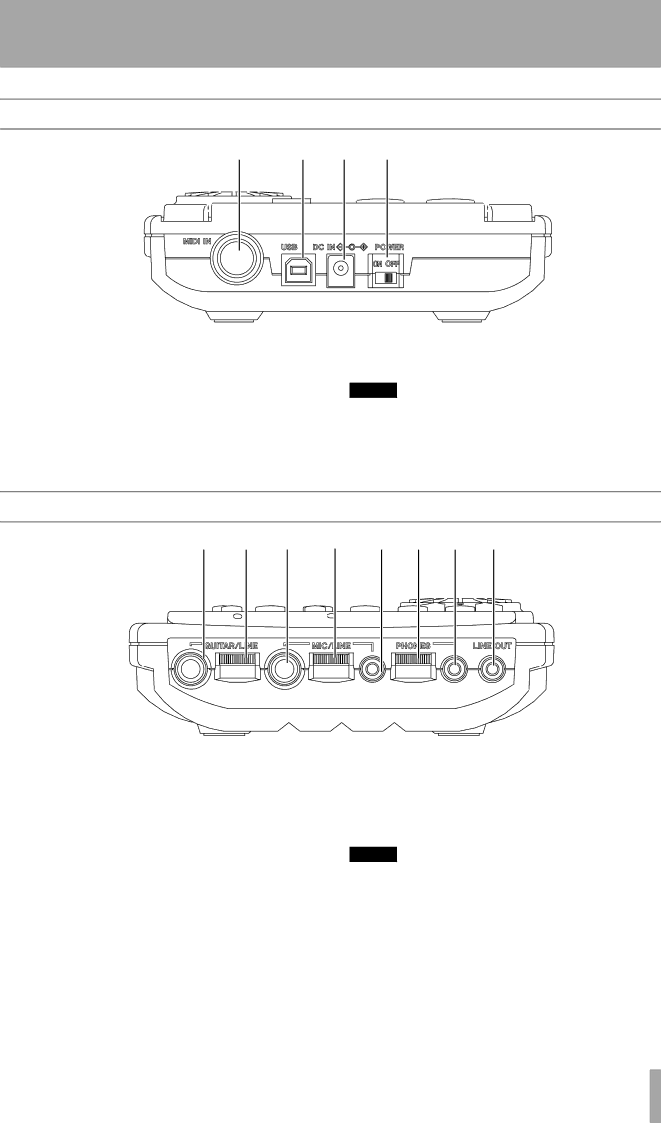
5 6 7 8 9 A B C
5GUITAR/LINE input Use this 1/4” input to connect either a guitar or a
6Guitar/line input level control Use this to adjust the level of the signal fed through the guitar/ line input. Turn to the right to increase, and to the left to decrease volume.
7MIC/LINE input 1/4” jack Connect either a microphone or a
8Microphone input level control Use this to adjust the level of the signal fed through either of the microphone inputs (or the
phone). Turn to the right to increase, and to the left to decrease volume.
9MIC/LINE
NOTE
The terms “guitar” and “microphone” are used for con- venience. It is possible to connect other sound sources to these inputs, if you make the correct switch settings (see “Right panel” on page 8). However, you can never connect a guitar to the “microphone” input, or a micro- phone to the “guitar” input.
APHONES level control Turn this to the right to increase the headphone volume, and to the left to decrease the volume.
TASCAM Pocketstudio 5 Getting Started 7