(Fig.
(Fig.
(Fig.
You must now tune your TV set to the transmission channel of the receiver. Select a free programme slot on your TV set and tune it to channel 41 (refer to operating manual of the TV set if necessary).
If you do not receive a clear image on channel 41, this may be the result of a neighbouring channel being set to a pro- gramme being received from the same antenna. You can check on this by temporarily removing the antenna cable from the Input terrestrial antenna socket of the receiver. If you then temporarily receive a clear image, you should select another transmission channel for the receiver in the range of 21 to 69.
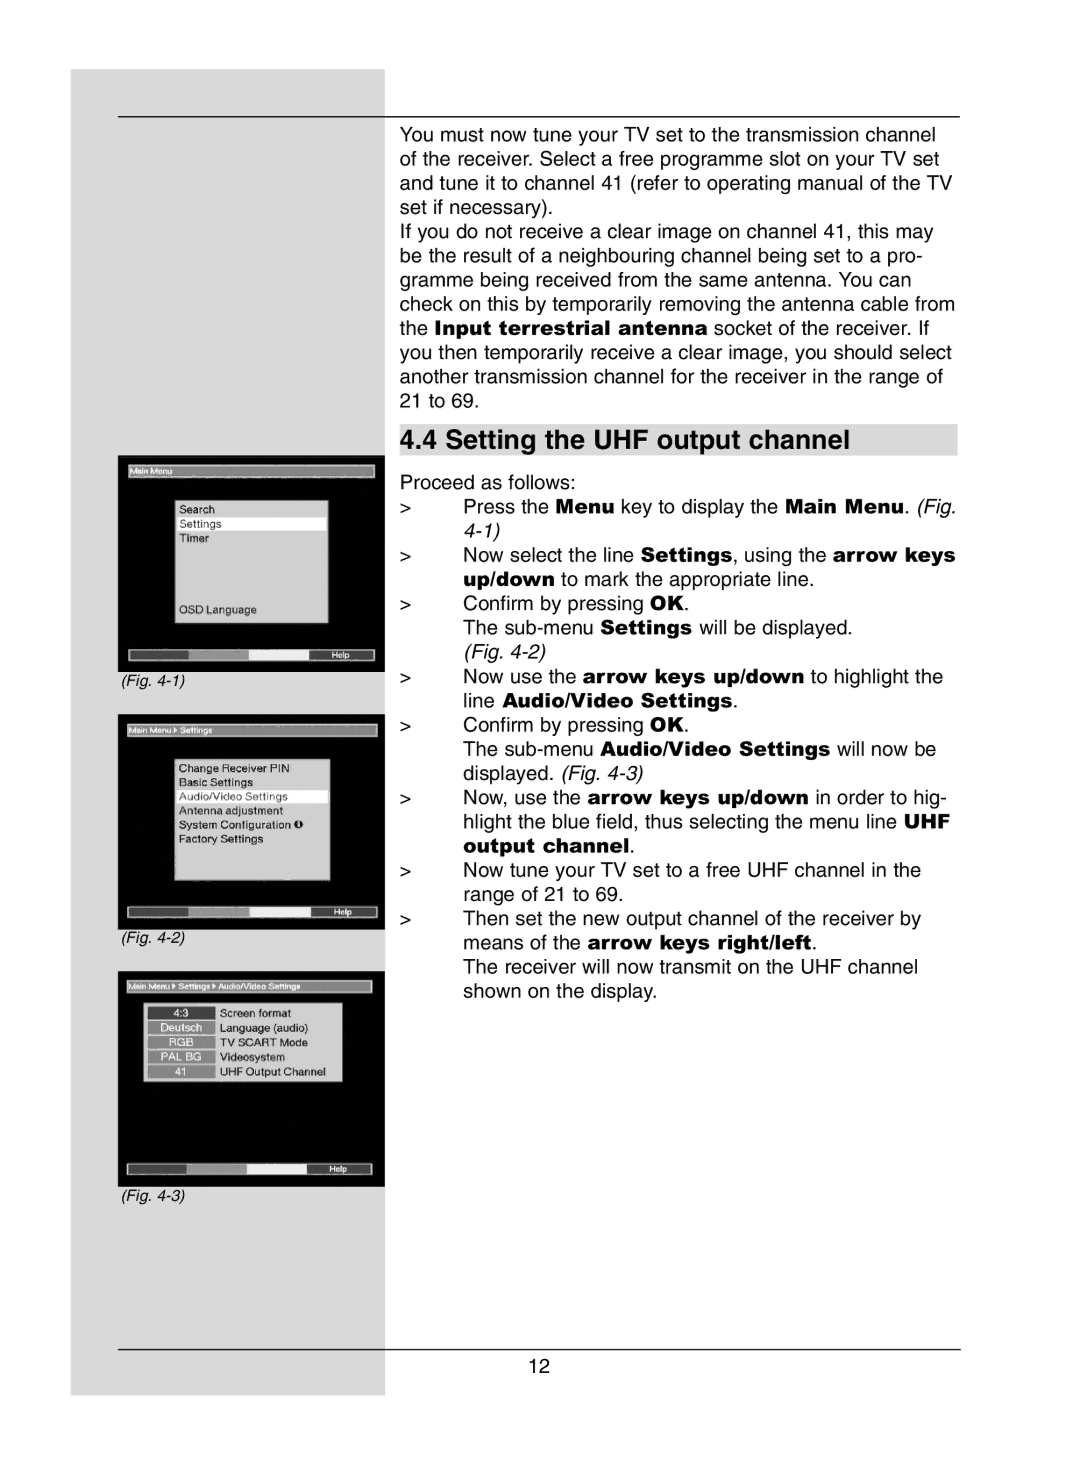
4.4 Setting the UHF output channel
Proceed as follows:
>Press the Menu key to display the Main Menu. (Fig.
>Now select the line Settings, using the arrow keys up/down to mark the appropriate line.
>Confirm by pressing OK.
The
>Now use the arrow keys up/down to highlight the line Audio/Video Settings.
>Confirm by pressing OK.
The
>Now, use the arrow keys up/down in order to hig- hlight the blue field, thus selecting the menu line UHF output channel.
>Now tune your TV set to a free UHF channel in the range of 21 to 69.
>Then set the new output channel of the receiver by means of the arrow keys right/left.
The receiver will now transmit on the UHF channel shown on the display.
12