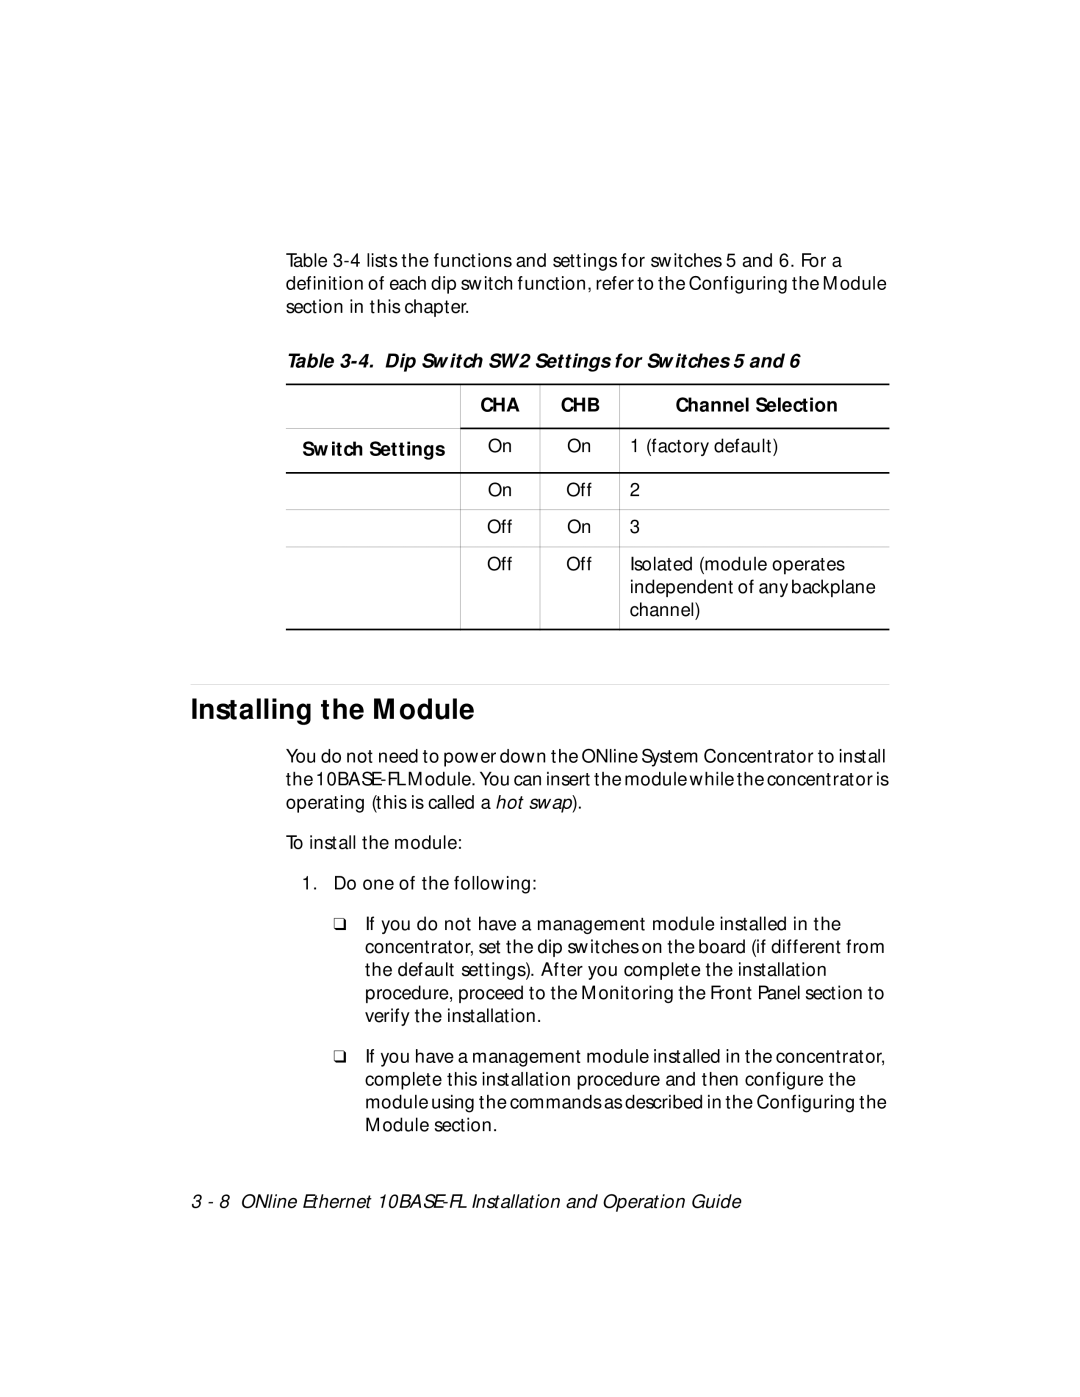
Table
Table 3-4. Dip Switch SW2 Settings for Switches 5 and 6
| CHA | CHB | Channel Selection |
|
|
|
|
Switch Settings | On | On | 1 (factory default) |
|
|
|
|
| On | Off | 2 |
|
|
|
|
| Off | On | 3 |
|
|
|
|
| Off | Off | Isolated (module operates |
|
|
| independent of any backplane |
|
|
| channel) |
|
|
|
|
Installing the Module
You do not need to power down the ONline System Concentrator to install the
To install the module:
1.Do one of the following:
❑If you do not have a management module installed in the concentrator, set the dip switches on the board (if different from the default settings). After you complete the installation procedure, proceed to the Monitoring the Front Panel section to verify the installation.
❑If you have a management module installed in the concentrator, complete this installation procedure and then configure the module using the commands as described in the Configuring the Module section.