www.ti.com
WinVCC in Depth
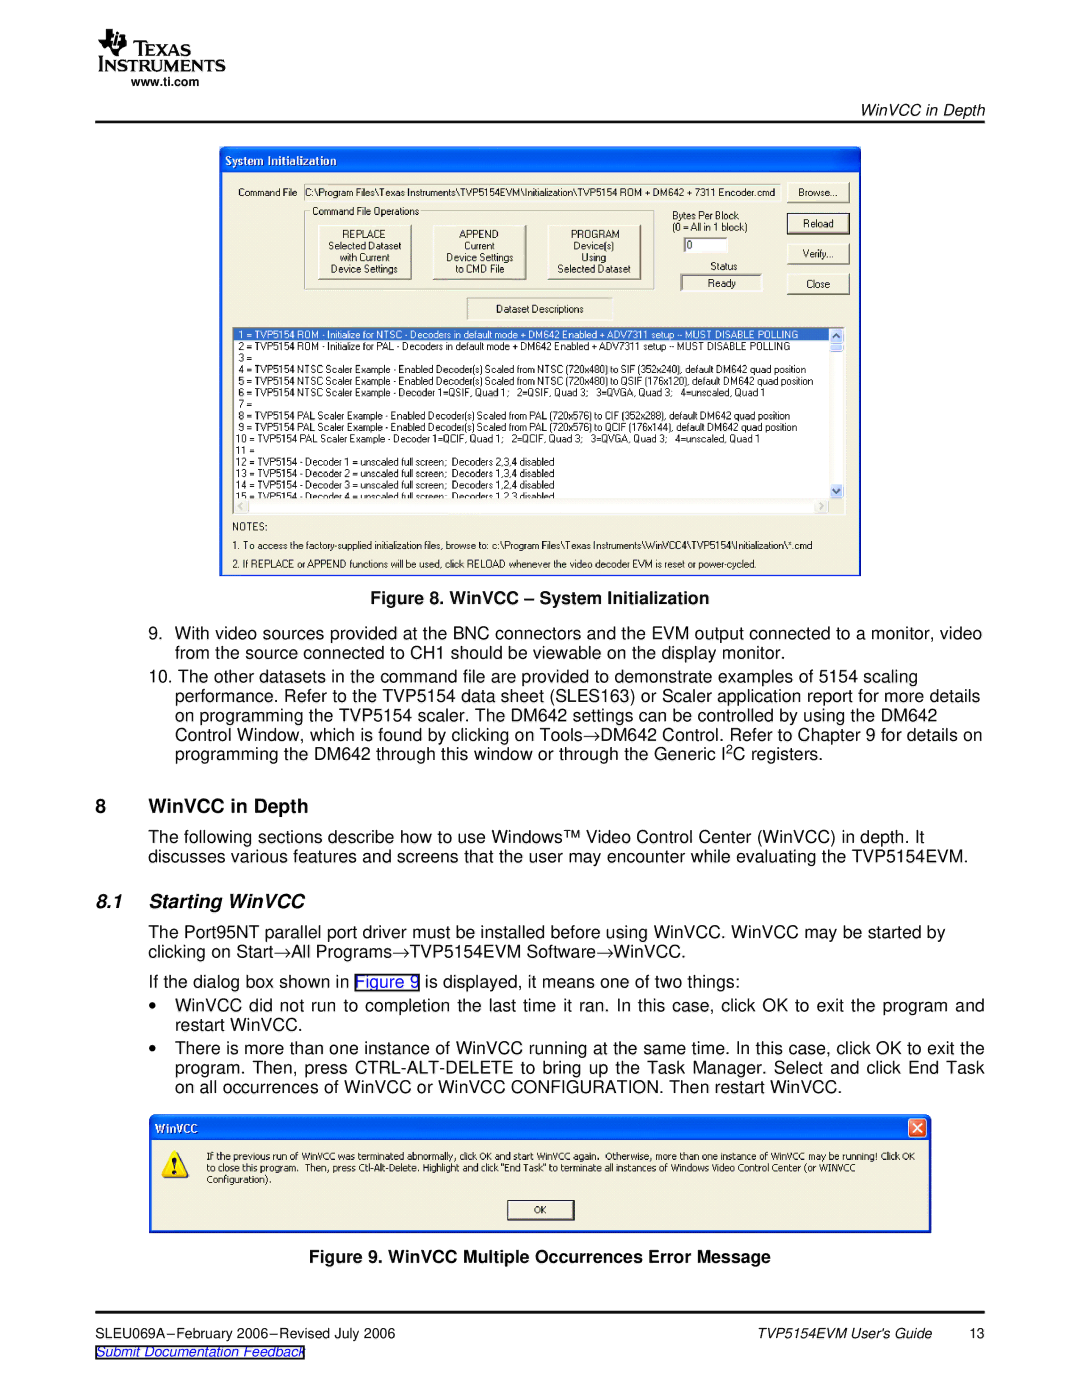
Figure 8. WinVCC – System Initialization
9.With video sources provided at the BNC connectors and the EVM output connected to a monitor, video from the source connected to CH1 should be viewable on the display monitor.
10.The other datasets in the command file are provided to demonstrate examples of 5154 scaling performance. Refer to the TVP5154 data sheet (SLES163) or Scaler application report for more details
on programming the TVP5154 scaler. The DM642 settings can be controlled by using the DM642 Control Window, which is found by clicking on Tools→DM642 Control. Refer to Chapter 9 for details on programming the DM642 through this window or through the Generic I2C registers.
8WinVCC in Depth
The following sections describe how to use Windows™ Video Control Center (WinVCC) in depth. It discusses various features and screens that the user may encounter while evaluating the TVP5154EVM.
8.1Starting WinVCC
The Port95NT parallel port driver must be installed before using WinVCC. WinVCC may be started by clicking on Start→All Programs→TVP5154EVM Software→WinVCC.
If the dialog box shown in Figure 9 is displayed, it means one of two things:
∙WinVCC did not run to completion the last time it ran. In this case, click OK to exit the program and restart WinVCC.
∙There is more than one instance of WinVCC running at the same time. In this case, click OK to exit the program. Then, press
Figure 9. WinVCC Multiple Occurrences Error Message
SLEU069A | TVP5154EVM User's Guide | 13 |
