Chapter 1 PREPARATIONS
Control panel
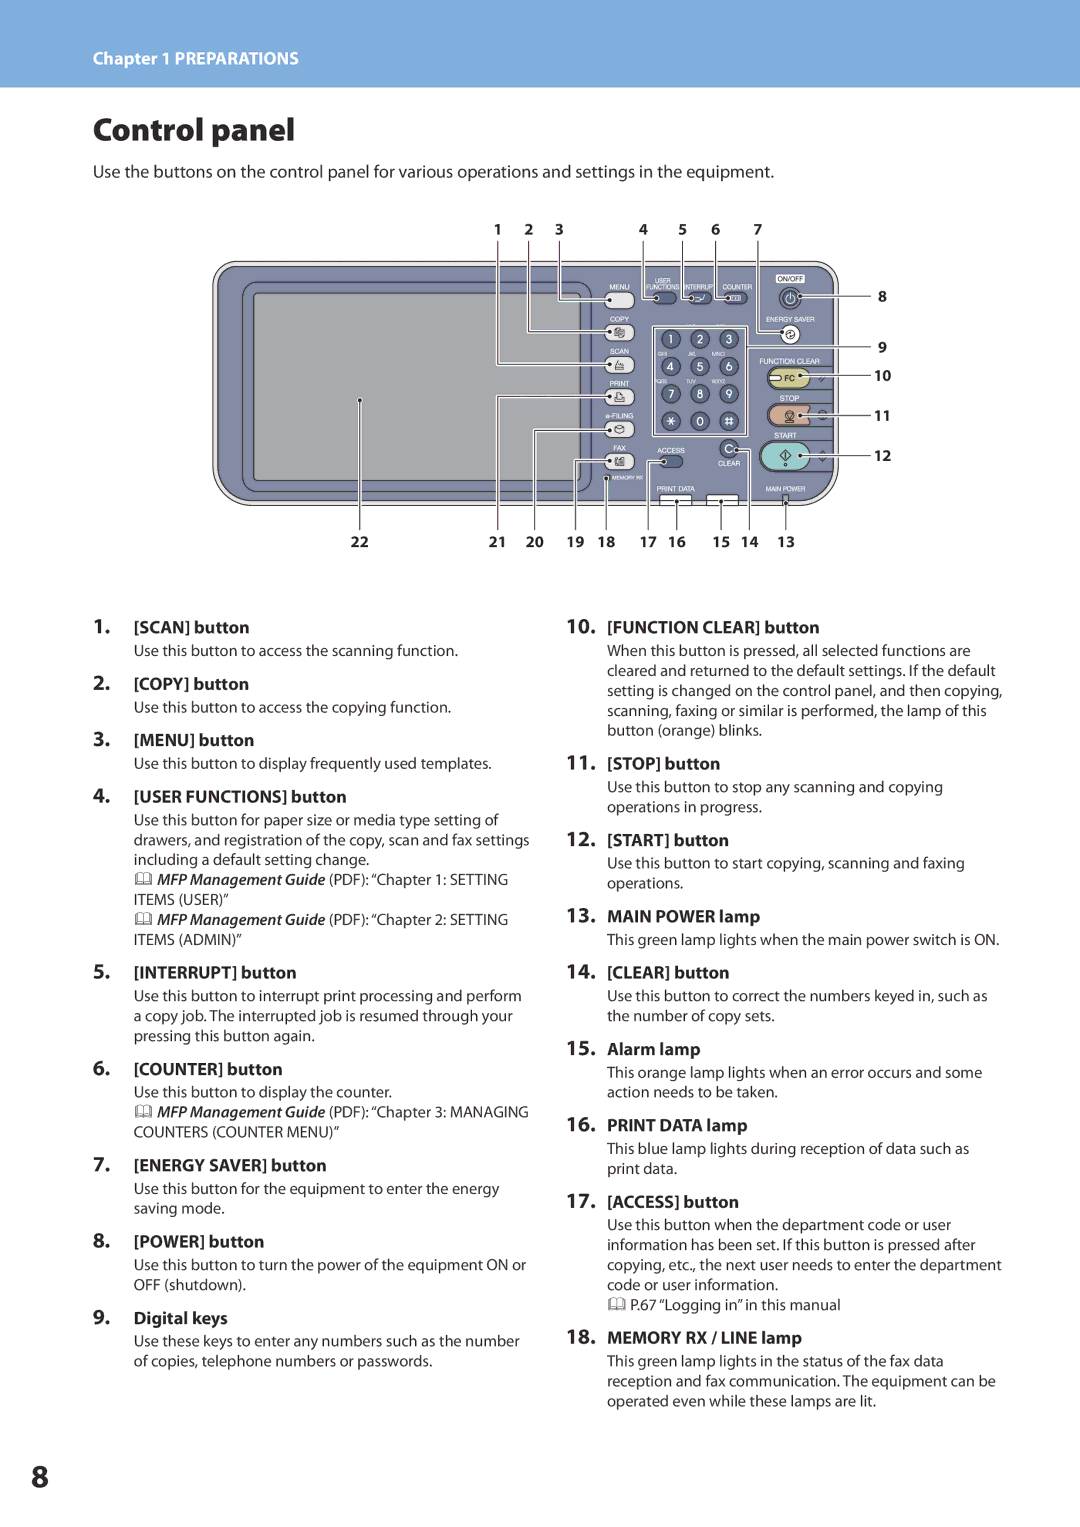
Use the buttons on the control panel for various operations and settings in the equipment.
1 | 2 | 3 | 4 | 5 | 6 |
7 |
8 |
9 |
10 |
11 |
12 |
22 | 21 | 20 |
19 | 18 | 17 | 16 | 15 | 14 | 13 |
1.[SCAN] button
Use this button to access the scanning function.
2.[COPY] button
Use this button to access the copying function.
3.[MENU] button
Use this button to display frequently used templates.
4.[USER FUNCTIONS] button
Use this button for paper size or media type setting of drawers, and registration of the copy, scan and fax settings including a default setting change.
&MFP Management Guide (PDF): “Chapter 1: SETTING ITEMS (USER)”
&MFP Management Guide (PDF): “Chapter 2: SETTING ITEMS (ADMIN)”
10.[FUNCTION CLEAR] button
When this button is pressed, all selected functions are cleared and returned to the default settings. If the default setting is changed on the control panel, and then copying, scanning, faxing or similar is performed, the lamp of this button (orange) blinks.
11.[STOP] button
Use this button to stop any scanning and copying operations in progress.
12.[START] button
Use this button to start copying, scanning and faxing operations.
13.MAIN POWER lamp
This green lamp lights when the main power switch is ON.
5.[INTERRUPT] button
Use this button to interrupt print processing and perform a copy job. The interrupted job is resumed through your pressing this button again.
6.[COUNTER] button
Use this button to display the counter.
&MFP Management Guide (PDF): “Chapter 3: MANAGING COUNTERS (COUNTER MENU)”
7.[ENERGY SAVER] button
Use this button for the equipment to enter the energy saving mode.
8.[POWER] button
Use this button to turn the power of the equipment ON or OFF (shutdown).
9.Digital keys
Use these keys to enter any numbers such as the number of copies, telephone numbers or passwords.
14.[CLEAR] button
Use this button to correct the numbers keyed in, such as the number of copy sets.
15.Alarm lamp
This orange lamp lights when an error occurs and some action needs to be taken.
16.PRINT DATA lamp
This blue lamp lights during reception of data such as print data.
17.[ACCESS] button
Use this button when the department code or user information has been set. If this button is pressed after copying, etc., the next user needs to enter the department code or user information.
&P.67 “Logging in” in this manual
18.MEMORY RX / LINE lamp
This green lamp lights in the status of the fax data reception and fax communication. The equipment can be operated even while these lamps are lit.