Using the Network Utility (Continued)
![]() Notes
Notes
•It may not be possible to transmit the images from movie player or other video applications.
•When using “Update automatically”, the transmitted image refresh rate depends on the performance of the computer you are using and the surrounding radio wave environment.
•The projector screen may have a few differences from the computer screen.
•If you selected application window in step 5 , if that application is not active (in use), the image may not be correctly displayed by the projector.
•The projector ID is the MAC address of the wired LAN inserted into the projector.
•Playing contents protected by copyright is not supported.
•To transmit sound, press the ![]() button then launch the application that plays the contents including the sound. When you operate the projector using Windows Vista®, “Switching audio play device” window will be displayed after pressing the start button of Network Utility. Follow the instruction to switch the audio play device, and then launch the application that plays the contents including sounds.
button then launch the application that plays the contents including the sound. When you operate the projector using Windows Vista®, “Switching audio play device” window will be displayed after pressing the start button of Network Utility. Follow the instruction to switch the audio play device, and then launch the application that plays the contents including sounds.
•If no sound can be heard from the computer though the connection is stopped,
•Transmission may not be conducted depending on the sound type.
•Sound cannot be transmitted if multiple projectors are selected.
•The audio signals transmitted by a computer become mono.
•Network Mouse Controller function may not work properly depending on the network condition.
•If you make any changes in the screen display settings of the window without launching Network Utility, the settings you made will be erased and not be reflected even if you check Switch to the last screen settings when using next time. checkbox.
■Easy Connect utility
This feature allows users to easily connect the projector to a computer over wireless
networks, without making Wireless LAN settings using Network Utility.
Launch the Network Utility software application and click the Tool button ![]() to bring up the Wireless LAN Settings Utility dialog box. Select a desired connection mode in this dialog box.
to bring up the Wireless LAN Settings Utility dialog box. Select a desired connection mode in this dialog box.
●How to set up with [Simple 1:1 connection]
• Setting on the projector
1 Turn the projector power on.
2 Switch the input to Network.
3 Press the ![]() button on the projector control panel.
button on the projector control panel.
• Setting on the computer
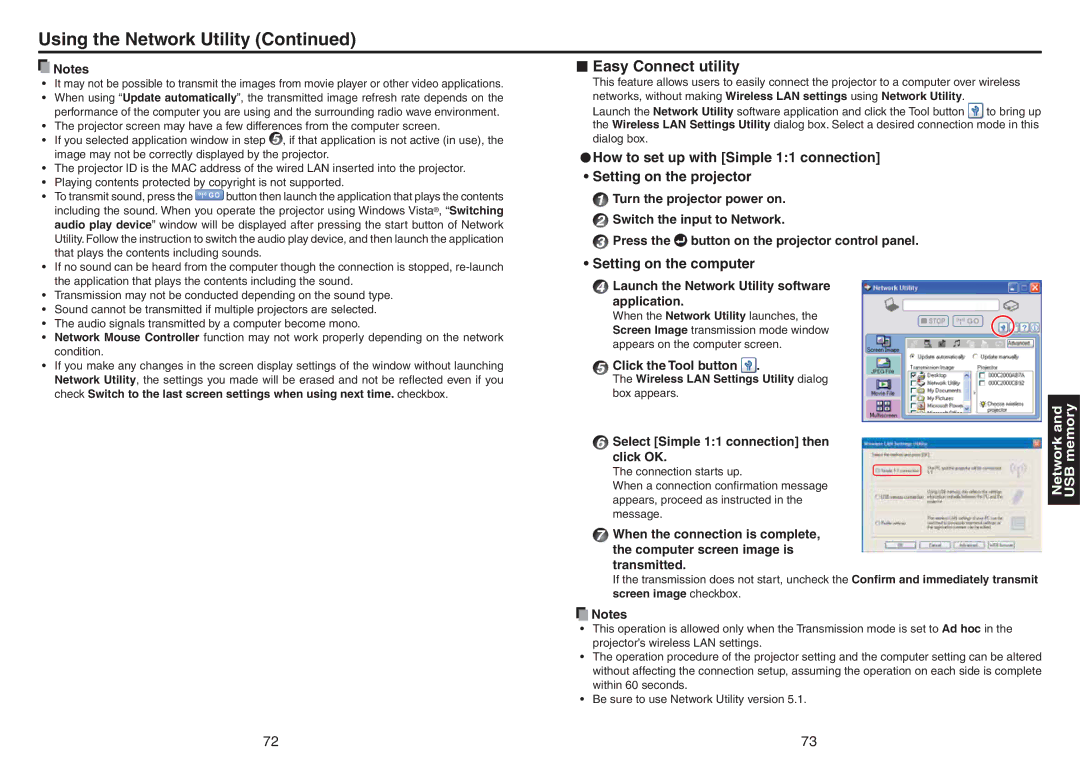
4Launch the Network Utility software application.
When the Network Utility launches, the Screen Image transmission mode window appears on the computer screen.
5Click the Tool button  .
.
The Wireless LAN Settings Utility dialog box appears.
6Select [Simple 1:1 connection] then
click OK.
The connection starts up.
When a connection confirmation message appears, proceed as instructed in the message.
7When the connection is complete, the computer screen image is transmitted.
If the transmission does not start, uncheck the Confirm and immediately transmit screen image checkbox.
![]() Notes
Notes
Network and USB memory
•This operation is allowed only when the Transmission mode is set to Ad hoc in the projector’s wireless LAN settings.
•The operation procedure of the projector setting and the computer setting can be altered without affecting the connection setup, assuming the operation on each side is complete within 60 seconds.
•Be sure to use Network Utility version 5.1.
72 | 73 |
