MM-012099-001, Rev. B
10.9.2P5450 Model
1.Press ![]() to toggle scan OFF and verify
to toggle scan OFF and verify ![]()
![]()
![]()
![]()
![]() is not displayed.
is not displayed.
2.Select group or channel.
3.Press ![]() once to remove group from the list.
once to remove group from the list.
4.Press ![]() once to add as a normal group.
once to add as a normal group.
5.Press ![]() twice to add as a Priority 2 group.
twice to add as a Priority 2 group.
6.Press ![]() three times to add as a Priority 1 group.
three times to add as a Priority 1 group.
7.Press ![]() to
to
10.10MENU
The Menu function accesses features that are not available directly from the keypad. The order and actual menu items available is configurable through programming. Upon radio power up, the menu item that is at the top of the menu list will always be displayed first. Subsequent access to the menu function will return the last menu item that was shown in the display and cursor position.
1.To enter the menu mode, press ![]() .
.
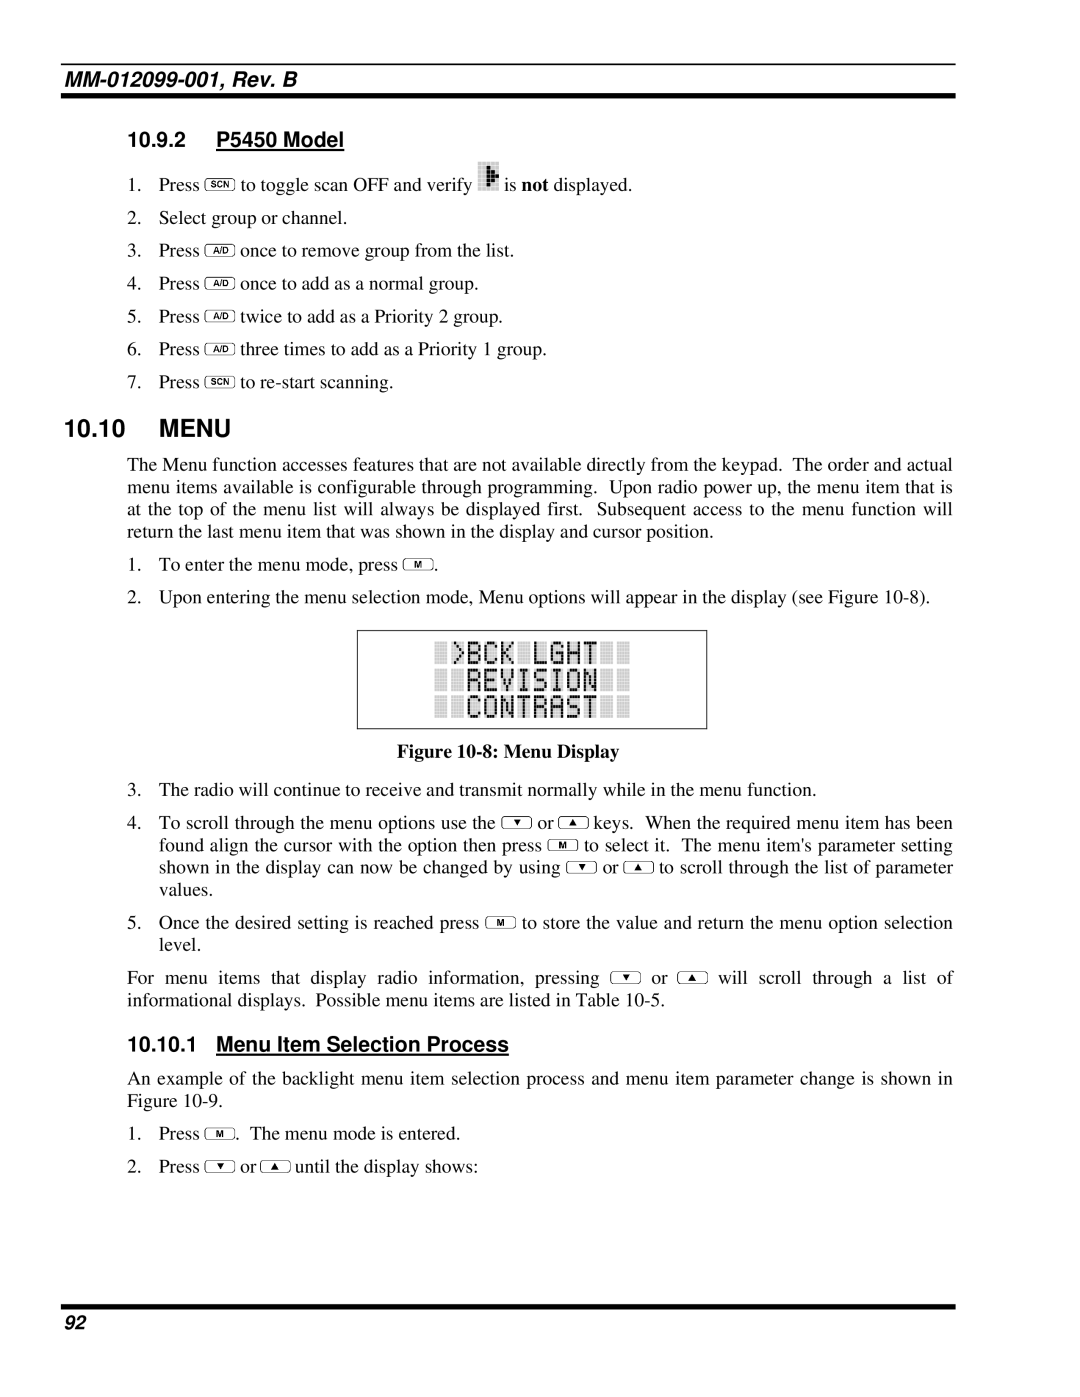
2.Upon entering the menu selection mode, Menu options will appear in the display (see Figure
Figure 10-8: Menu Display
3.The radio will continue to receive and transmit normally while in the menu function.
4.To scroll through the menu options use the ![]() or
or ![]() keys. When the required menu item has been
keys. When the required menu item has been
found align the cursor with the option then press ![]() to select it. The menu item's parameter setting
to select it. The menu item's parameter setting
shown in the display can now be changed by using ![]() or
or ![]() to scroll through the list of parameter values.
to scroll through the list of parameter values.
5.Once the desired setting is reached press ![]() to store the value and return the menu option selection level.
to store the value and return the menu option selection level.
For menu items that display radio information, pressing ![]() or
or ![]() will scroll through a list of informational displays. Possible menu items are listed in Table
will scroll through a list of informational displays. Possible menu items are listed in Table
10.10.1Menu Item Selection Process
An example of the backlight menu item selection process and menu item parameter change is shown in Figure
1.Press ![]() . The menu mode is entered.
. The menu mode is entered.
2.Press ![]() or
or ![]() until the display shows:
until the display shows:
92