3-16 System Operation
To restore the focus position back to the original factory setting, go back into this menu and press the up and down arrow keys simultaneously.
You will see the motion system move to the 1 inch horizontal and the 1 inch vertical position (factory default). Now select “YES, SAVE POSITION”. Press the “ESCAPE” button twice to exit back to the “MAIN” menu. Your settings will automatically be retained permanently in memory.
SET ROTARY AXIS Menu
The Rotary Fixture Axis is a setting that is pre-set at the factory. The laser system will sense when the Rotary Fixture is plugged in and will position the X-Axis arm directly over the centerline of rotation automatically when it begins to engrave. This setting can be altered if you position the Rotary Fixture in a location OTHER than the factory set position. Please refer to the section on the optional Rotary Fixture for a full description on how to set up and use this device before altering any factory setting.
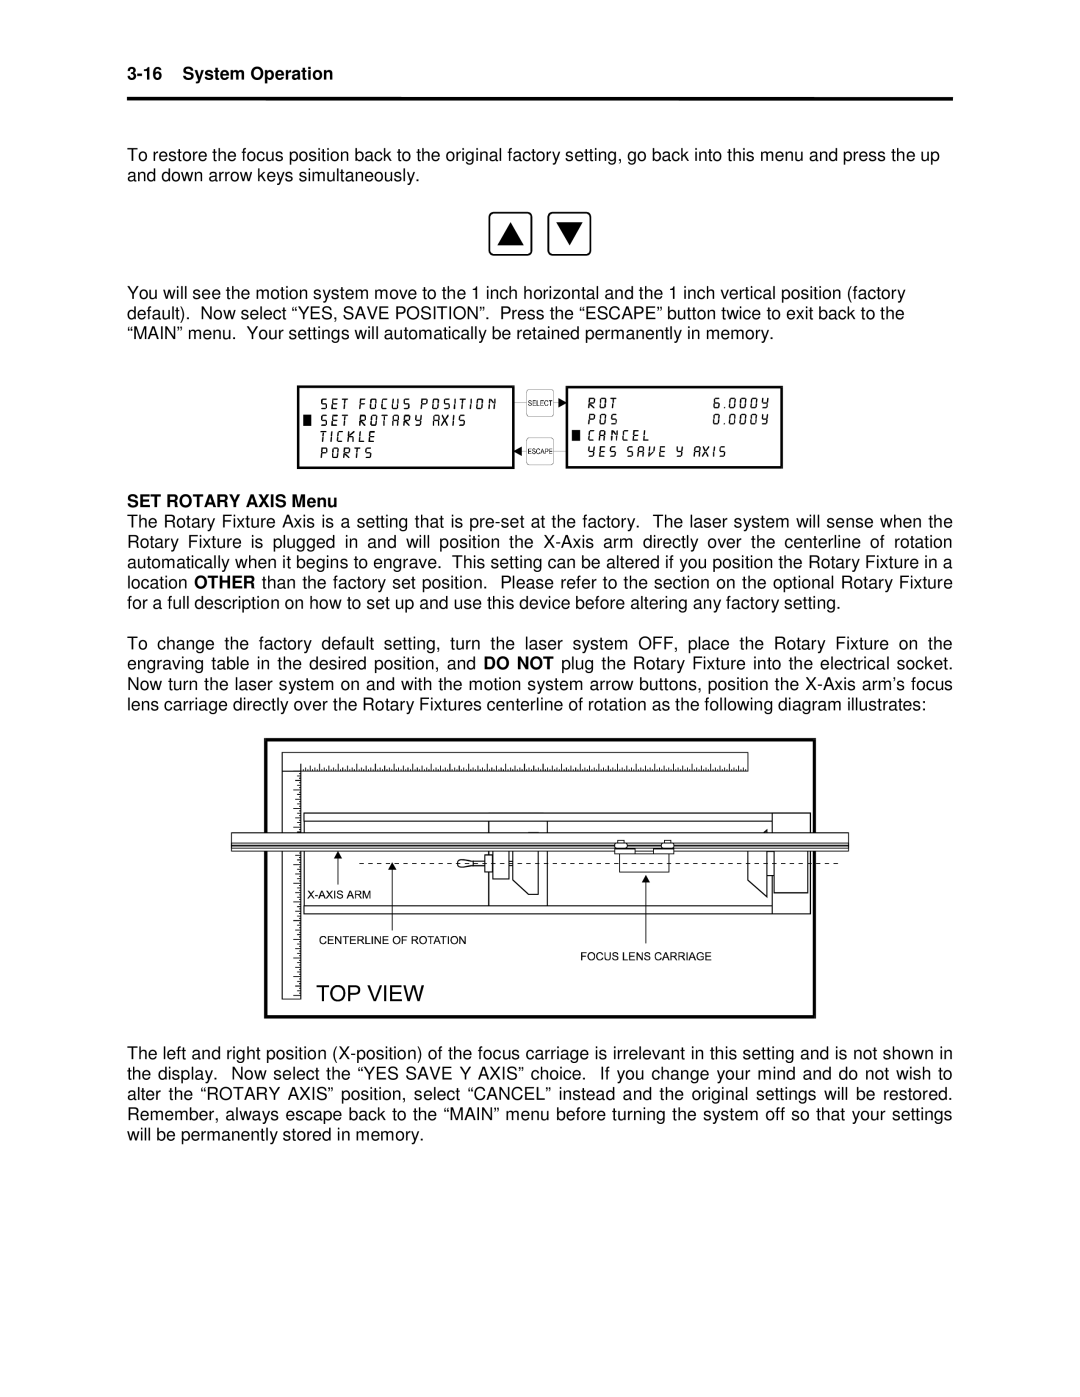
To change the factory default setting, turn the laser system OFF, place the Rotary Fixture on the engraving table in the desired position, and DO NOT plug the Rotary Fixture into the electrical socket. Now turn the laser system on and with the motion system arrow buttons, position the X-Axis arm’s focus lens carriage directly over the Rotary Fixtures centerline of rotation as the following diagram illustrates:
The left and right position (X-position) of the focus carriage is irrelevant in this setting and is not shown in the display. Now select the “YES SAVE Y AXIS” choice. If you change your mind and do not wish to alter the “ROTARY AXIS” position, select “CANCEL” instead and the original settings will be restored. Remember, always escape back to the “MAIN” menu before turning the system off so that your settings will be permanently stored in memory.