Installation
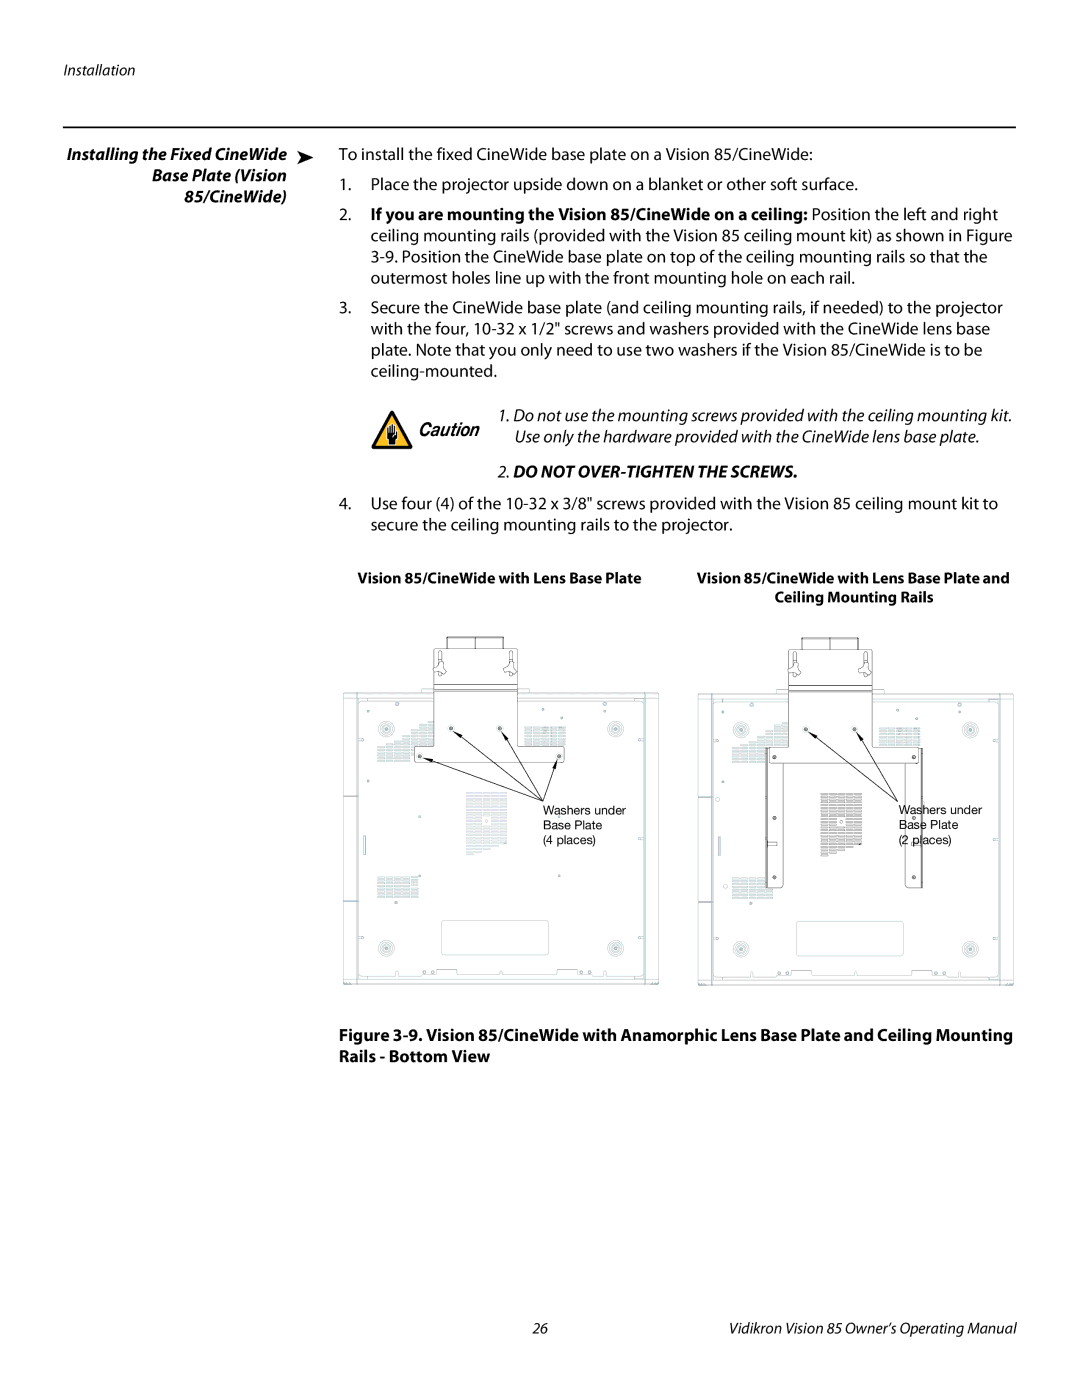
Installing the Fixed CineWide ➤ To install the fixed CineWide base plate on a Vision 85/CineWide:
Base Plate (Vision | 1. | Place the projector upside down on a blanket or other soft surface. | ||
85/CineWide) | ||||
2. | If you are mounting the Vision 85/CineWide on a ceiling: Position the left and right | |||
| ||||
|
| ceiling mounting rails (provided with the Vision 85 ceiling mount kit) as shown in Figure | ||
|
| |||
|
| outermost holes line up with the front mounting hole on each rail. | ||
| 3. | Secure the CineWide base plate (and ceiling mounting rails, if needed) to the projector | ||
|
| with the four, | ||
|
| plate. Note that you only need to use two washers if the Vision 85/CineWide is to be | ||
|
|
|
| |
|
| Caution | 1. Do not use the mounting screws provided with the ceiling mounting kit. | |
|
| Use only the hardware provided with the CineWide lens base plate. | ||
|
|
| ||
|
|
| 2. DO NOT | |
| 4. | Use four (4) of the | ||
|
| secure the ceiling mounting rails to the projector. | ||
Vision 85/CineWide with Lens Base Plate | Vision 85/CineWide with Lens Base Plate and |
| Ceiling Mounting Rails |
Washers under | Washers under |
Base Plate | Base Plate |
(4 places) | (2 places) |
Figure 3-9. Vision 85/CineWide with Anamorphic Lens Base Plate and Ceiling Mounting
Rails - Bottom View
26 | Vidikron Vision 85 Owner’s Operating Manual |
