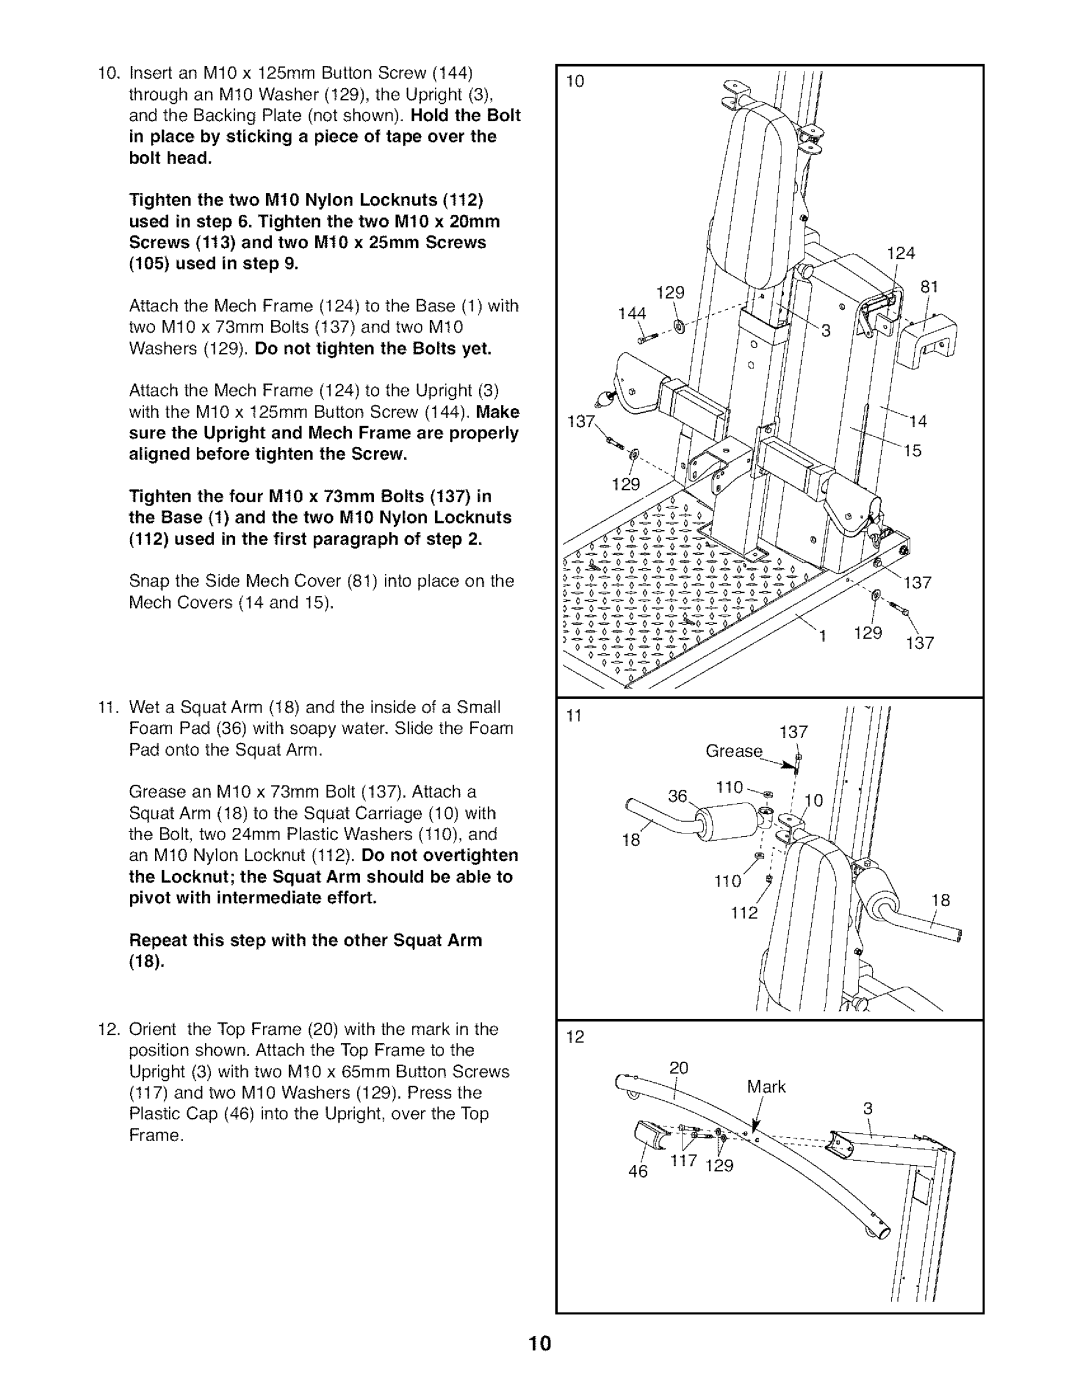
10.Insert an M1O x 125mm Button Screw (144) through an M!O Washer (!29), the Upright (3), and the Backing Plate (not shown). Bold the Bolt in place by sticking a piece of tape over the bolt head.
Tighten the two Mt0 Nylon Locknuts (1t2) used in step 6. Tighten the two Mt0 x 20ram
Screws (tt3) and two Mt0 x 25ram Screws (t05) used in step 9.
Attach the Mech Frame (124) to the Base (1) with two M10 x 73ram Bolts (137) and two M1O Washers (129), Do not tighten the Bolts yet.
Attach the Mech Frame (124) to the Upright (3) with the M10 x 125mm Button Screw (144). Make sure the Upright and Mech Frame are properly aligned before tighten the Screw.
Tighten the four M10 x 73ram Bolts (137) in the Base (1) and the two Mt0 Nylon Locknuts (tt2) used in the first paragraph of step 2.
Snap the Side Mech Cover (81) into place on the Mech Covers (14 and 15).
11.Wet a Squat Arm (18) and the inside of a Small Foam Pad (36) with soapy water. Slide the Foam Pad onto the Squat Arm.
Grease an M10 x 73mm Bolt (137). Attach a Squat Arm (18) to the Squat Carriage (!0) with the Bolt, two 24mm Plastic Washers (110), and an M1O Nylon Locknut (112). Do not overtighten the Locknut; the Squat Arm should be able to pivot with intermediate effort.
Repeat this step with the other Squat Arm (18).
12.Orient the Top Frame (20) with the mark in the position shown. Attach the Top Frame to the Upright (3) with two M10 x 65mm Button Screws (!17) and two M10 Washers (129). Press the Plastic Cap (46) into the Upright, over the Top Frame.
lO
124
12981
144
).
"1 129_
137
11
137
Grease_
18
18
112
12
20
Mark
3
46 117 129
10